
Removing
Attention! Aluminum rims are covered with a protective varnish layer that prevents corrosion. When changing wheels, be careful not to damage the protective lacquer layer. If necessary, restore it with a colorless varnish.
8. Mark with chalk the direction of rotation of the wheel.
9. Ensure the stability and immobility of the vehicle. To do this, apply the parking brake and engage first or reverse gear.
On vehicles with an automatic transmission, move the gearbox control lever to position P. In addition, place a stop shoe under the diagonally located in relation to the wheel to be removed.
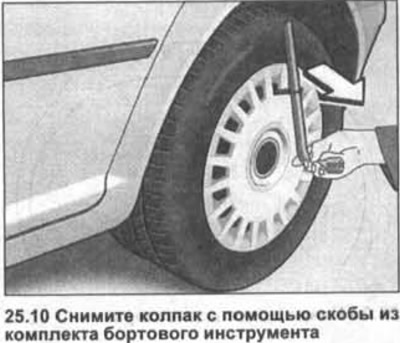
10. Remove the wheel cover. To do this, use the wire clamp from the on-board tool kit. Fasten the wire clip to the cap and remove it by inserting the balloon wrench into the clip (see illustration).
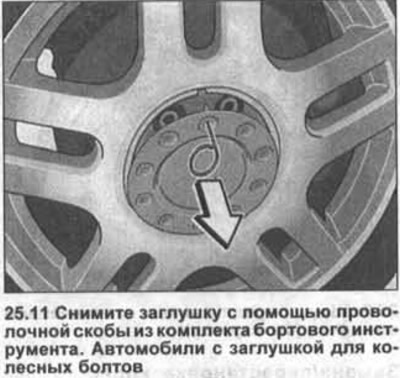
11. Vehicles with wheel bolt plugs. Remove the plug using the wire shackle from the vehicle tool kit (see illustration).
12. Vehicles with protective caps on wheel bolt heads. Remove the protective caps from the bolt heads using the wire cleat from the vehicle tool kit.
13. Vehicles with anti-theft wheel bolts. Attach the adapter supplied with the vehicle tool kit to the wheel bolt.
14. Loosen the wheel bolts 1/2 turn. Carry out the operation with the vehicle on wheels. To do this, apply the parking brake and shift into gear. Use a torque wrench to loosen the wheel bolts.
Attention! Jacking up and jacking up a car is dangerous. Therefore, it is recommended that you familiarize yourself with the safety precautions outlined in chapter «car jacking».
15. Jack up the car enough to remove the wheel.
16. Unscrew wheel bolts and remove a wheel.
Installation
17. Lubricate the wheel seat on the hub with a thin coat of bearing grease. This will prevent «accretion» disc to hub.
18. Clean dirty wheel bolts with a wire brush.
Attention! Replace rusty or damaged bolts with new ones.
19. Establish a wheel on a nave according to the marks put at removal.
20. Screw in the wheel bolts and tighten them crosswise with a force of approx. 50 Nm.
21. Lower the car on wheels.
22. Tighten the wheel bolts in a criss-cross pattern in several passes. Always use a torque wrench to tighten the wheel bolts. This ensures that the bolts are tightened securely and to the correct torque.
The bolt tightening torque for all types of rims is 120 Nm.
Attention! If the bolts were not tightened with a torque wrench, you should contact a workshop to check the tightening torque as soon as possible. Tightening the bolts on one side or tightening them with different torques can cause the hub to skew or pinch.
23. Cars with wheel covers. Fasten the cap near the valve, and then push it down until it locks into place. If necessary, knock it around the circumference with your hands.
24. Vehicles with wheel bolt plugs. Install the cap in place and secure. When installing, make sure that the protrusion on the plug fits into the recess on the rim.
25. Vehicles with protective caps on wheel bolt heads. Put protective caps on the bolt heads.
Attention! Wheel rims and wheel bolts are matched to each other. If tires are being converted to other rims, for example, from aluminum rims to steel rims, or wheels with winter tires are installed, then the wheels must be fastened with bolts intended for steel rims and vice versa. The bolts must match the wheel rim in length and shape. It depends on the landing of the wheels and the functioning of the brake system.
After changing tires, be sure to check the pressure and, if necessary, bring it to the norm.
Visitor comments