
The sequence of tightening the cylinder head bolts on the 1.4-I engine
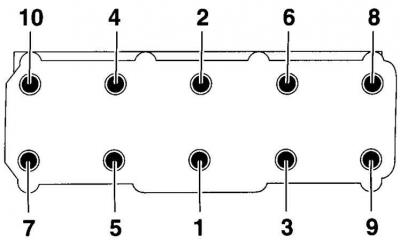
- stage 1 - 30 Nm;
- stage 2 - tighten by an angle of 90°;
- stage 3 - turn 90°
There are two centering pins for centering the cylinder head, so no guide pins need to be screwed in.
Order of execution
1. Using a steel ruler and feeler gauge, check the flatness of the mating surface of the cylinder head. Deviations from flatness should be no more than 0.05 mm.
2. Install a new cylinder head gasket on the surface of the cylinder block with the TOP or OBEN·markings facing up.
3. Gradually, in the sequence shown in Fig. The sequence of tightening the cylinder head bolts on the 1.4-I engine, tighten the cylinder head bolts in several stages.
4. Clean the mating surfaces of the cylinder head and camshaft housing.
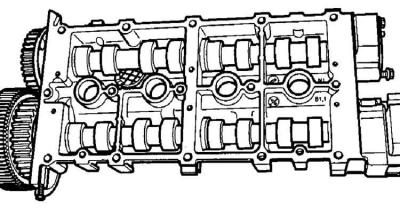
5. Apply a thin layer of AMV 188 003 sealant to the mating surface of the camshaft housing.
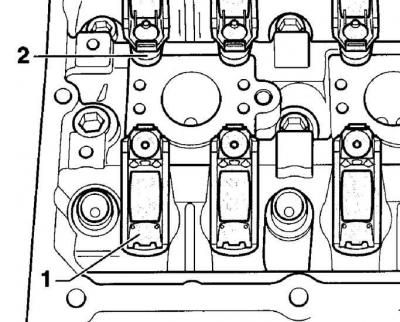
6. Establish the supporting elements and yokes in a head of the block of cylinders on the same places where they were before removal. Check the correct position of the rocker arms on the valves (1) and reliability of their fixation with fixing clips (2).
7. Lubricate the working surfaces of the camshaft cams with clean engine oil.
8. Before installing the camshaft housing, screw the M6x70 guide pins into the extreme holes of the cylinder head (indicated by arrows).
9. Install the camshaft housing and unscrew the guide pins. Screw in the new camshaft housing bolts and tighten them crosswise to a torque of 10 Nm, and then tighten by 90°in the same sequence.
Warning: After installing the camshaft housing, the sealant must dry for at least 30 minutes before the engine can be started.
Visitor comments