
Loosen the guide pin on the inside (pic.) wrench SW 7 with an internal hexagon.
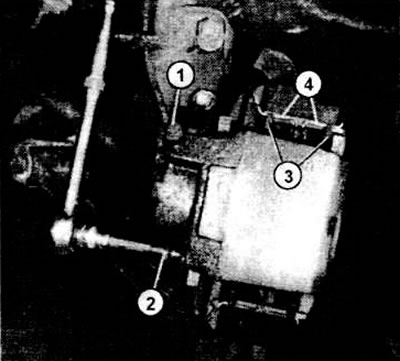
To remove lining (3) in the cam brake disc mechanism, the fixing springs at the top must be removed (4) and below Then the upper and lower guide pins are unscrewed (2) using a socket wrench with an Allen key.
Pull out the finger, remove the bracket body.
So that the bracket does not pull the brake hose, it is suspended on a wire near the shock absorber.
Remove the trims on the right and left from the guides.
Push the piston in the bracket back with a clamp. To prevent the piston from being damaged or distorted, place a wooden gasket on the support ring.
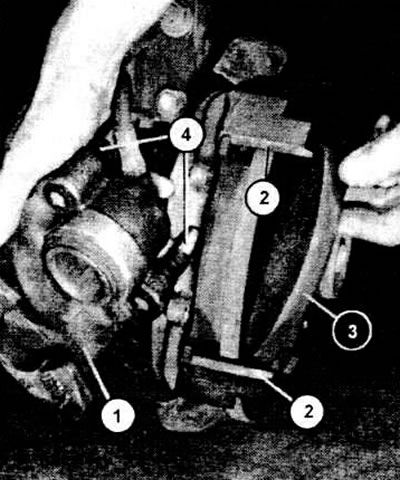
In the illustration - dismantled cam bracket (1) disc brake with guide pin (4). Near the brake lining (3), drawn to the side, top and bottom guides (2).
Insert new inner lining.
Install the fixing springs, then insert the outer trim.
Attach the bracket body.
Insert the long guide pin at the top and the shorter one at the bottom.
The tightening torque is 10 Nm.
After assembly, depress the brake pedal several times until the pads are in contact with the discs.
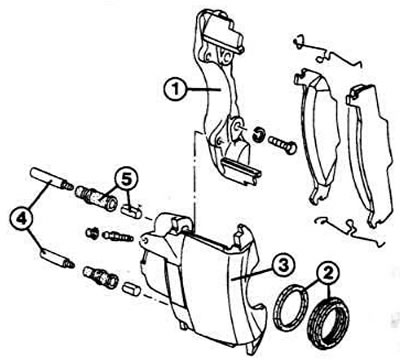
Details of floating caliper cam disc brake: 1 - holder; 2 - seals; 3 - body of the brake cylinder; 4 - guide fingers; 5 - guide bushings.
Instruction. When new brake pads are installed, brake carefully for the first 500 km, if possible. Strong braking at the very beginning leads to the fact that burnt places appear on the lining. The overlay changes in its structure. The most effective braking effect is not achieved, the lining hardens.
Visitor comments