
Knock out the fixing pins from the inside out with a hammer and a punch, remove the spacer spring.
Remove the inner brake lining. To do this, alternately insert a screwdriver through the lugs of the inner lining support (see fig.).
Then you need to remove the inner lining (3). brace (5) slide outward, if necessary tap lightly with a hammer. Only now you can remove the outer lining (4), releasing it from the fixing ledge of the movable frame.
Or, with tubular pliers, alternately pull either at the upper or at the lower lug of the support.
Move the movable frame outward. Due to this, the locking lug in the bracket releases the outer trim, and it can be dismantled in the same way.
Wipe the recess for the brake lining with alcohol (never use petrol!); if necessary, remove the remnants of the old lining with a brush.
Adhering crusts of dirt and rust can be removed with a flat-blade screwdriver. When doing this, be careful not to damage the piston collar.
To move the piston back, re-insert the worn brake lining.
Push the piston back with a wide screwdriver inserted between the brake disc and lining, with the screwdriver resting on the brake disc.
Before mounting the brake linings, the position of the piston in the floating caliper should also be checked; for this, the workshop has the appropriate gauge.
It is enough to carry out an auxiliary check: the bearing surface at the piston must be slightly inclined at the rear (20 degrees) down.
Move the movable frame outward, insert the outer trim.
Slide the movable frame back and insert the inner trim.
Insert the latch from the outside and carefully hammer it in; then - with a punch, until the latch is completely fixed inside.
Insert the spacer spring and the second retainer.
Insert the safety springs into the retainers; if necessary, turn the fasteners accordingly.
Press the brake pedal several times. until you feel resistance so that the pistons self-adjust in the cylinders. And only now the pads are adjacent to the brake disc, and the car has brakes!
Locking lug (2) in a floating bracket enters the recess (1) supports and thus protects the outer lining | 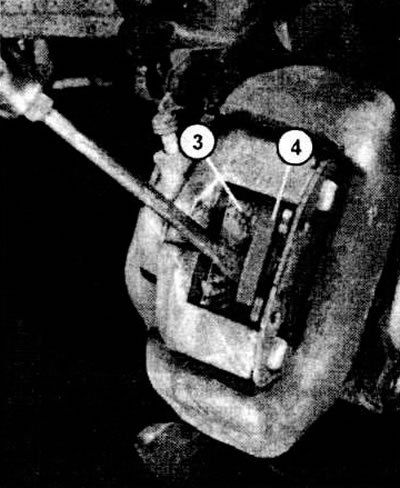
Thus, the piston in the floating bracket is pushed back. Old overlay (4) re-insert from the outside. Insert a wooden block (3) to protect the piston in the floating bracket. Using a screwdriver, you can move the piston back. Screwdriver rests on the old pad |
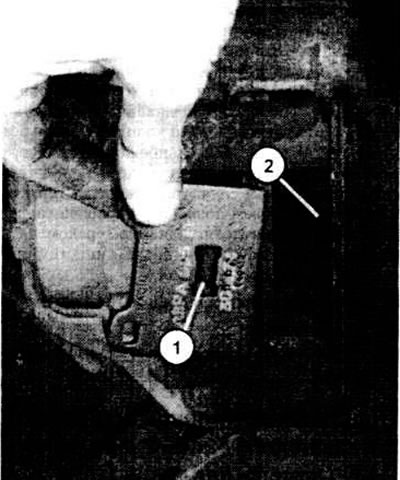
For dismantling the brake linings in the brake "Girling" unscrew the bolt (I) staples (3). Hold the nut on the back (2). | 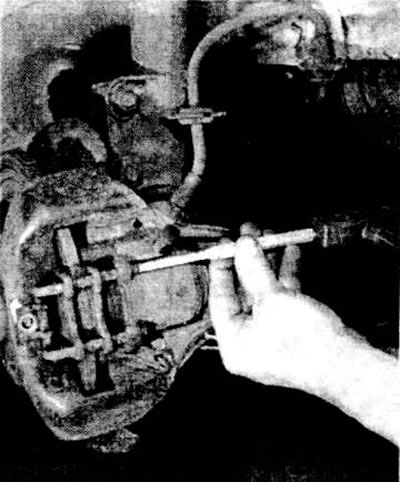
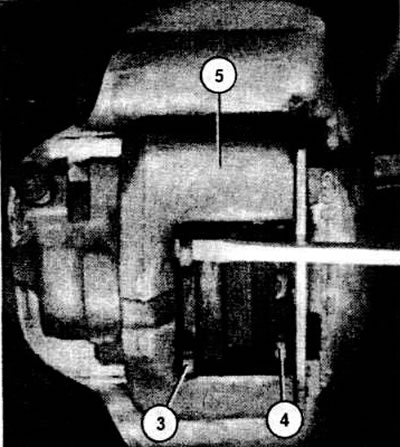
Often, due to corrosion, the fixing bracket is so tightly clamped in the lugs of the support that it has to be knocked out alternately with a hammer and a punch. |

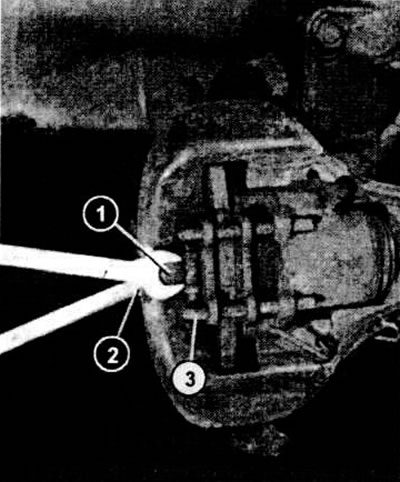
Disassembled floating caliper disc brake (manufacturer - ATE): 1 - movable frame; 2 - brake piston; 3 - dustproof cuff; 4 - holder; 5 - clamping ring; 6 - body of the brake cylinder.
Visitor comments