



Raise the car onto supports.
Release the handbrake completely.
If necessary, manually press the brake force regulator lever once firmly (see "Checking the brake force regulator") in the direction of the rear axle, otherwise, due to the possible residual pressure still present in the brake system, the right rear wheel brake will begin to operate without any additional adjustment.
On the inside of the wheel, the rear ones are hidden (if you look in the direction of movement) plastic plugs.
To position the linings closer to the brake drum, turn the adjusting nut, which has a splined surface, down.
Continue turning the adjusting nut with a screwdriver: tooth by tooth.
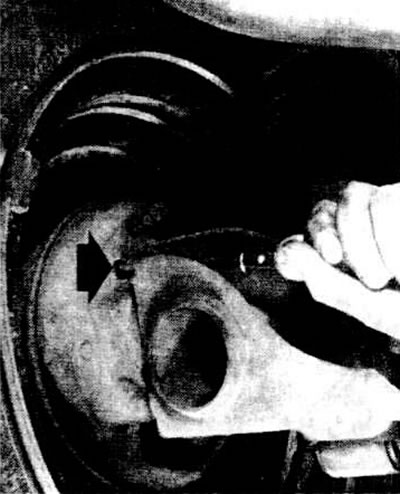
To adjust the drum brakes, insert a screwdriver into the hole located at the rear (if you look in the direction of movement) in the support sheet. A toothed adjusting nut is located at the rear.
If the adjusting nut is rusted, you need to put a powerful screwdriver to the tooth and hit the screwdriver shaft with a hammer.
If this does not help, remove the brake drum and try to ensure the smooth movement of the adjusting mechanism using rust solvent. Be careful not to get the solvent on the linings.
Turn the adjusting nut until the wheel can no longer turn - now the pads are in contact with the drum.
Turn the nut back again until the wheel can be turned. Pay attention to the noise when turning.
Automatic clearance adjustment on models produced after August 1978.
Since August 1978, drum brakes with an adjusting wedge have been used in the cars. This design no longer required additional adjustment. This was due to simple mechanics. The pressure rod, located between the brake shoes, must be extended as the linings wear out, so that they fit the drum again. This is done by means of a spring-loaded wedge, which moves in the rod as the linings gradually wear out.
Visitor comments