
When replacing the front oil seal, the V-belt, cover and toothed belt, as well as the pulley and toothed pulley, must be removed. To unscrew the bolt securing the toothed pulley, it is necessary to lock the crankshaft; for example, put the transmission into fourth or fifth gear and apply the handbrake.
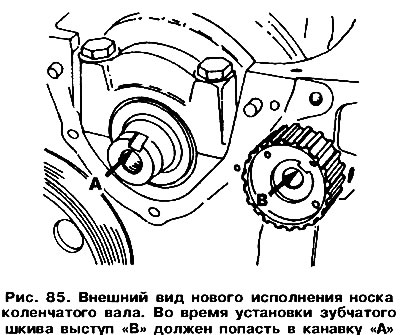
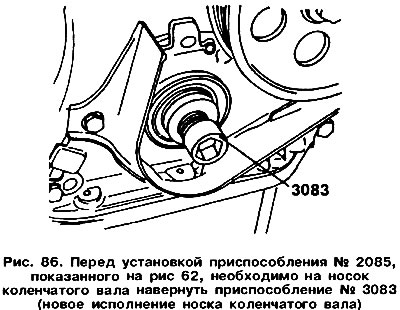
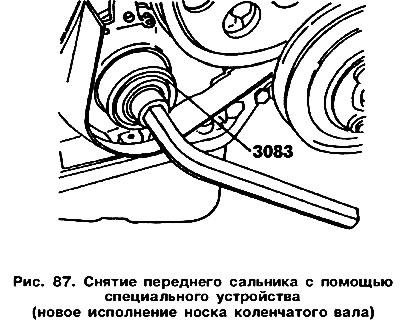
At the end of 1986, changes were made to the design of the front toe of the crankshaft (pic. 85). These changes affected only those crankshafts that were supplied as spare parts. During the factory assembly of engines, crankshafts of a modified design began to be used somewhat later. The operations for replacing the front oil seal will be described for both design options below. Usually, to remove the front oil seal, use the tool shown in rice. 62, but in the case of a modified crankshaft, another tool is needed, shown in fig. 86, the bolt of which is screwed into the toe of the crankshaft as deep as possible. And then you can use the puller shown in rice. 62. Removal is carried out in the same way as described for the camshaft oil seal (pic. 87).
 |  |
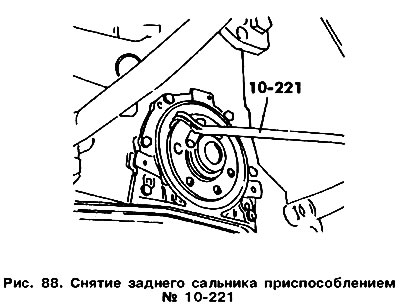
When dismantling the rear oil seal, you must first remove the gearbox, clutch and flywheel. To remove the seal, use the special tool shown in Fig. 88, or try to carefully pry it out with a screwdriver, being careful not to damage the seating surfaces with the screwdriver. If the engine is removed from the vehicle, it is necessary to remove the cover 2 (see fig. 82) together with seal (this cover is shown in fig. 82). Then the gland is knocked out of the cover out.
Attention! A flywheel with a worn surface causing clutch slippage or with damaged crown teeth must be replaced.
Visitor comments