



2. Disconnect the clutch cable from the clutch release lever.
3. Disconnect the speedometer cable from the gearbox by unscrewing the fastening bolt and remove the cable. Tie the clutch and speedometer cables so that they do not interfere.
4. Disconnect the wires from the reverse light switch
5. Loosen the fastening nut and disconnect the gearbox suspension bracket. Loosen the nut and disconnect the ground wire from the gearbox.
6. Disconnect the gear selection rods by unfastening the plastic clamps located on the ball joints. Only after unfastening the clamps does it become possible to remove the plastic joints.
7. Disconnect the elongated gear selector lever. When completely disassembling, it is necessary to pay attention to the fact that the ends of the lever differ in the angle of inclination, and also that the end marked with a notch (notch) is installed on the gearbox side.
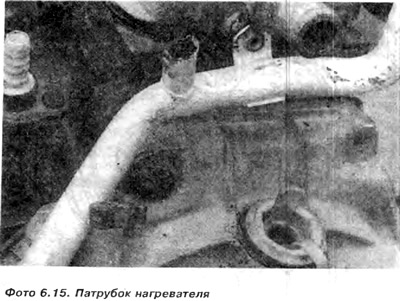
8. Disconnect the heater pipe bracket (near the starter) (photo 6.15).
9. Unscrew and remove the starter, leaving the wires connected. Place the starter so that it does not interfere.
10. Unscrew the separate bolt securing the sealing plate to the right drive flange.
11. Unscrew and remove the bracket securing the engine and gearbox on the left side of the vehicle (front of the car).
12. Loosen and remove the bolts accessible from above that connect the engine to the gearbox.
13. From underneath the vehicle, disconnect the right and left drive axles from the drive flanges. To do this, unscrew the drive joints from the drive flanges of the differential mechanism. The drive axles must be tied up to support them.
14. Disconnect and remove the wheel well cover on the left side.
15. Unscrew and remove the bolts of the clutch housing metal cover.
16. Loosen and remove the bolts accessible from below that connect the engine to the gearbox.
17. Disconnect the exhaust pipe from the exhaust manifold cuff.
18. Unscrew and disconnect (but do not extract) engine mount bracket (between the engine and the bulkhead). This will turn the engine, making it possible to remove the gearbox.
19. It is necessary to lower the engine and gearbox a little, and then pull the gearbox forward. It is necessary to remove the engine carefully, so as not to damage the engine equipment and the equipment fixed in the engine chamber. An assistant is needed to observe this process and hold the engine at the right angle so that the gearbox passes near the wheel well during its disconnection from the engine.
20. The box must be pulled out.
Installation in a car
21. The gearbox is assembled in the reverse order of disassembly. The connecting surfaces must be clean and lubricated with a small amount of graphite grease. The gearbox must be installed parallel so that the clutch shaft enters the hole in the clutch disc.
22. When the engine and gearbox are reconnected, the mounting bolts must be reinstalled and tightened to the appropriate torque. The gearbox weight must not be allowed to rest on the clutch shaft at any time.
23. The engine and gearbox must be mounted on the brackets in such a way that they do not cause lateral stress on the metal-rubber elements of the brackets. Only then can the fastening bolts be tightened.
24. It is necessary to adjust the clutch clearance. Check whether the gear selection mechanism works. And then fill the gearbox with oil.
Visitor comments