



General Provisions
Oil change (bringing its level up to normal) and the filter is performed after repair work or as part of inspection service. There are no other reasons to replace or top up the oil.
The following sequence of actions must be strictly followed.
Conditions:
- The engine is off.
- The vehicle is positioned strictly horizontally, all lift grips are located at the same height.
- The selector lever is in position "P".
- The tester is connected.
- At the start of work, the oil temperature does not exceed 50°C.
At temperatures above 50°C, allow the gearbox to cool down.
Gearboxes manufactured before September 20, 2004.
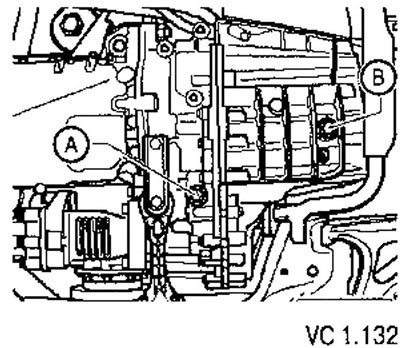
Before September 20, 2004, gearboxes were manufactured with a threaded oil inspection plug (A) and a threaded oil drain plug (B).
It's important not to confuse the drain plug (B) with the oil level plug (A). The oil level plug (A) is located near the lower engine mount.
Gearboxes manufactured after September 20, 2004.
Gearboxes manufactured after September 20, 2004, do not have a threaded plug (B), so oil draining and oil level adjustment are performed through a threaded plug (A). The threaded plug for the oil drain and oil level inspection hole (A) is located near the lower powertrain mount.
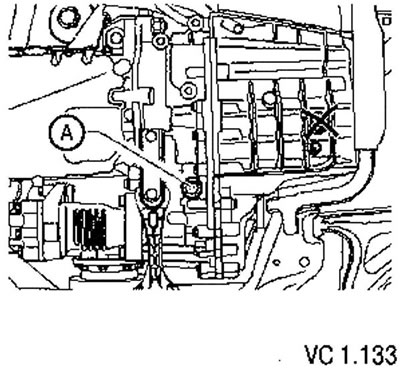
Threaded plug for draining oil and checking its level in both gearbox versions.
Each time the plug is unscrewed, the sealing ring must be replaced.
Replacing the filter
1. Select the "Guided functions" item on the tester and identify the vehicle.
2. Then select the item "Direct shift manual transmission", then the item "Check oil level".
3. Do not start the engine!
4. Place the receiving pan under the gearbox.
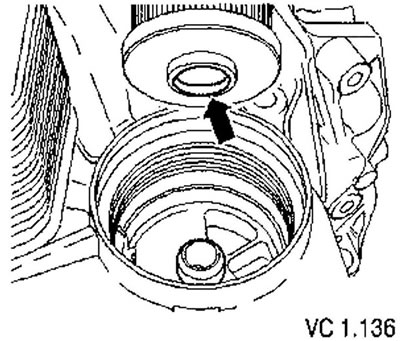
5. Unscrew the filter housing (arrow).
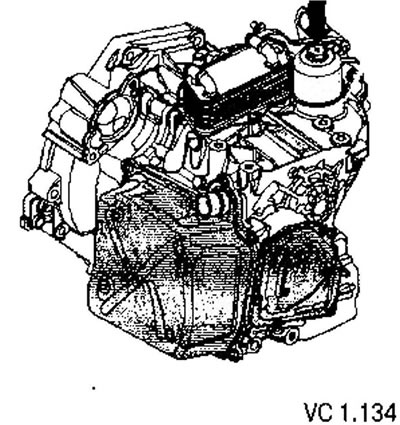
6. Before removing the filter housing from the gearbox, it should be slightly rocked so that the oil from the filter flows back into the gearbox.
7. Then remove the filter housing and filter.
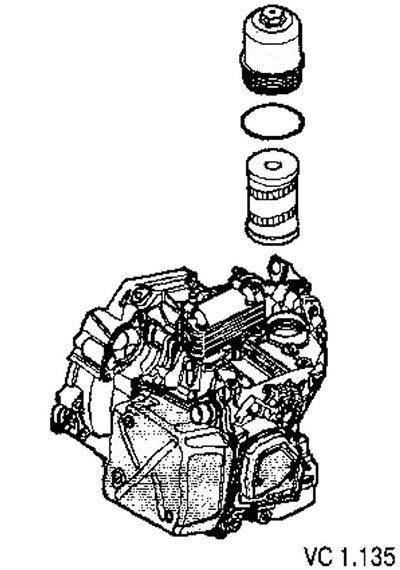
8. After installing the new filter with the belt facing down (arrow), tighten its housing to a torque of 20 Nm.
Oil change
1. Raise the car.
2. Remove the sound-insulating lower casing of the engine compartment.
3. Place the receiving pan under the gearbox.
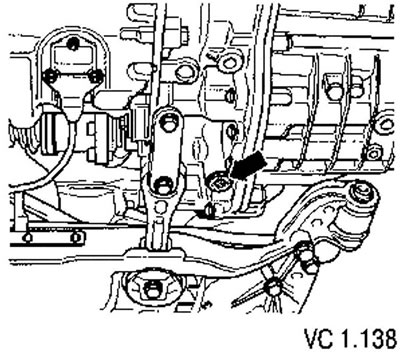
4. Remove the threaded plug (arrow) located next to the lower support of the power unit.
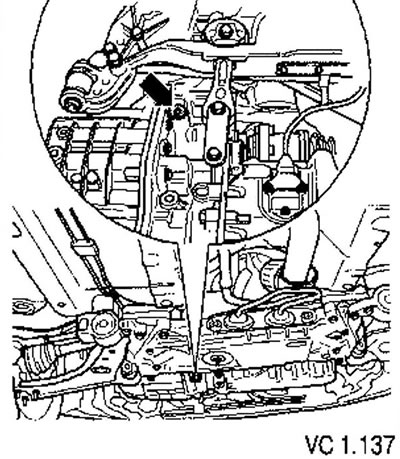
Behind this screw plug (arrow) is a plastic overflow tube (8 mm internal hexagon). The length of this overflow tube determines the oil level in the gearbox.
5. Remove the overflow tube and let the oil drain.
6. After approximately 5 liters of oil has drained, screw the overflow tube back in. Tightening torque: 3 Nm.
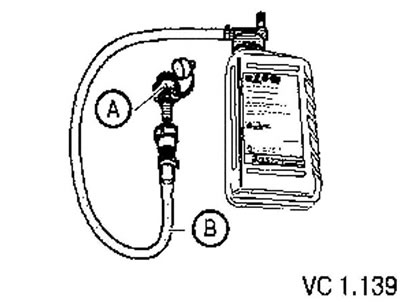
7. Screw the adapter (A) of the gearbox oil filling device (B) into the inspection hole by hand.
B. Shake the twin-disc clutch transmission fluid containers before opening.
9. Pour in oil.
Checking the oil level
1. Check the oil temperature.
2. Start the engine.
3. Press the brake and select all gears in sequence, holding each gear engaged for 3 seconds.
4. After this, set the selector lever back to position "P" without turning off the engine.
At a dual-disc clutch gearbox oil temperature of 35°C to 45°C
6. Disconnect the quick-release coupling of the adapter with the engine running.
7. Allow excess oil to drain. In this case, it is considered that excess oil has drained when the oil begins to drip, rather than pour.
Caution: Reusing drained oil is prohibited!
8. Unscrew the oil filling adapter.
9. Install the unscrewed threaded plug with the sealing ring back in place. Tightening torque: 45 Nm.
10. Turn off the engine. This completes the oil and filter change, and the correct oil level is set in the gearbox.
11. Install the sound-insulating lower casing of the engine compartment.
12. Turn off the tester.
Visitor comments