



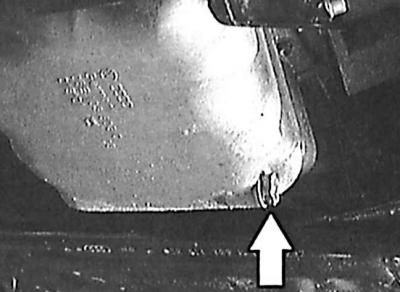
Location of the oil drain plug
Periodic oil and oil filter changes are the most important preventative maintenance procedure. As engine oil ages, it becomes thin and contaminated, leading to premature engine wear.
Before starting this procedure, gather all the necessary tools and materials together. It is necessary that the engine is warm so that the oil flows better along with the bulk of the contaminants.
Execution order
1. Raise the vehicle on a lift or place the vehicle in a horizontal position over an inspection pit.
2. Remove the lower engine splash shield.
3. Loosen the drain plug about half a turn. Place a container to collect the oil under the drain plug and unscrew the plug completely. If necessary, apply pressure to the plug while unscrewing to prevent the oil from leaking prematurely, see Fig. Location of the oil drain plug.
4. Once the oil has drained completely, wipe off any debris around the drain hole with a rag and screw the plug back on securely.
5. Move the container under the oil filter.
4- and 6-cylinder engines
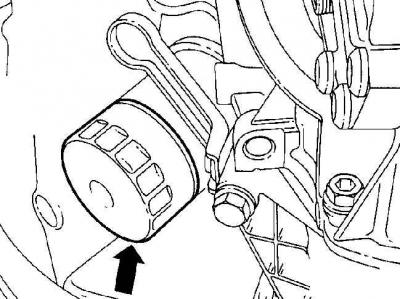
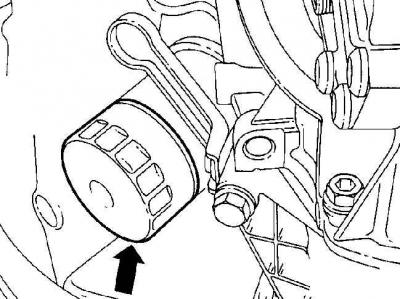
Location of oil filter on 4- and 6-cylinder engines
Execution order
1. Use the HAZET special tool 2171-1 to loosen the oil filter, then unscrew it by hand.
2. Wipe away all traces of oil and dirt around the filter mounting area. Check to see if the rubber seal is still on the cylinder block. If it is, remove it.
3. Lubricate the rubber seal of the new oil filter with clean engine oil and screw the oil filter in by hand until the rubber gasket touches the engine, then screw the filter in by hand 1/2 turn.
5-cylinder engines
Lower part of the oil filter
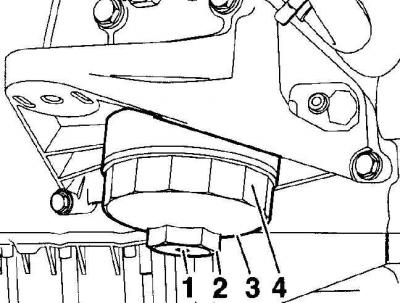
- 1 - cork,
- 2 - hexagon,
- 3 - lower part of the oil filter,
- 4 - polyhedron
The drain plug in the oil filter is located on the oil pan side.
Location of the sealing ring at the bottom of the filter
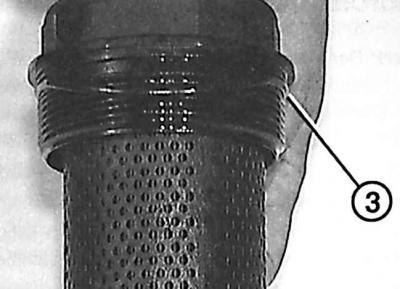
- 3 - lower part of the oil filter
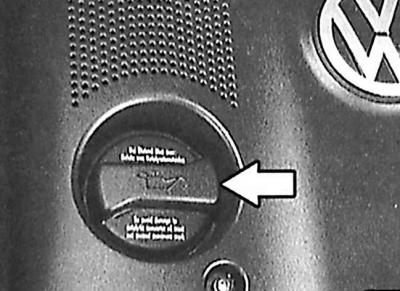
Location of the oil filler cap
Oil level on the dipstick
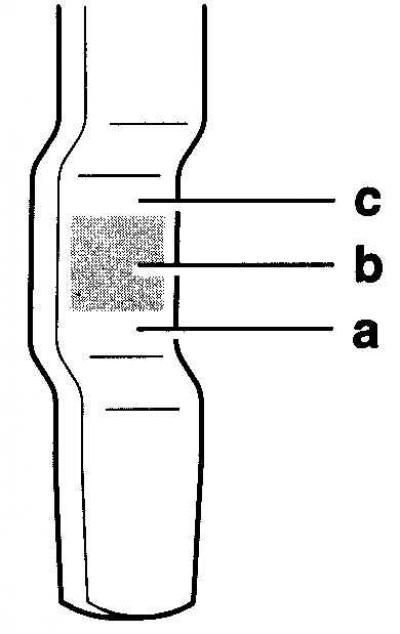
- a - minimum,
- b - normal,
- c - maximum
Location of MAX and MIN marks on the oil dipstick
Execution order
1. Using a hex or polyhedron, unscrew the lower part of the filter, see figure "Lower part of the oil filter".
2. Using a clean cloth, remove the bottom of the filter with the filter cartridge.
3. Install a new filter cartridge.
4. Replace the sealing ring at the bottom of the filter, see Fig. Location of the sealing ring at the bottom of the filter.
5. Screw the bottom part of the filter with a torque of 25 Nm.
6. Using tool N02-0135, tighten the plug into the bottom of the oil filter to 10 Nm.
7. Remove the oil filler cap, see Fig. Location of the oil filler cap.
(The original article is posted on the website: VWMANUAL.ru)
8. Fill the engine with oil using the correct grade of oil. Fill half the required amount of oil and wait a few minutes for the oil to drain into the pan, then continue to fill the oil in small portions until the oil level reaches the maximum level on the dipstick (c), see Fig. Oil level on the dipstick.
If the oil level is at the minimum level (a), adding approximately another liter will raise the oil level to the maximum level on the dipstick.
9. Close the filler cap.
10. Start the engine and let it run for a few minutes. Check for oil leaks around the filter and the drain plug on the pan. Note that the oil pressure light may stay on for a few seconds as the oil fills all the passages and oil reservoirs in the engine.
11. Turn off the engine and wait a few minutes for the oil to drain into the pan. Check the oil level and top up if necessary. Check that the oil drain plug is securely tightened.
12. Install the lower engine splash shield.
Visitor comments