



Elements of car body Volkswagen Passat B4

Features of the body structure
The body of a sedan or station wagon is all-metal, welded, load-bearing structure. There are five seats, including the driver. The overall dimensions of the body are shown in Fig....
The body of a sedan or station wagon is all-metal, welded, load-bearing structure. There are five seats, including the driver. The overall dimensions of the body are shown in Fig....

Paint care
If bird excrement gets on the surface of the car body, rinse the contaminated area with clean water and polish it with silicone-free polish. If metal particles get on the surface...
If bird excrement gets on the surface of the car body, rinse the contaminated area with clean water and polish it with silicone-free polish. If metal particles get on the surface...

Lubrication of moving parts of doors and hood
To prevent pins of moving parts of doors and body from breaking off and seizing due to corrosion, it is recommended to regularly lubricate all moving parts in accordance with...
To prevent pins of moving parts of doors and body from breaking off and seizing due to corrosion, it is recommended to regularly lubricate all moving parts in accordance with...

Removal and installation of the body
Warning: When installing the hood, adjust its position according to the gaps with the left and right wings and according to the hood protrusion. To remove, open the hood....
Warning: When installing the hood, adjust its position according to the gaps with the left and right wings and according to the hood protrusion. To remove, open the hood....

Reference dimensions of body openings for Volkswagen Passat sedans produced in 1988-93.
Windshield Front door Back door Rear window and luggage compartment
Windshield Front door Back door Rear window and luggage compartment

Reference dimensions of the body openings of Volkswagen Passat station wagons produced in 1988-93.
Windshield Front door Back door Tailgate
Windshield Front door Back door Tailgate

Removal and installation the radiator grille
To remove, open the hood. Unscrew the four bolts securing the trim to the upper crossmember (Fig. 9-8). Remove the radiator trim by removing the lower mounting pins from their...
To remove, open the hood. Unscrew the four bolts securing the trim to the upper crossmember (Fig. 9-8). Remove the radiator trim by removing the lower mounting pins from their...

Removal and installation the front bumper
To remove, lift the front of the vehicle and place it on stands. Unscrew the three Phillips-head screws securing the air intake grille. Use a screwdriver to remove the grille...
To remove, lift the front of the vehicle and place it on stands. Unscrew the three Phillips-head screws securing the air intake grille. Use a screwdriver to remove the grille...
Repair of front and rear bumpers
Repair of plastic bumpers is performed by welding with a pulse air heater or a large soldering iron. Since the operation of removing and installing the bumper is not difficult, it...
Repair of plastic bumpers is performed by welding with a pulse air heater or a large soldering iron. Since the operation of removing and installing the bumper is not difficult, it...
Welding the bumper
Attach a small diameter tip to the hair dryer nozzle to produce a directed stream of hot air. Heat the parts of the bumper to be welded with a hair dryer, moving the hair dryer to...
Attach a small diameter tip to the hair dryer nozzle to produce a directed stream of hot air. Heat the parts of the bumper to be welded with a hair dryer, moving the hair dryer to...

Removal and installation of optical elements of headlights and front direction indicators
Note: Before removing the headlight optical element, position the vehicle in front of a surface (for example. wall), turn on the headlights and mark the position of the low and...
Note: Before removing the headlight optical element, position the vehicle in front of a surface (for example. wall), turn on the headlights and mark the position of the low and...

Removal and installation front fenders
To remove, open the hood. Raise the front of the car, place it on stands and remove the front wheel from the desired side. In the wheel well, unscrew the two lower wing mounting...
To remove, open the hood. Raise the front of the car, place it on stands and remove the front wheel from the desired side. In the wheel well, unscrew the two lower wing mounting...
Removal and installation front doors
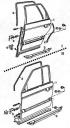
This operation is performed with an assistant. During the operation, be guided by the exploded view of the doors (Fig. 9-17). Fig. 9-17. Door details: I - front door; II - back...
This operation is performed with an assistant. During the operation, be guided by the exploded view of the doors (Fig. 9-17). Fig. 9-17. Door details: I - front door; II - back...

Removal and installation front and rear door trim
When removing and installing door trim, refer to the detailed view of the door trim (fig. 9-19 and 9-20). Fig. 9-19. Door trim details: I - front door; II - back door. 1 - door; 2...
When removing and installing door trim, refer to the detailed view of the door trim (fig. 9-19 and 9-20). Fig. 9-19. Door trim details: I - front door; II - back door. 1 - door; 2...

Removal and installation of window lifters
When removing and installing window lifters, refer to the exploded view (fig. 9-23 and 9-24). Remove the door trim as described above. Disconnect the glass from the window...
When removing and installing window lifters, refer to the exploded view (fig. 9-23 and 9-24). Remove the door trim as described above. Disconnect the glass from the window...

Removal and installation front door locks
When removing and installing locks, refer to the exploded view (Fig. 9-26). Fig. 9-26. Front door lock parts: 1 - external handle of the lock drive; 2 — connector for the central...
When removing and installing locks, refer to the exploded view (Fig. 9-26). Fig. 9-26. Front door lock parts: 1 - external handle of the lock drive; 2 — connector for the central...

Removal and installation rear doors
When removing and installing locks, refer to the exploded view (Fig. 9-28). Fig. 9-28. Rear door lock parts: 1 - external handle of the lock drive; 2 - lock release button; 3 -...
When removing and installing locks, refer to the exploded view (Fig. 9-28). Fig. 9-28. Rear door lock parts: 1 - external handle of the lock drive; 2 - lock release button; 3 -...
Removal and installation of windshield and rear glass
Considering the complexity of the operation of removing and installing glued glass, it is best to do it at a service station. It should be borne in mind that glued glass increases...
Considering the complexity of the operation of removing and installing glued glass, it is best to do it at a service station. It should be borne in mind that glued glass increases...
Repair of rear window heating element
If the rear window heating element is faulty, first check the integrity of its circuit to the positive power terminal using a test lamp. Check the reliability of the contact in...
If the rear window heating element is faulty, first check the integrity of its circuit to the positive power terminal using a test lamp. Check the reliability of the contact in...
Removal and installation a glued interior rearview mirror
Mark the position of the mirror bracket base on the glass. The top of the base should be approximately 4 cm from the seal on the upper edge of the windshield. Heat the glued area...
Mark the position of the mirror bracket base on the glass. The top of the base should be approximately 4 cm from the seal on the upper edge of the windshield. Heat the glued area...
Removal and installation the trunk lid
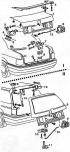
When removing and installing the cover, refer to the exploded view (Fig. 9-29). Fig. 9-29. Details of the trunk lid and tailgate: I — trunk lid; II - tailgate. 1 - trunk lid; 2 -...
When removing and installing the cover, refer to the exploded view (Fig. 9-29). Fig. 9-29. Details of the trunk lid and tailgate: I — trunk lid; II - tailgate. 1 - trunk lid; 2 -...
Removal and installation the tailgate of station wagons
Open the tailgate and place it on a wooden stop. Remove the upper mounting bracket of the door gas-filled stop. Raise the lower mounting bracket of the gas-filled stop, remove the...
Open the tailgate and place it on a wooden stop. Remove the upper mounting bracket of the door gas-filled stop. Raise the lower mounting bracket of the gas-filled stop, remove the...

Removal and installation the rear bumper
When removing and installing, refer to the exploded view (Fig. 9-30). Open the trunk lid and fold back the carpet on the floor of the compartment. Unscrew the two side bumper...
When removing and installing, refer to the exploded view (Fig. 9-30). Open the trunk lid and fold back the carpet on the floor of the compartment. Unscrew the two side bumper...

Removal and installation the instrument panel
To remove, disconnect the wire from the negative terminal of the battery. Remove the steering wheel. Remove the instrument cluster as described in the section " Electrical...
To remove, disconnect the wire from the negative terminal of the battery. Remove the steering wheel. Remove the instrument cluster as described in the section " Electrical...

Removal and installation the heater electric fan
Disconnect the wire from the negative terminal of the battery. Remove the storage shelf on the passenger side by unscrewing the mounting screws (Fig. 9-32) and removing the...
Disconnect the wire from the negative terminal of the battery. Remove the storage shelf on the passenger side by unscrewing the mounting screws (Fig. 9-32) and removing the...

Removal and installation the heater radiator
When removing and installing the radiator, refer to the exploded view of the heater (fig. 9-37 and Fig. 9-38). Fig. 9-37. Air conditioning system parts: 1 — heater radiator; 2 -...
When removing and installing the radiator, refer to the exploded view of the heater (fig. 9-37 and Fig. 9-38). Fig. 9-37. Air conditioning system parts: 1 — heater radiator; 2 -...
This section is available on russian, bulgarian, belarusian, ukrainian, serbian, croatian, romanian, polish, slovak, hungarian
Similar sections from other manuals for VW cars:
Body: Body elements Volkswagen Golf 2 (1984-1993)
Body: Body and interior elements Volkswagen Transporter T3 (1979-1992)
Body: Body elements Volkswagen LT 28 (1975-1991)
Body: Body elements Volkswagen Golf 2 (1984-1993)
Body: Body and interior elements Volkswagen Transporter T3 (1979-1992)
Body: Body elements Volkswagen LT 28 (1975-1991)
Passat B6
Passat B5
Passat B4
Passat B3
Passat B2
- General information
- User manual
- Maintenance
- Petrol engine 1.6L
- Engine repair
- Cooling and lubrication system
- Fuel injection system
- Petrol engine 2.0L
- Engine repair
- Lubrication system
- Cooling system
- Fuel and exhaust systems
- Diesel engine 2.0L
- Engine repair
- Cooling and lubrication system
- Fuel and exhaust systems
- Transmission
- Clutch
- Mechanical gearbox
- Automatic gearbox
- Drive shafts
- Chassis
- Wheels and tires
- Car suspension
- Steering
- Brake system
- Body
- Exterior (external elements)
- Electrical equipment
- Power devices
- Lighting and appliances
- Electrical circuits
- General information
- User manual
- Weekly checks
- Maintenance
- Power unit
- Engine repair
- Cooling system
- Fuel system (petrol)
- Fuel system (diesel)
- Engine management
- Exhaust system
- Transmission
- Clutch
- Car gearbox
- Drive shafts
- Chassis
- Car suspension
- Wheels and tires
- Steering
- Brake system
- Body
- Exterior (external elements)
- Interior (internal elements)
- Doors and covers
- Ventilation and heating
- Electrical equipment
- Power devices
- Lighting and appliances
- Electrical circuits
- General information
- User manual
- Maintenance
- Technical data
- 8-valve engine
- Engine repair
- Cooling and lubrication system
- Supply system
- Ignition system
- Fuel injection «Mono-Jetronic»
- Control system «Mono-Motronic»
- Control system «Digifant»
- Control system «Simos»
- 16-valve engine
- Engine repair
- Cooling and lubrication system
- Fuel injection «K-Jetronic»
- Control system «KE-Motronic»
- Control system «Digifant»
- Diesel engine
- Engine repair
- Cooling and lubrication system
- Power and control system
- Turbocharging system
- Digital control system
- Transmission
- Clutch
- Manual gearbox
- Hydromechanical gearbox
- Front wheel drive
- Chassis
- Car suspension
- Steering
- Brake system
- Body
- Body elements
- Electrical equipment
- Power devices
- Lighting and appliances
- Electrical circuits
- General information
- User manual
- Driving Tips
- Maintenance instructions
- Technical data
- Power unit
- Engine repair
- Ignition system
- Lubrication system
- Cooling system
- Supply system
- Petrol injection system
- Diesel engine
- Exhaust system
- Transmission
- Clutch
- Car gearbox
- Chassis
- Suspension
- Steering
- Brake system
- Wheels and tires
- Body
- Exterior
- Interior
- Heating system
- Electrical equipment
- Power devices
- Lighting system
- Equipment and devices
- Wiper system
- Electrical circuits
- General information
- Introduction to instructions
- User manual
- Power unit
- Engines 4-cylinder FZ
- Engines 4-cylinder
- Engines 5-cylinder
- Transmission
- Clutch
- Four-speed gearbox
- Five-speed gearbox
- Hydromechanical gearbox
- Front wheel drive
- Chassis
- Front suspension
- Rear suspension
- Steering
- Brake system
- Body
- Body elements
- Electrical equipment
- Equipment and devices
- Electrical circuits