



- a) Disconnect the negative battery cable
- b) Remove the air filter housing and fuel pump
- c) Drain the liquid from the cooling system and remove the upper elastic hose, as well as the thermostat
- d) Remove the ignition mechanism and spark plugs
- d) Unscrew the intake and exhaust manifolds
- e) Disconnect the electrical wiring from the temperature sensor and oil pressure sensor
1. Loosen the nuts and bolts securing the valve cover and remove the cover together with the gasket and reinforcing belts
2. Turn the crankshaft so that the notch made on the large timing gear appears in the hole in the valve cover, and the notch on the crankshaft pulley coincides with the TDC indicator. The TDC indicator is located in front of the oil pump. Then turn the crankshaft a quarter turn counterclockwise so that none of the pistons are at TDC (top dead center).
3. Unscrew and remove the distribution cover, paying attention to the fact that the oil level dipstick tube and the engine ground wire are attached to the upper cover bolts. Remove the oil level dipstick tube from the cylinder block
4. Using a socket wrench, through the hole in the timing gear, unscrew the upper bolt holding the inner plate 11 (figure 1.7), to which the distribution cover 7 is screwed.
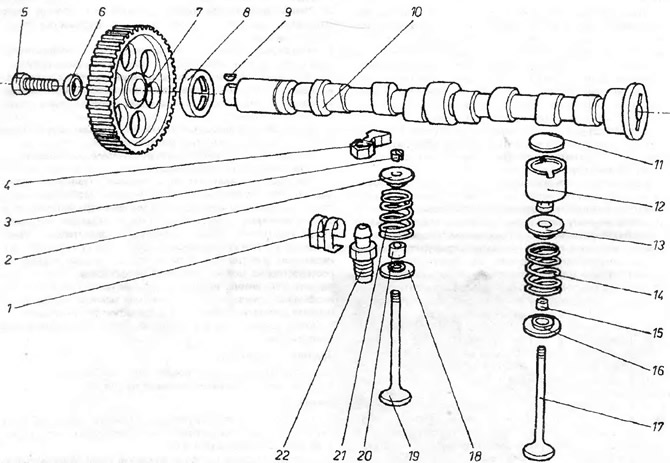
Lever and plate valve drive
1 - safety bracket; 2 - top plate; 3 - cone fuse; 4 - valve lever; 5 - fastening bolt; 6 - washer; 7 - distribution washer (wheel) (large); 8 - seal; 9 - tongue and groove; 10 - camshaft; 11 - adjustment plate; 12 - pusher; 13 - top plate; 14 - valve springs; 15 - valve guide seal; 16 - lower valve spring seat; 17 - valve; 18 - lower plate; 19 - valve; 20 - valve guide seal; 21 - valve springs; 22 - valve clearance adjusting bolt.
5. Loosen the bolts securing the water pump, then turn the pump body clockwise to reduce the tension on the timing belt. Remove the timing belt from the large timing gear.
6. Remove the bolts and pull back the inner plate securing the timing cover, then remove the water pump if necessary.
7. Using a slotted wrench, loosen all cylinder head bolts by half a turn, starting from bolt number 10. Only after loosening all bolts can they be completely unscrewed. Pay attention to the position of the brackets used to extract the engine.
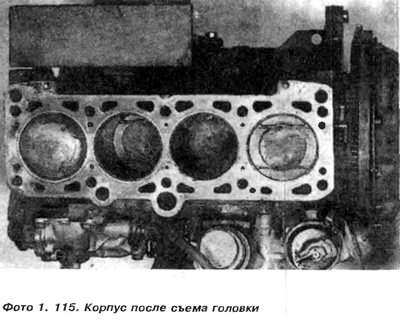
8. Remove the cylinder head from the block. If it is attached to the block, it is necessary to tap it using a hammer or a wooden mallet. In no case should screwdrivers be driven between the head and the cylinder block, as this will damage the surface of the head or cylinder block. The resulting scratch or dent will make it impossible to seal the head and it will be necessary to polish the damaged surface at a specialized enterprise.
9. Remove the gasket from the cylinder block. Usually part of the gasket sticks to the block and head. It is necessary to carefully clean both surfaces with a scraper, paying attention not to create very deep scratches.
Visitor comments