
Removing
Remove the gearbox.
Insert the screw release support.
Loosen the screws little by little, crosswise.
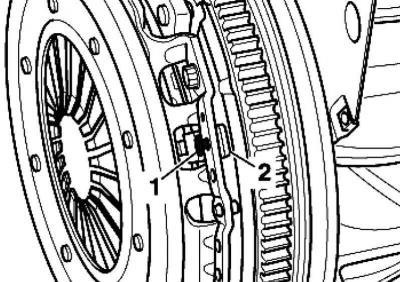
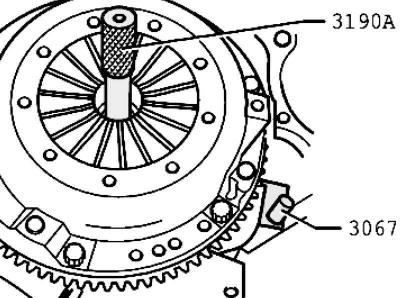
Pic. 3.29. flywheel stop
When unscrewing stop 2 with screw 1 must be loosened (pic. 3.29).
If the stop does not loosen: push the screw in the direction of the dual-mass flywheel.
Remove pressure plate and clutch disc.
Installation
Installation is carried out in the reverse order, paying attention to the following points.
Note: Replace pressure plate and clutch disc only together. Identify pressure plate and clutch plate by engine code.
Note: Check if there are fitted bushings for centering the engine/gearbox in the cylinder block, insert them if necessary.
Note: Lack of fitted bushings results in shifting difficulties, clutch problems and hence gearbox noise (crackling in drive wheels).
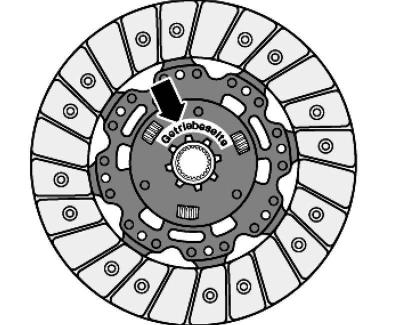
Pic. 3.30. Installation position of the clutch disc
Inscription «Gearbox side» towards the gearbox (pic. 3.30).
Checking the ends of the diaphragm spring
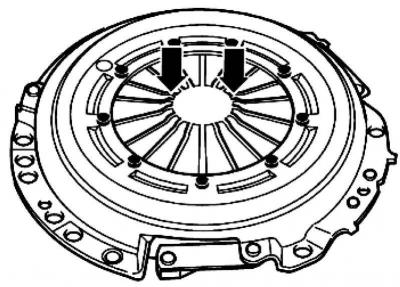
Pic. 3.31. Checking the ends of the diaphragm spring
Check the ends of the diaphragm spring (pic. 3.31).
The diaphragm spring is allowed to wear up to half of its thickness.
Check keyed and riveted connections
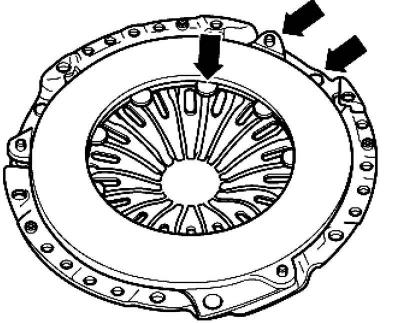
Pic. 3.32. Checking keyed and riveted connections
Check keyed connections between clutch basket and cover for cracks and riveted connections for firm seating (pic. 3.32).
Note: Replace clutch discs and pressure plates with damaged or missing rivet connections.
Note: To reduce odor in the event of a burnt clutch, thoroughly clean the clutch cap as well as the flywheel and engine on the transmission side.
Clean the input shaft gear and, if using a clutch disc, the hub gear, remove any corrosion and apply a very thin layer of clutch disc gear grease to the gear. Then move the clutch disc back and forth until the hub runs easily on the shaft. Be sure to remove excess grease.
Pressure plates are corrosion protected and greased. They can only clean the working surface, otherwise the service life of the clutch will be significantly reduced.
The working surface of the pressure plate and the clutch disc lining must fit snugly against the flywheel. Only then can the fixing screws be inserted.
Pic. 3.33. Support installation
When installing, insert the support (pic. 3.33).
Slide the pressure plate onto the centering pins.
Use a centering rod to center the clutch disc.
Hand-tighten all screws evenly until the head of the screw is in contact with the pressure plate.
Tighten the screws progressively in a criss-cross pattern so as not to damage the centering holes of the pressure plate and the centering pins of the dual-mass flywheel.
Install the gearbox.
Visitor comments