



Removal
With the ignition off, disconnect the ground wire from the battery.
Remove the entire air filter housing if it is located in the battery area.
Remove the battery and its support.
Note: When performing the following work, be careful not to allow brake fluid to come into contact with the side member or gearbox. If this does happen, clean the area thoroughly.
Note: Place a lint-free cloth under the master cylinder.
Remove the hose clamp to the master cylinder.
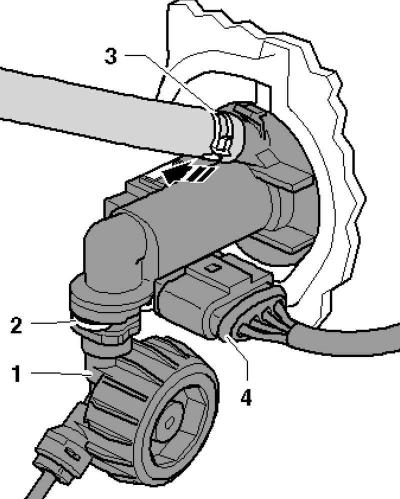
Fig. 3.6. Removing the hose line
Release spring clamp 3 using the assembly tool, then pull the hose off the clutch pedal sensor cartridge (Fig. 3.6).
Using a screwdriver, remove the safety clip 2 and pull it out of the master cylinder until it stops.
Remove the pipe/hose line 1 from the master cylinder and close it.
Disconnect connector 4 on the clutch pedal position sensor (Fig. 3.6).
Remove the driver's side footwell trim.
Remove the lower steering column trim.
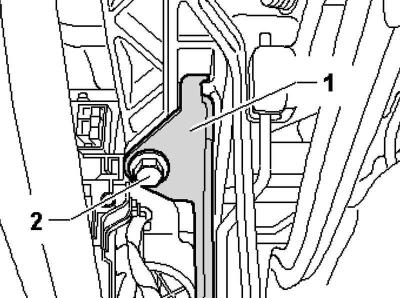
Fig. 3.7. Impact protection stand mounting bolt
Remove the impact protection pillar 1 by unscrewing the bolt 2 (Fig. 3.7).
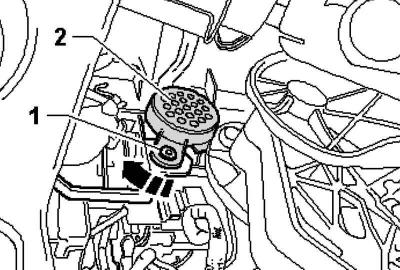
Fig. 3.8. Removing the parking assistant
If there is a fastening clip 1, remove it and move the front parking aid warning buzzer in the direction of the arrow (Fig. 3.8).
Unscrew fastening nuts 1 and 2.
The upper fastening nut 1 can be unscrewed through the hole in the lower steering column trim.
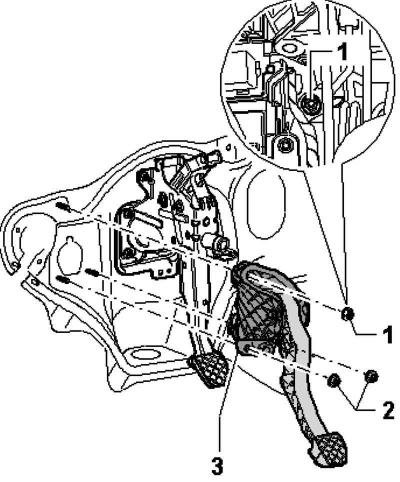
Fig. 3.9. Removing the support bracket
Pull support bracket 3 off the spacer bolts on the engine shield (Fig. 3.9).
Installation
Install in reverse order. Please note the following.
Replace the self-locking nuts.
Replace the lip seals.
Replace the hose clamps
If there is a mounting clip for the front parking aid warning buzzer, install this clip.
Install shock strut 1 and tighten bolt 2 to the tightening torque (Fig. 3.7).
(View the original on this resource: «VWmanual.ru»)
Install the lower steering column trim.
Install the driver's side footwell trim.
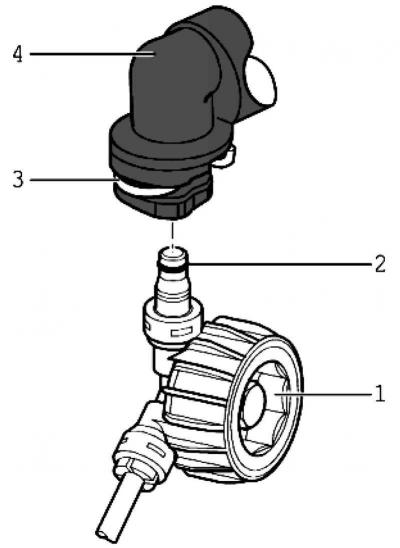
Fig. 3.10. Installation diagram of the pipe-hose main
Place the hose-pipe line 1 with a new sealing lip 2 on the main cylinder nipple 4 so that the click of the safety clip 3 can be heard (Fig. 3.10).
To check, pull on the pipe/hose line.
Remove air from the clutch assembly.
Install the battery, battery cover and battery bracket.
Install the air cleaner housing assembly if it was removed.
When reconnecting the battery, follow the instructions for work required after connecting it.
Tightening torques
Support bracket for engine shield (replace self-locking nuts) – 25 Nm.
Impact protection stand – 20 Nm.
Visitor comments