



Removing
Raise the car.
Spray all bolts and nuts of the exhaust system with a rust remover. Leave the agent on the surfaces of the parts for some time to show its effect.
Remove the subsequent muffler.
Unscrew the protective screen.
Cars up to 9/93
Remove the pressure springs between the exhaust pipe and the front exhaust pipe.
Attention: This requires a spring remover VAG 3049A or HAZET2585. The easiest way to do this is with a special tool with an expansion wedge VAG 3140/2 or HAZET 2586-3. Never remove springs without these tools.
Removal with spring remover
Adjust the distance between the trunnions of the device to the distance between the holes of the clamping springs.
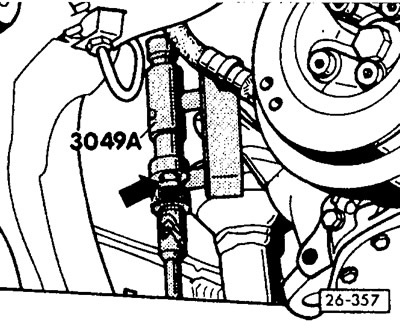
Insert the spring remover into the spring holes and release it slightly by hand. To do this, at the VAG device, turn the corrugated washer in the direction of the arrow (knurled washer end arrow).
Insert the T-handle into the spring remover and stretch the spring until it stops.
Remove the clamping spring from the recesses of the exhaust pipe and the exhaust pipe, for which the exhaust pipe is pressed in the direction of the clamping spring to be removed.
Remove the second spring in the same way.
Removal with wedge tool
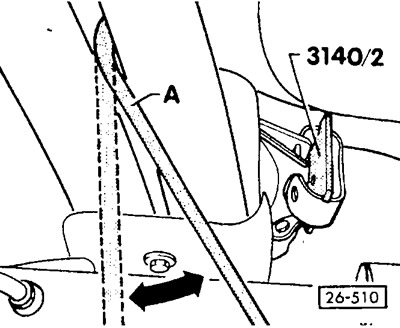
Push the exhaust pipe to the side. Due to this, the spring located on the side where the exhaust pipe is pressed will stretch. In this position, insert a short spacer wedge VAG 3140/2 or HAZET 2586-3 into the pressure spring. Stretch the second pressure spring in the same way and insert the expansion wedge.
Attention: In the case of a double exhaust pipe, to stretch the spring, insert a pry bar -A- between the pipes, and in the case of a single pipe, grasp it with a pipe wrench and press the pipe to the side. If necessary, remove the exhaust system from the retaining tracks.
Press the front exhaust pipe in the direction of the pressure spring, which is to be removed first. Check the clamping strength of the clamping spring with a spacer wedge, remove the spring.
Support the exhaust system from the front with a garage jack (or ask an assistant to support her) and remove the retaining rings both in the middle and at the back.
Remove the exhaust system.
Parts of the exhaust system can also be removed individually. If the connecting sections or bolts cannot be unscrewed, heat the exhaust pipe at the connection point with a welding torch. Put on asbestos!
Caution: Fire hazard!
Attention, 16-valve engines up to 9/92: If the front exhaust pipe is to be removed, first loosen the front axle beam, support it on the right with tool VAG 1383 or a garage jack with a suitable gasket and unscrew the bolts on the right. Lower right front axle carrier by approx. 10 mm. After installation, tighten the bolts securing the beam to the body with the following torques: M12 bolts - 130 Nm, M10 bolts - 80 Nm.
Installation
Attention: Rubber rings, nuts and bolts must be replaced. To make the nuts and bolts of the exhaust system easier to unscrew later, it is recommended to lubricate them with a high-temperature paste, for example, Liqui Moly LM-508-ASC.
Connect the front exhaust pipe and pre-muffler and tighten the clamp slightly. If necessary, clean the connecting element of the clamp before tightening with emery from carbon deposits.
Replace the mechanical seal between the exhaust pipe and the front exhaust pipe only if damaged or leaking and pull it out with a screwdriver.
Insert the trunnions of the spring remover into the holes of the clamping spring. Open the spring with the help of the device and insert it, while the spring is first inserted into the recess on the side of the exhaust pipe.
Loosen the spring remover and insert into the second spring. In conclusion, check the correct installation of the springs in the recesses. If spacer wedges are used, insert the extended compression springs and make sure that their ends fit into the recesses of the front exhaust pipe and exhaust pipe. Remove the spacer wedges by pushing the front exhaust pipe to the side.
Install the subsequent muffler, do not tighten the clamps yet.
Align the exhaust system before tightening the bolts. When doing this, make sure that there is a sufficient distance to the body (not less than 25 mm), otherwise turn the exhaust system or move it longitudinally. The retaining rings must be loaded evenly. Make sure that the pipes go far enough into the clamps, the distance -a- from the designation on the pipe to the clamp should be approx. 5 mm, see large figure.
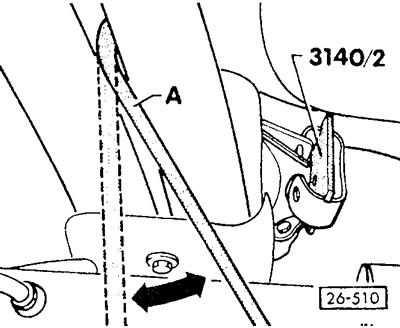
16-valve engines and all models from 10/93: When aligning the exhaust system, make sure that the rear suspension of the subsequent muffler protrudes from the rubber bracket by a distance b = 10 mm. If necessary, move the pre-silencer in the clamping sleeve.
Tighten bolts and nuts. The tightening torques for the bolts depend on the thread diameter: M6 bolts - 5 Nm, M8 bolts - 25 Nm, M10 bolts - 40 Nm.
Screw on heat shield with new self-locking nuts.
Lower the vehicle, see section «Vehicle lifting».
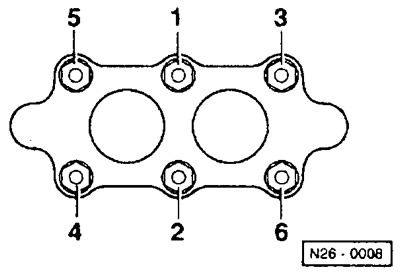
The sequence of fastening the exhaust pipe to the exhaust pipe
Visitor comments