
The brake mechanism of a back wheel of drum type
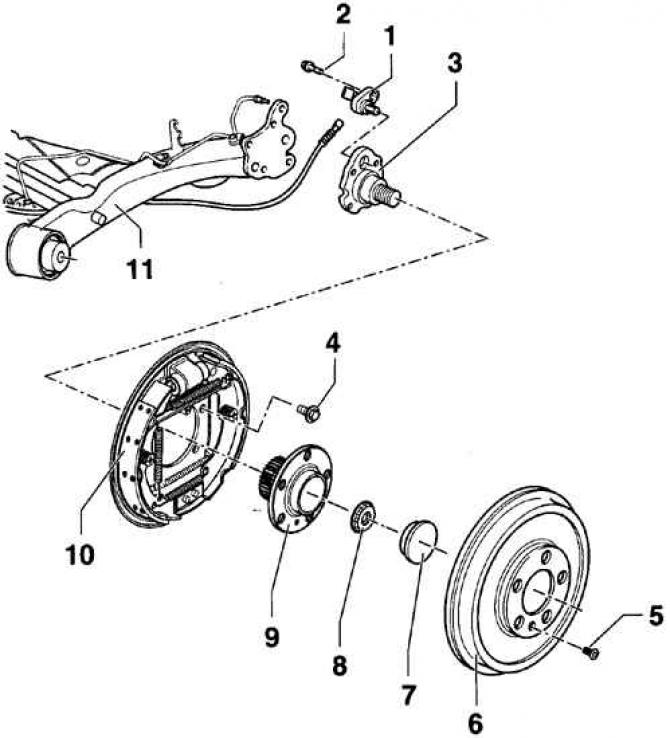
- 1 - ABS sensor;
- 2 - screw with hexagon socket, 8 Nm;
- 3 - trunnion of the hub;
- 4 - bolt, 60 Nm;
- 5 - cross-slotted screw;
- 6 - brake drum;
- 7 - protective cap. At removal of a brake drum removal of a protective cap is not required;
- 8 - self-locking twelve-sided nut, 175 Nm. At installation it is necessary to use a new nut;
- 9 - rear wheel hub with bearing;
- 10 - brake shield with brake pads;
- 11 - rear beam
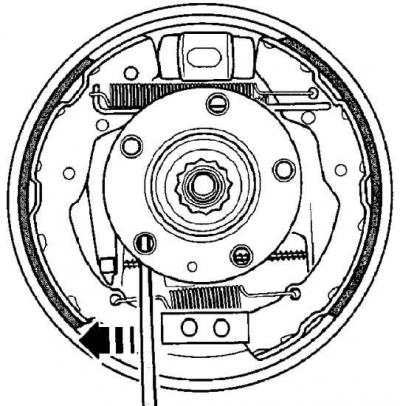
Rear brake pads of a front wheel drive drum brake
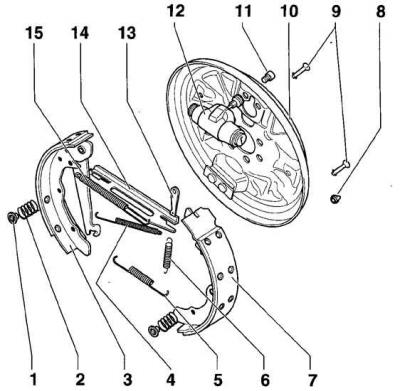
- 1 - spring plate. To remove the spring, press the plate and turn it 90°;
- 2 - spring;
- 3 - brake shoe with hand brake lever;
- 4 - upper return spring;
- 5 - lower return spring;
- 6 - spring;
- 7 - brake shoe. The minimum thickness of the brake pad lining is 2.5 mm;
- 8 - cap. After removing the cap from the brake shield, you can check the condition of the brake pads;
- 9 - spacer pin;
- 10 - brake shield;
- 11 - a bolt with an internal hexagon, 8 Nm;
- 12 - wheel brake cylinder;
- 13 - wedge. When removing the brake drum, the wedge must be moved upwards;
- 14 - spacer bar. When installing the spacer bar, it must be lubricated with G000650 grease;
- 15 - clamping spring
The rear drum brake has an automatic brake shoe clearance adjustment device. In this case, the expansion bar automatically changes its length and thereby ensures a constant gap between the brake drum and brake shoes. To do this, a wedge with a spring is placed between the front shoe and the expander bar, which is a continuation of the expander bar. After pressing the brake pedal once, the required clearance is set. If, due to wear, the pad travel increases, the wedge, under the influence of the expansion bar and the spring, goes down. Thus, the length of the expansion bar changes and the gap of the brake shoes is automatically maintained.
Order of execution
Warning: Be sure to replace all pads on the same axle, even if only one pad has reached the wear limit.
1. The thickness of the rear drum brake pads can be checked without removing the brake drums. Remove the rubber cap that is installed over the handbrake cable entry on the brake shield.
2. Illuminating with a portable lamp, check the thickness of the brake pads.
3. Raise the rear of the car and secure it on stands.
4. Remove the rear wheels and release the handbrake.
5. Remove the brake drum mounting screw.
6. Rotate the brake drum so that one of the wheel bolt holes is at a 45°angle from the vertical plane towards the front of the vehicle.
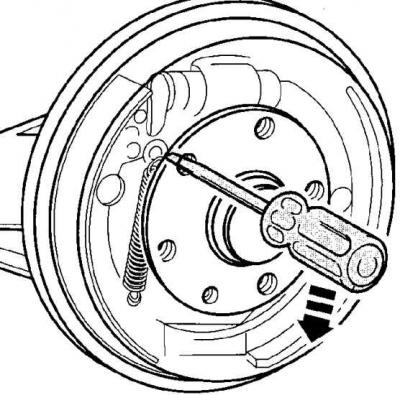
7. Release the brake pads by inserting a screwdriver through the hole and moving the wedge up.
8. Remove the brake drum. Use a universal puller if necessary.
Warning: When the brake drum is removed, do not press the brake pedal, as the pistons may come out of the working brake cylinder.
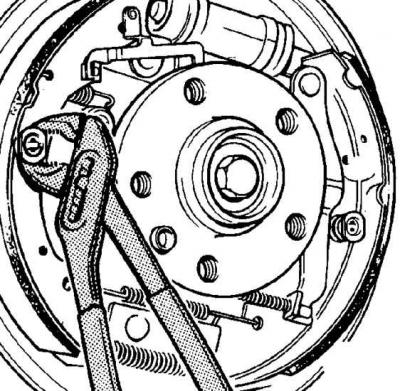
9. Use pliers to press the cups of the springs, turn them 90°and remove them together with the springs. Hold the pin in place when turning the calipers on the back of the brake shield.
10. Remove the cup and spring from the second brake shoe in the same way.
11. Using a screwdriver, remove the brake shoe from the lower support.
12. Remove the lower return spring.
13. Disconnect the handbrake cable from the brake shoe lever.

14. Remove the brake pads and secure them in a vise. Remove the top return spring and wedge tension spring.
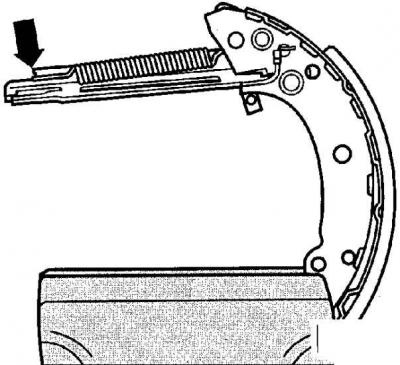
15. Disconnect the expansion bar clamping spring and remove the expansion bar together with the wedge (the arrow indicates the point of disconnection).
Visitor comments