
Warning: Optimum brake pad clearance is maintained by the automatic adjustment mechanism, however, when replacing the handbrake cables or rear brake caliper, the handbrake must be adjusted.
Order of execution
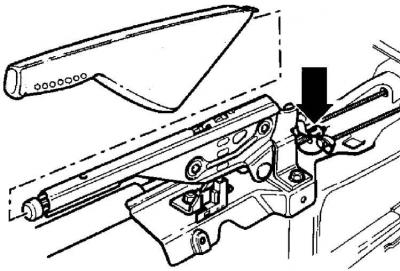
1. Remove the handbrake lever trim and the rear of the center console. Adjusting nut (arrow) located behind the handbrake lever.
2. Fully depress the brake pedal at least once.
3. Loosen the rear wheel bolts, then raise the rear of the vehicle and secure it on stands. Remove rear wheels.
4. Fully release the handbrake.
Vehicles with rear disc brakes
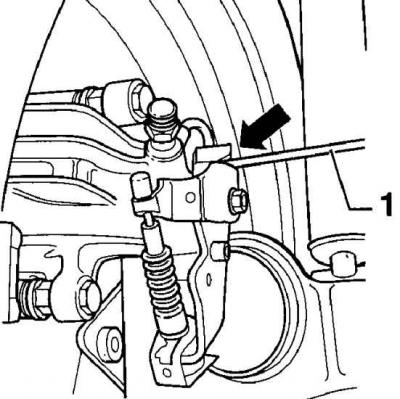
5. By turning the adjusting nut behind the handbrake lever, set it to such a position that the distance between the handbrake lever and the caliper, measured with a feeler gauge (1), will be no more than 1.5 mm.
6. Tighten the handbrake lever up to the stop three times, while all the elements of the handbrake will be installed in their places.
7. Check that the rear wheels turn freely when the handbrake lever is released.
Vehicles with rear drum brakes
8. Tighten the handbrake lever four clicks.
9. Turn the adjusting nut until it is in a position where the rear wheels of the vehicle are difficult to turn.
10. Release the handbrake lever and check that the rear wheels turn freely. Repeat the adjustment if necessary.
11. Lower the car.
12. Install the center console and handbrake lever trim.
Visitor comments