
Hand brake
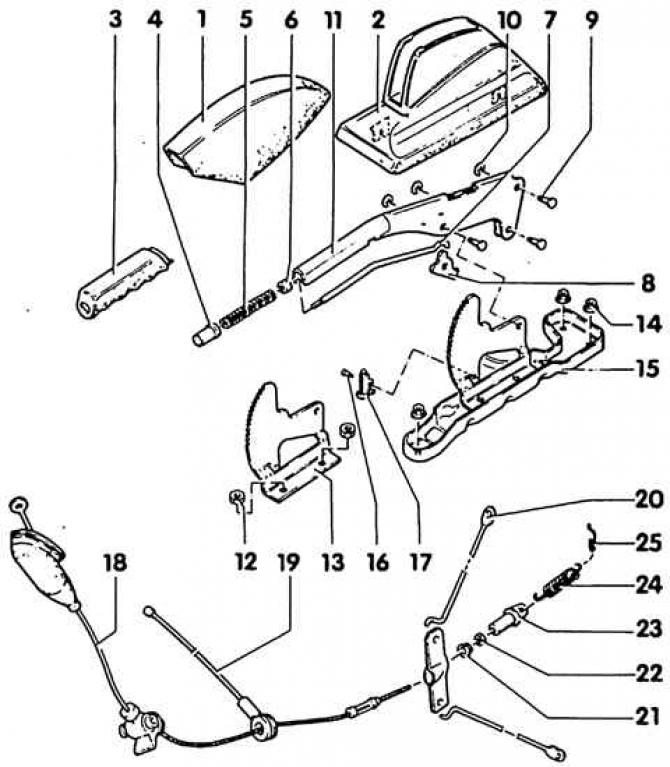
1. The upper part of the skin; 2. The lower part of the skin; 3. Handle; 4. Lock release button; 5. Pressure spring; 6. Spring sleeve; 7. Locking rod; 8. Stopper; 9. Finger; 10. Safety washer; 11. Handbrake lever; 12. Hex nut; 13. Toothed segment; 14. Nut, 25 Nm, self-protective, always replace; 15. Hand brake support; 16. Rivet; 17. Limit switch; 18. Handbrake cable; 19. Cable; 20. Traction; 21. Hex nut; 22. Safety nut; 23. Spring holder; 24. Return spring; 25. Holder
Thanks to the automatic adjustment of the rear brakes, there is no need to adjust the handbrake. A new adjustment is necessary when replacing the brake cable or parts.
1. Release the handbrake lever in the driver's compartment completely.
2. Remove both brake drums (see subsection 7.7).
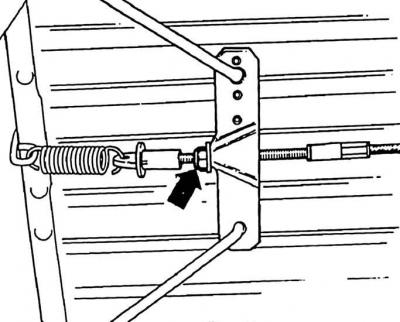
3. The handbrake is adjusted with the handbrake cable adjusting nut. The nut is located under the bottom of the car on the handbrake cable compensator (arrow).
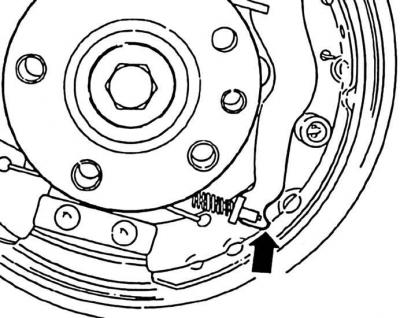
4. Tighten the adjusting nut until the handbrake lever (indicated by an arrow) on both brakes of the rear wheels will not rise by 2 mm relative to the brake shoes.
5. Install brake drums (see subsection 7.7).
Attention! After adjusting the rear brake, a slightly increased stroke of the hand and foot brake appears, which during operation, when the brake is applied, will decrease.
Visitor comments