
2. Removal of air must begin from the farthest wheel, and end closest to the brake cylinder. The air removal sequence is as follows:
A) rear right wheel.
b) rear left wheel
V) front right wheel
G) front left wheel.
3. It is necessary to systematically control the level of brake fluid in the reservoir so that air does not get into the cylinder, since in this case the removal of air will have to be started all over again.
4. We unscrew the air extractor at the beginning of the pedal stroke, and wrap it at the end of the outflow of liquid from the air extractor in order to prevent air being sucked in by the air extractor.
5. To remove air from the brakes, you must:
A) Press the brake pedal several times and keep it pressed.
b) At this point, the second person turns the bleeder off so that the liquid starts to flow out.
V) Without expecting that the liquid will completely stop flowing out, wrap the air bleeder. It is necessary to have time to turn the bleeder on before air can penetrate the threads of the bleeder into the cylinder.
G) The brake pedal must be held down and not released until there is a signal that the air bleeder is compressed. Only then is it allowed to lift (let go) pedal. If necessary, do the same for the remaining wheels according to the order given above.
d) Repeat this operation several times until the fluid stops flowing out along with air bubbles and the brake pedal becomes high and hard. When pressed, the pedal should constantly linger at the same height.
e) If after the first pressing the pedal sinks low, and then its travel is reduced and it becomes springy, this is the presence of air in the system. In this case, it is necessary to repeat the bleeding operation.
e) After the removal of air is completed, it is necessary to add liquid to the tank to the desired level.
and) A protective cap must be put on each bleeder. This is very important to prevent corrosion of the bleeder, which reduces the risk of the bleeder blowing off during unscrewing
Attention: The liquid that leaked out during the removal of air must not be poured into the tank, as it is contaminated and often diluted with water. The manufacturer recommends changing the fluid in the system every two years (after winter).
To fill the system, use only the liquid recommended by the manufacturer. Brake fluid is poisonous, corrosive and hygroscopic.
Another way to avoid air being sucked in through the bleeder is to put a tight-fitting small hose over the bleeder and immerse the other end in a container of liquid that is raised 300mm above the bleeder. This method is not effective in a situation where air is removed from the entire brake system.
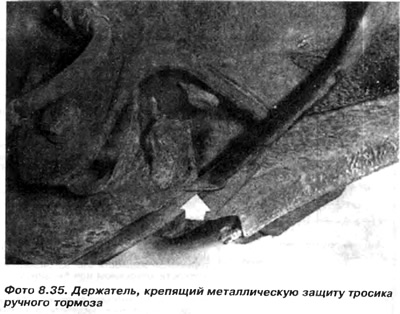
6. Remove the cable with metal protection from the grips (holders), attaching it to the body, and pull it out from under the car (photo 8.35).
Installation
7. Installation is carried out in the reverse order to dismantling.
8. The clearance of the hand brake lever is adjustable depending on whether it is disc or drum brakes.
A) Drum brakes - with the hand brake fully released, depress the main brake pedal firmly and tighten the hand brake lever two clicks. Tighten the adjusting nut so that the resistance of the rear wheel during rotation is noticeable. Fully release the handbrake lever, then check if the wheel turns freely. If the wheel turns freely, lock the adjusting nut with the locknut. Then tighten the hand brake lever and check if the wheel is locked. Repeat the same operation for the second cable.
b) Disc brakes - Before adjusting the handbrake cables, check the clearance between the outer shoe and the clamp. Fully release the handbrake lever, then tighten the cable adjusting nut to a position where the lever on the clip no longer touches the buffer it rests on. The gap between the lever and the buffer must not exceed 1 mm. Then tighten the locknut and check whether the wheel rotates without friction when the handbrake lever is released, and is locked when tightened.
Repeat the same operation for the second cable.
Visitor comments