
2. To remove the corrector, you must:
A) Add brake fluid up to the upper mark on the surface of the reservoir funnel. Place a circle of foil under the cork and squeeze it to seal the tank. If the tank is sealed, then after unscrewing the pipelines, much less liquid will flow from the corrector.
b) Open-end wrench is necessary to unscrew the four brake pipelines from the corrector, noting their location (fig 8.4).
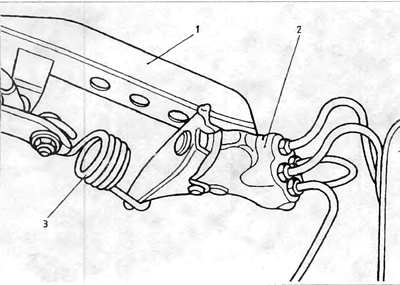
Pic. 8.4. Brake force corrector
1 - body; 2 - brake force corrector; 3 - spring.
V) Remove the spring 3 and unscrew the bolt securing the housing 2.
Installation
3. Installation is carried out in the reverse order to dismantling.
4. After installing the corrector, it is necessary to remove air from the system.
The corrector must be checked at a service station, since normal adjustment requires the installation of a pressure gauge in the corrector, the corresponding vehicle load and the corresponding bending of the corrector arm. The adjustment itself consists in an involuntary change in the spring tension.
Visitor comments