
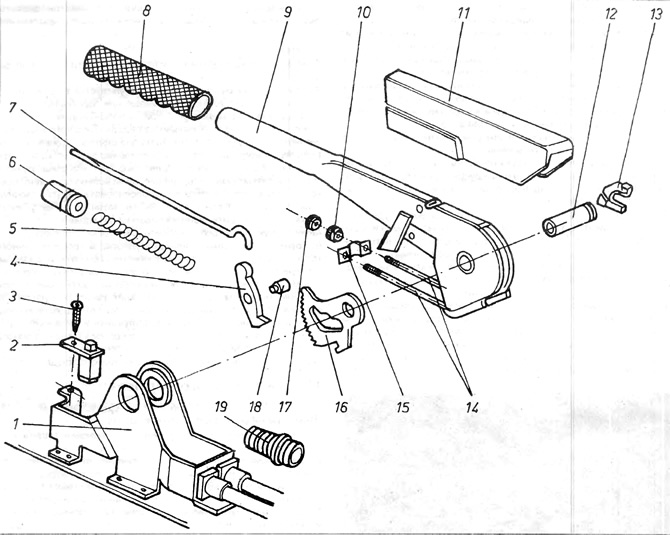
Pic. 8.14. Hand brake lever
1 - lever bracket; 2 - switch; 3 - screw; 4 - latch; 5 - spring; 6 - button; 7 - pusher; 8 - lever handle; 9 - lever; 10 - adjusting nut; 11 - lever cover; 12 - kingpin; 13 - protection; 14 - threaded ends of the handbrake cables; 15 - plate; 16 - notched cutout; 17 - locknut; 18 - axis of the latch; 19 - casing.
To disassemble the lever, you must:
1. Place wedge chocks on both sides under the front wheels.
2. Remove lever cover 11 by lifting its lower edges. Fully lower the lever.
3 Loosen lock nuts 17 and adjusting nuts 10 from the two cables. Remove the rods from the threaded ends of the cables 14.
4. Remove the protection 13 of the king pin 12 on the right side, remove the king pin and lever 9.
5. If necessary, unscrew the screw 3 from the switch 2, disconnect the electrical wires and remove the switch.
6. Installation is carried out in the reverse order to dismantling. It is necessary to remember to lubricate the king pin 12 before installing it in the lever hole. Then you need to adjust the handbrake clearance.
Visitor comments