
Note: The left-hand discharge lamp -L13- and the right-hand discharge lamp -L14- can be checked using the final control diagnosis of the onboard supply control unit -J519-. The illustrations show the replacement of a gas discharge lamp on the right headlight. For the right headlight, the replacement is similar.
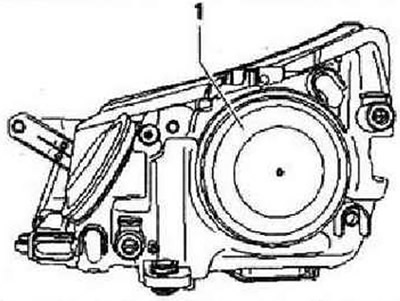
Remove headlight. Remove plug -1-.
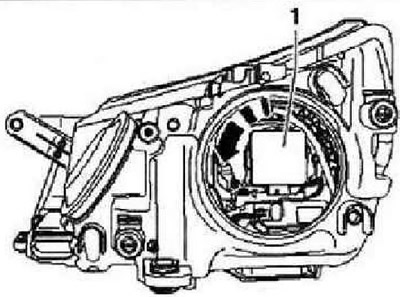
Unlock connector by pressing side button -arrow- and remove from discharge lamp igniter -N195- -1-.
WARNING: The pressure inside the discharge lamp is between 1 (cold) up to 100 bar (heated). The temperature near the heated discharge lamp reaches 700 degrees Celsius. The discharge lamp may explode and there is a risk of burns. Be sure to wear safety goggles and gloves when removing and installing the lamp.
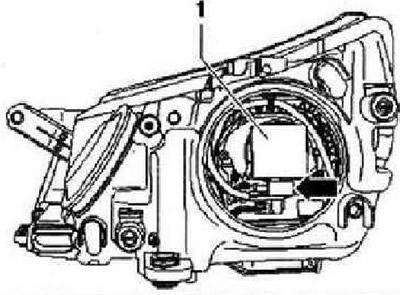
Turn discharge lamp igniter -N195- -1- in -direction of arrow- and pull it out of reflector together with discharge lamp. Discharge lamp: type D1S, 35 W.
Installation
Caution: When installing the cover, pay attention to the correct position of the cover. If water gets inside the headlight, it may fail. When installing a gas discharge lamp, do not touch its glass surface. Fingerprints leave greasy prints on the glass of the lamp, which, after switching on the gas discharge lamp, evaporate and cause the glass to become cloudy. Under no circumstances should the glass bulb of the discharge lamp be subjected to mechanical stress. The glass bulb is very sensitive and. moreover, it is under high pressure. Do not look directly into a focused light beam, as the ultraviolet radiation of a gas discharge lamp is approximately 2.5 times higher than that of a conventional halogen light. If a headlight with automatic leveling has been dismantled, then after installation it is necessary to carry out a basic adjustment of the headlights.
Installation is carried out in the reverse order. Check headlight operation.
Visitor comments