
Removing
Remove the wheel.
Remove the coil spring.
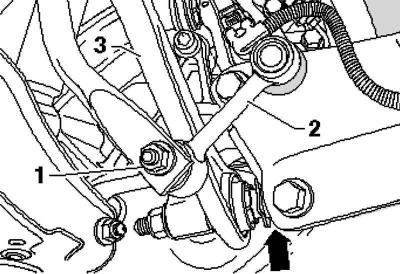
Pic. 4.71. Connecting rod and stabilizer
Unscrew the nut 1 and pull the connecting rod 2 out of the stabilizer (pic. 4.71).
Unscrew the tie rod bolt 3.
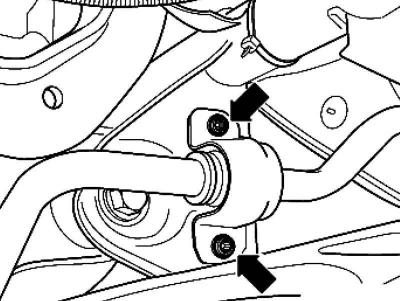
Pic. 4.72. Bolts of fastening of a bracket of the stabilizer
Unscrew the stabilizer bracket bolts (pic. 4.72).
Loosen the nut and remove the bolt towards the rear.
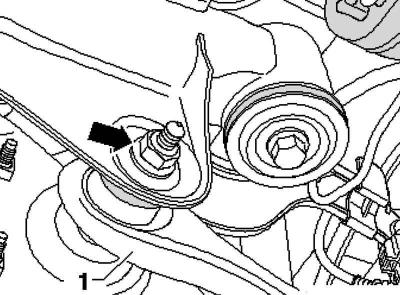
Pic. 4.73. Bolt of fastening of cross draft
Remove tie rod 1 (pic. 4.73).
Installation
Install the tie rod on the vehicle and tighten the bolts by hand.
The tie rod should only be screwed on when the dimension has been reached «a».
Screw the tie rod 1 to the subframe and tighten the new nut.
Tighten the stabilizer bracket bolts.
Unscrew the tie rod bolt 3.
Note: Make sure there is a washer between the nut and the wheel bearing housing.
Insert connecting rod 2 into stabilizer and tighten nut 1.
Install the coil spring.
Install and screw the wheel.
Adjust wheel alignment
Visitor comments