



Contents: Removal ↓ Installation ↓
Removal
Remove the lower noise insulation screen.
Note: The subframe is removed together with the levers.
Remove the wheels.
Unscrew the nuts on the left and right sides of the car.
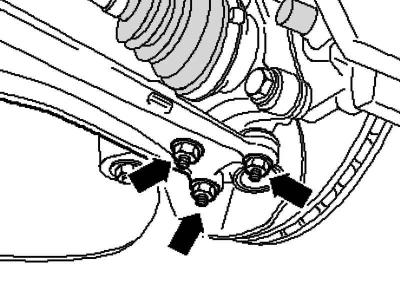
Fig. 4.41. Lever mounting nuts
Remove the lever from the hinge (Fig. 4.41).
Remove the exhaust system mount from the subframe.
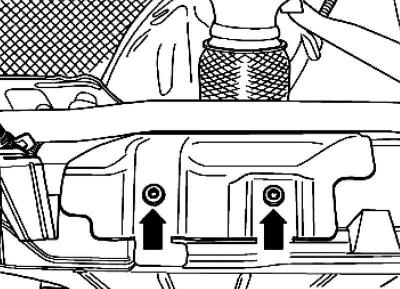
Fig. 4.42. Heat shield mounting bolts
Remove the bolts from the heat shield (Fig. 4.42).
Cars with additional heating
Remove bolts A from the heat shield.
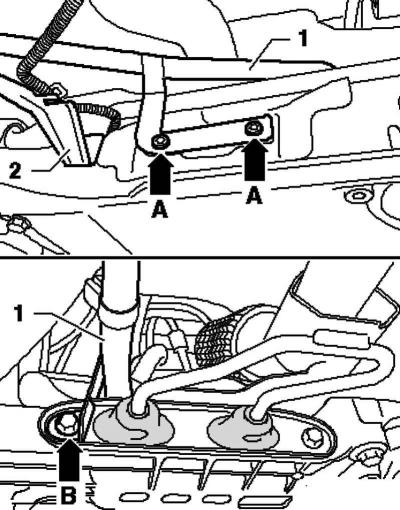
Fig. 4.43. Fastening the subframe and the outlet pipe of the additional heater
Remove fastening 2 from the subframe (Fig. 4.43).
Unscrew bolt B and move the outlet pipe of the additional heater 1 upwards.
Continuation of installation operations for all vehicles
Remove the heat shield from the subframe.
Remove the connecting rods from the stabilizer.
Remove the rocker support from the gearbox by unscrewing the bolts.
Fix the subframe.
Remove the bolts: steering gear 3 and 6, stabilizer 11 and 14, and subframe 4 and 5.
Lower the subframe onto the engine and transmission stand.
Attach the steering gear to the body.
Installation
Installation is carried out in reverse order.
Tighten the bolts.
Install the wheels.
Install the lower noise insulation screen, tightening torques of the mounting bolts.
After completing the repair, perform a test drive; if the steering wheel is not straight when driving in a straight line, the wheel alignment angles must be adjusted.
Visitor comments