
Clamp the head of the block in a vise together with the bracket screwed to the exhaust studs.
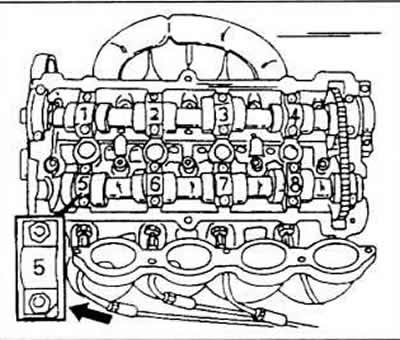
First remove the intake camshaft. To do this, slowly and alternately on each side, disconnect the bearing caps #5 and #7 and the last bearing cap; take them off.
Loosen the #6 and #8 bearing cap nuts evenly, in a criss-cross pattern, two turns until both caps disengage. Remove the covers and lift the camshaft, disengaging it with the drive chain at the same time.
Mark the direction of the water chain with paint. If this was not done and the chain was installed incorrectly, it will wear out very quickly, so it will soon have to be replaced again.
Unscrew and remove bearing caps #1 and #3. front as well as back.
Loosen #2 and #4 bearing caps evenly in a criss-cross pattern. remove the covers and remove the camshaft.
The oil seal ring is located in the front bearing cap of this shaft.
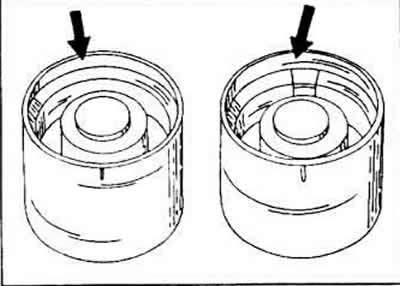
Remove pushers. They should not be confused, so label accordingly. It's best to label them. drawing risks from the inside, i.e. on the first pusher one risk, on the second - two risks, etc. Operate from the engine management system; continuously note whether the tappet is in the inlet or outlet section. Do not lay the pushers on their side, but fit them so that the contact surface is facing inward.

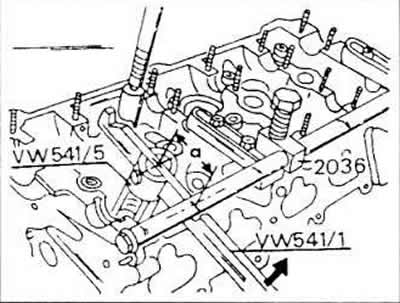
The tool required according to the instructions for dismantling and installing the valves is part number 2036. The tool is brought to the cylinder head. If you have the necessary tools at your disposal, you should look at the drawings, since the dismantling of the intake and exhaust valves is carried out in different ways. When dismantling the intake valves, the lever is pulled up to push the plunger; when dismantling the exhaust valves, press the lever down to push the plunger inward. The size of the tool plunger is matched to the inside of the valve spring seats, otherwise the springs cannot be compressed. Compress the springs until the valve half-cones can be removed.
To dismantle the valves, you can also use a piece of pipe that is put on the upper spring plate for this. Place something suitable under the spring plate located on the other side. Use a hammer to give a short blow to the pipe so that the valve half-cones can pop out. They remain in the inner part of the pipe. So that they are not lost, the pipe must adhere well to the spring plate.
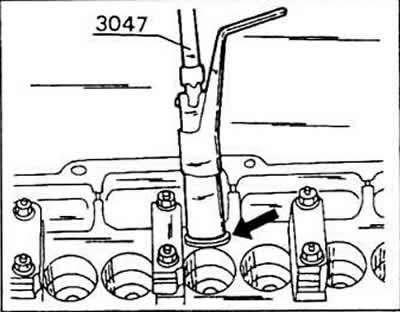
Pull out the plates and springs. Remove the valve stem o-rings and discard them immediately as they need to be replaced. Remove the lower spring plate from the hole, for which you can use the special tool 3047 or a collet with an internal elastic retaining ring.
Visitor comments