



2. Remove the front buffer.
3. Remove the arch protection.
4 Remove the antenna (if any).
5. Remove the rubber shock absorbers from the engine compartment cover.
6. Loosen the bolts securing the front connector to the wing being removed.
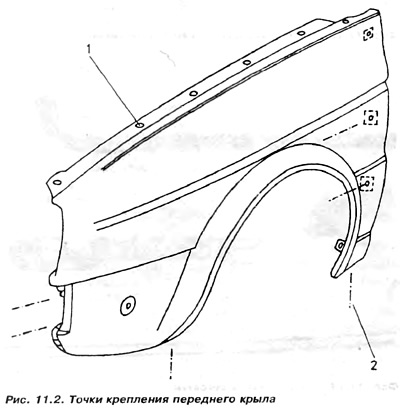
7. Remove the hex head screws and Phillips head screws, see Figure 11.2.
8. The anti-corrosion coating layer of the chassis glues the wing to the body quite strongly. For this reason, workshops use air blowing at a temperature above 60°C in order to soften the coating. Without a dryer of sufficient parameters, it is necessary to cut off the anti-corrosion coating with a sharp knife in the places where the wing separates from the body.
9. By shaking the wing from side to side and lifting it with a screwdriver, separate it from the body.
Note: When using a suitable dryer, the wing near the front pillar will become hot (after opening the door) by means of a blower directed at the bent edge of the sheet metal wing plate. To protect the adjacent plastic parts, a flat nozzle is placed on the dryer exhaust. While heating the edge of the wing, it is necessary to move it at the same time.
Caution: Plastic (PCV) components can be heated for short periods of time and at low temperatures without causing bubbles or discoloration.
Installation
1. Clean the entire surface where the wing meets the body.
Note: Before installing the wing, it is necessary to cover the places where it is screwed to the front pillar with zinc primer.
2. Apply new elastic wing sealing tape.
3. Use a punch to make holes in the sealing tape in the places where the bolts securing the wing are screwed in.
4. Put on, install and screw on the wing.
5. Cover the inside of the wing and the joints with a layer of anti-corrosion chassis grease.
The information is posted on this website (www.VWMANUAL.ru)
6. Insert the rubber shock absorbers of the engine cover.
7. Install (if necessary) antenna
8. Install the wheel bearing liner.
9. Set the buffer.
10. Tighten the bolts connecting the front spoiler to the wing.
11. Screw the wheel, lower the car
12. Tighten the bolts securing the wheel to a torque of 110 Nm.
Visitor comments