



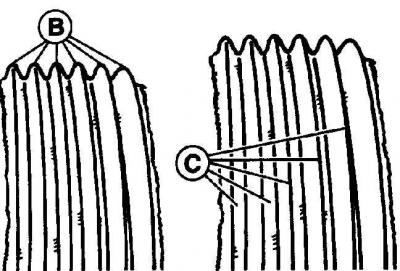
Wear of the edges of the poly V-belt ribs
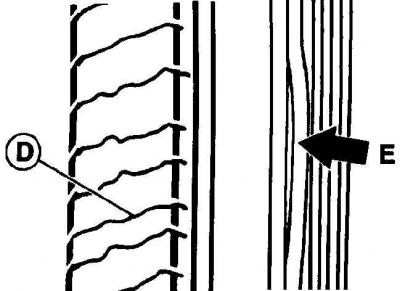
Transverse cracks (D) on the reverse side of the belt and delamination of the ribs (E) of the poly V-belt
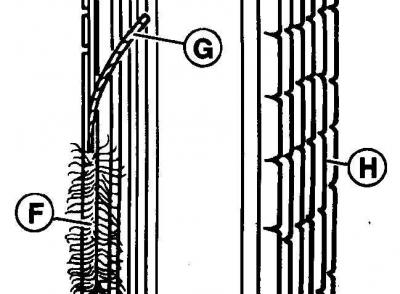
Fraying of end edges (F), cracks (H) and delamination of lateral transverse ribs (G)
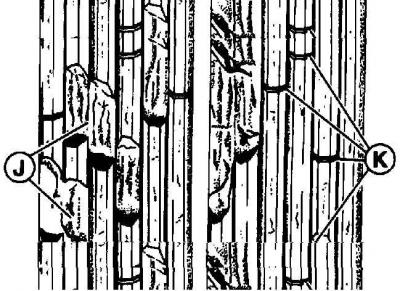
Destruction of individual ribs (J) and cracks in some ribs (K)
(The information is presented on the website: «vwmanual.ru»)
The poly V-belt may have the following defects:
- traces of oil and grease;
- wear of the edges of the ribs. This may be due to the fact that the ribs (B) during rotation fall on the projections of the pulley, while the belt ribs have a trapezoidal shape. The stretching phase is visually noticeable at the base of the ribs (C), especially in the light area, see Fig. Wear of the edges of the ribs of the poly V-belt;
- hardening of rib edges, glassy edges;
- transverse cracks (D) on the back side of the belt, see Fig. Transverse cracks (D) on the back side of the belt and delamination of the ribs (E) of the poly V-belt;
- delamination of individual ribs (E), see Fig. Transverse cracks (D) on the reverse side of the belt and delamination of ribs (E) of the poly V-belt);
- fraying of the end edges (D) of the belt, see Fig. Fraying of the end edges (F), cracks (H) and delamination of the lateral transverse ribs (G);
- fraying of end edges (F), see Fig. Fraying of end edges (F), cracks (H) and delamination of lateral transverse ribs (G);
- delamination of lateral ribs (G), see Fig. Fraying of end edges (F), cracks (H) and delamination of lateral transverse ribs (G);
- transverse cracks in some ribs (H), see Fig. Fraying of end edges (F), cracks (H) and delamination of lateral transverse ribs (G);
- destruction of individual ribs (J), see Fig. Destruction of individual ribs (J) and cracks in some ribs (K);
- cracks in some ribs (K), see Fig. Destruction of individual ribs (J) and cracks in some ribs (K);
- presence of dirt and stones between the ribs;
- rubber growths at the bases of the ribs.
Execution order
1. Place the gear shift lever in neutral position.
2. Remove the lower engine splash shield.
3. Use chalk to mark the belt.
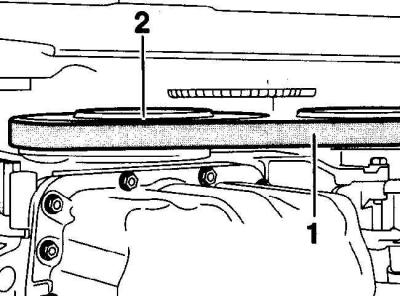
4. Using the pulley mounting bolt (2), turn the crankshaft clockwise until the mark appears, while visually checking the condition of the belt (1).
5. If any of the defects are present, replace the belt.
6. Install the lower engine splash shield.
Visitor comments