
English Русский
Български
Беларускі
Український
Српски
Hrvatski
Română
Polski
Slovenský
Magyar
  |  Articles  |  Sitemap  |  Contacts  |    |
Car maintenance Ford Car maintenance Hyundai Car maintenance Chevrolet Car maintenance BMW Car maintenance Audi Car maintenance Opel Car maintenance AvtoVAZ
VWmanual.ru


Main   Passat   Golf   Polo   Touareg   Tiguan   Sharan   Transporter   Others  
Passat B2 (1981-1988) Passat B3 (1988-1993) Passat B4 (1988-1996) Passat B5 (1996-2005) Passat B6 (2005-2010)

Checking and adjusting the Pierburg 2B5 carburetor (VW Passat B2)

  • Main
  • Passat
  • Passat B2
  • Power unit
  • Engines 4-cylinder
  • Checking and adjusting the Pierburg 2B5 carburetor
            0


Contents: Adjusting the fuel level in the…↓ Adjusting the idle speed of a cold…↓ Adjusting the starting clearances of…↓ Adjusting the opening of the…↓ Adjusting the opening of the…↓ Adjusting the accelerator pump ↓ Adjusting the throttle control lever…↓ Adjusting the idle speed of a warm…↓

Adjusting the fuel level in the float chamber


Remove the carburetor cover and turn it over.

Measure the distance between the plane of the carburetor cover and the lower point of the floats, which for the 1st chamber should be within 28±1 mm, for the 2nd chamber - 30±1 mm. If it does not correspond to this, set the required size by bending the tongues of the float levers.
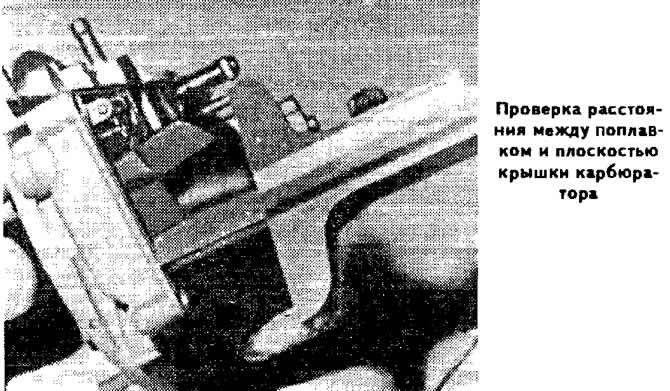
Measure the distance between the plane of the carburetor cover and the lower point of the floats,…


Adjusting the idle speed of a cold engine


Warm up the engine to operating temperature.

Connect the tachometer.

Stop the engine.

Remove the air filter.

Open the throttle valve of the 1st chamber and close the air damper by pressing the throttle valve opening cam (see photo).

Release the throttle valve of the 1st chamber.

Start the engine without pressing the accelerator pedal.
Measure the crankshaft speed, which should be within 3350-3450 rpm for vehicles with manual transmission and 3550-3650 rpm for vehicles with automatic transmission.


If necessary, adjust the opening of the throttle valve of the 1st chamber using the limiting screw resting on the profiled throttle valve opening cam.
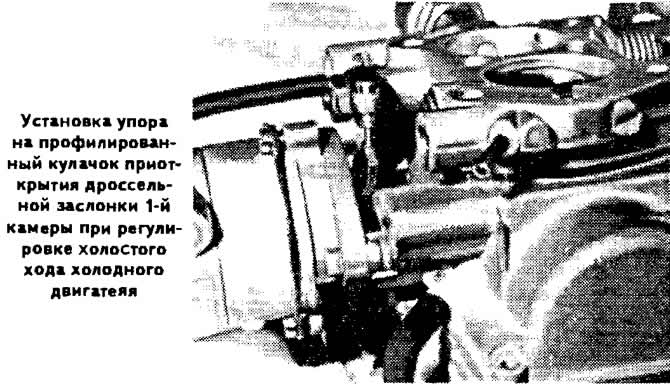
If necessary, adjust the opening of the throttle valve of the 1st chamber using the limiting screw…


Adjusting the starting clearances of the air damper


Remove the starter cover.

Open the throttle valve fully, placing the throttle valve opening cam on the appropriate profile.

Connect a vacuum gauge and a vacuum pump to the air damper pneumatic drive and create a vacuum of 100 mbar in the pneumatic drive.

(The original information is posted on the resource: www.VWMANUAL.ru)

If the air damper pneumatic drive is hermetically sealed, the vacuum should not decrease by more than 5 mbar per minute and should not decrease below 40 mbar.

Bring the vacuum in the air damper pneumatic drive to 200-300 mbar.

Using a set of feeler gauges, measure the starting gap of the first stage of the air damper, which should be within 1.8±0.15 mm.

If necessary, set the required clearance using the pneumatic drive diaphragm stroke adjustment screw located on its cover.

Close the atmospheric hole of the air damper pneumatic drive with a plug, create a vacuum of 200 mbar in the pneumatic drive, which, if the pneumatic drive is sealed, should remain unchanged for at least 1 min.


Using a set of feeler gauges, measure the starting gap of the second stage of the air damper, which should be within 3.9±0.15 mm for vehicles with a manual transmission and 3.7±0.15 mm for vehicles with an automatic transmission.

If there is a deviation from the norm, set the proper clearance using the pneumatic drive diaphragm stroke adjustment screw located on the end of the air damper pneumatic drive rod.

Adjusting the opening of the throttle valve of the 1st chamber


The position of the throttle valve of the 1st chamber is adjusted at the factory, but if the adjustment is disturbed, it can be restored as follows:
  • remove the throttle limit screw plug;
  • move the throttle control lever stop away from the profiled choke control lever, fully opening the choke;
  • turn the limit screw so that it does not touch the throttle control lever;
  • open the throttle;
  • screw the limit screw until it touches the throttle control lever, then screw it in another 1/4 turn. If the throttle opening is adjusted correctly, the gap between the limit screw and the throttle control lever should be 0.05 mm;
  • install a new plug on the throttle stop screw.
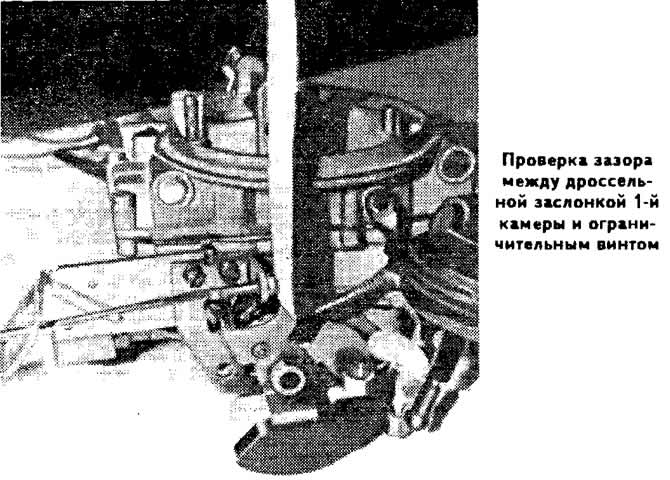
install a new plug on the throttle stop screw.


Adjusting the opening of the throttle valve of the 2nd chamber


The position of the throttle valve of the 2nd chamber is adjusted at the factory, but if the adjustment is disturbed, it can be restored as follows:
  • unscrew the limit screw of the 2nd chamber throttle valve so that it moves away from the stop, then screw in the limit screw so that it barely touches the stop;
  • disconnect the rod from the pneumatic drive of the throttle valve of the 2nd chamber;
  • turn the limit screw ¼ turn;
  • lock the limit screw with special glue or paint.

Adjusting the accelerator pump


Remove the carburetor.

Fully retract the movable rod of the pneumatic drive of the 1st chamber throttle valve and turn the cam for opening the 1st chamber throttle valve so as to release the throttle valve and open it fully.

Place a measuring cup under the carburetor.

Smoothly open and close the throttle valve of the first chamber ten times, thereby activating the accelerator pump.

Measure the amount of fuel in the measuring cup, which should be 10±1.5 cm³, i.e. 1.0±0.15 cm³ per cycle.

If necessary, adjust the required performance of the accelerator pump by moving the pump drive cam on the 1st chamber throttle control lever.

Adjusting the throttle control lever of the 2nd chamber


Remove the carburetor.

Set the throttle valves of both chambers to the idle position of a warm engine: the air damper should be open and the throttle valves closed.

Measure the free travel of the 2nd chamber throttle control lever on its drive fork, which should be within 1.00±0.20 mm toward closing and 1.20±0.20 mm toward opening. If necessary, adjust the free travel of the lever by bending the edges of the fork.

Install the carburetor and adjust the engine idle speed.
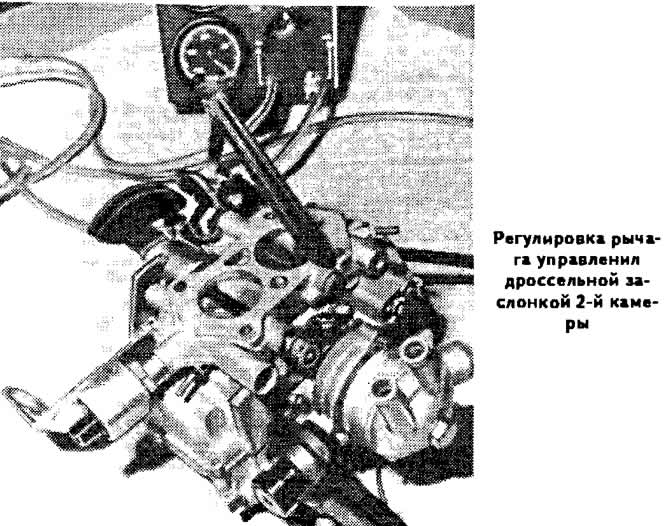
Install the carburetor and adjust the engine idle speed.


Adjusting the idle speed of a warm engine


Idle speed adjustment must be performed on a warm engine (with the air damper fully open) with the ignition timing set correctly and the valve drive mechanism clearances adjusted.

Connect the tachometer and gas analyzer according to the operating instructions.

Using the mixture quantity adjusting screw, set the engine crankshaft speed within 900-1000 rpm.

Use the mixture quality (composition) adjustment screw to set the carbon monoxide (CO) content in the exhaust gases within 0.5-1.5%.

Check and, if necessary, restore the crankshaft speed, then the CO content, repeating these operations until the desired values of both parameters are simultaneously obtained.
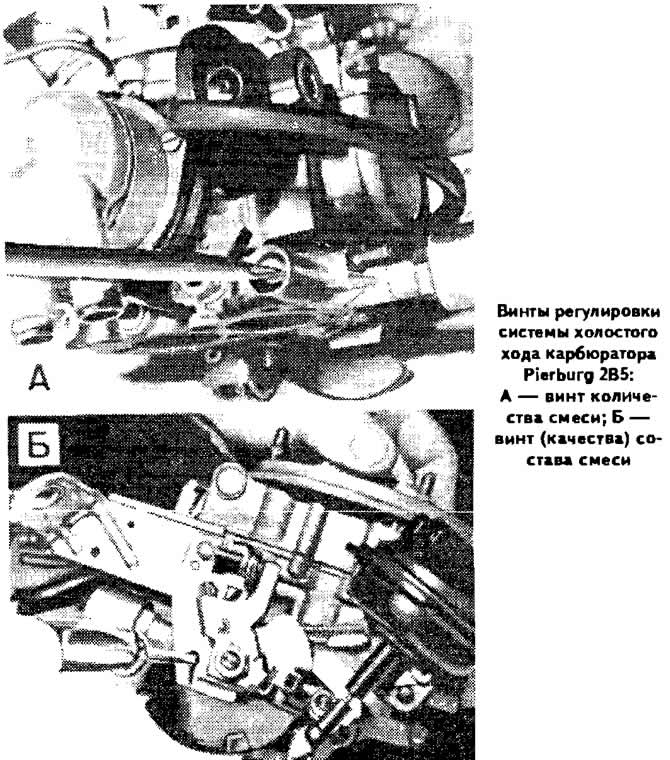
Check and, if necessary, restore the crankshaft speed, then the CO content, repeating these…

This article is available at russian, bulgarian, belarusian, ukrainian, serbian, croatian, romanian, polish, slovak, hungarian
The text has been checked: Kolesnikov Artem

Share information:

Previous articles
Operating principle of the Pierburg 2B5 carburetor
Checking and adjusting the Pierburg 1B3 carburetor
Operating principle of the Pierburg 1B3 carburetor
Adjusting the Keihin 26-30 DC carburetor
Operating principle of the Keihin 26-30 DC carburetor
Fuel pump of the power supply system
Next articles
Operating principle of the Pierburg 2E2 carburetor
Checking and adjusting the Pierburg 2E2 carburetor
The structure and principle of operation of the electronic ignition system
Checking and adjusting the ignition system
Removal and installation the ignition distributor sensor
Setting the ignition timing


Similar articles from other manuals for VW cars:
Adjusting the Pierburg 2E3 carburetor Golf 2 (1984-1993)
Checking the self-adjusting tension roller Polo 3 (1995-2003)
Checking and adjusting the position of the pump-injector pistons… Touareg 1 (2002-2006)
Checking the operation of the intake manifold flap Tiguan 1 (2007-2015)
Checking the engine oil level and replacing it Sharan 1 (1995-2000)
Adjusting the carburetor cable 34 PICT Transporter T3 (1979-1992)
Checking and adjusting idle speed Beetle (1960-1986)
Link to this page in different formats


Visitor comments


No comments yet


How much will 25 + 26 =


Passat B6 
  • General information
  • User manual
  • Maintenance
  • Petrol engine 1.6L
  • Engine repair
  • Cooling and lubrication system
  • Fuel injection system
  • Petrol engine 2.0L
  • Engine repair
  • Lubrication system
  • Cooling system
  • Fuel and exhaust systems
  • Diesel engine 2.0L
  • Engine repair
  • Cooling and lubrication system
  • Fuel and exhaust systems
  • Transmission
  • Clutch
  • Mechanical gearbox
  • Automatic gearbox
  • Drive shafts
  • Chassis
  • Wheels and tires
  • Car suspension
  • Steering
  • Brake system
  • Body
  • Exterior (external elements)
  • Electrical equipment
  • Power devices
  • Lighting and appliances
  • Electrical circuits
Passat B5 
  • General information
  • User manual
  • Weekly checks
  • Maintenance
  • Power unit
  • Engine repair
  • Cooling system
  • Fuel system (petrol)
  • Fuel system (diesel)
  • Engine management
  • Exhaust system
  • Transmission
  • Clutch
  • Car gearbox
  • Drive shafts
  • Chassis
  • Car suspension
  • Wheels and tires
  • Steering
  • Brake system
  • Body
  • Exterior (external elements)
  • Interior (internal elements)
  • Doors and covers
  • Ventilation and heating
  • Electrical equipment
  • Power devices
  • Lighting and appliances
  • Electrical circuits
Passat B4 
  • General information
  • User manual
  • Maintenance
  • Technical data
  • 8-valve engine
  • Engine repair
  • Cooling and lubrication system
  • Supply system
  • Ignition system
  • Fuel injection «Mono-Jetronic»
  • Control system «Mono-Motronic»
  • Control system «Digifant»
  • Control system «Simos»
  • 16-valve engine
  • Engine repair
  • Cooling and lubrication system
  • Fuel injection «K-Jetronic»
  • Control system «KE-Motronic»
  • Control system «Digifant»
  • Diesel engine
  • Engine repair
  • Cooling and lubrication system
  • Power and control system
  • Turbocharging system
  • Digital control system
  • Transmission
  • Clutch
  • Manual gearbox
  • Hydromechanical gearbox
  • Front wheel drive
  • Chassis
  • Car suspension
  • Steering
  • Brake system
  • Body
  • Body elements
  • Electrical equipment
  • Power devices
  • Lighting and appliances
  • Electrical circuits
Passat B3 
  • General information
  • User manual
  • Driving Tips
  • Maintenance instructions
  • Technical data
  • Power unit
  • Engine repair
  • Ignition system
  • Lubrication system
  • Cooling system
  • Supply system
  • Petrol injection system
  • Diesel engine
  • Exhaust system
  • Transmission
  • Clutch
  • Car gearbox
  • Chassis
  • Suspension
  • Steering
  • Brake system
  • Wheels and tires
  • Body
  • Exterior
  • Interior
  • Heating system
  • Electrical equipment
  • Power devices
  • Lighting system
  • Equipment and devices
  • Wiper system
  • Electrical circuits
Passat B2 
  • General information
  • Introduction to instructions
  • User manual
  • Power unit
  • Engines 4-cylinder FZ
  • Engines 4-cylinder
  • Engines 5-cylinder
  • Transmission
  • Clutch
  • Four-speed gearbox
  • Five-speed gearbox
  • Hydromechanical gearbox
  • Front wheel drive
  • Chassis
  • Front suspension
  • Rear suspension
  • Steering
  • Brake system
  • Body
  • Body elements
  • Electrical equipment
  • Equipment and devices
  • Electrical circuits
VWmanual.ru © 2016-2026 | Mobile version | News and articles | Sitemap: EN BG BY UA RS HR RO PL SK HU | Write message | Site search
Passat B2 • Passat B3 • Passat B4 • Passat B5 • Passat B6 • Golf 1, diesel • Golf 1, petrol • Golf 2, petrol • Golf 2 • Golf 3 • Golf 4 • Golf 5 • Polo 3 • Polo 4 • Touareg 1 • Tiguan 1 • Sharan 1 • Transporter T3 • Transporter T4 • LT 28 • LT 2D • Beetle • Caddy 3 •
Our website uses cookies to ensure functionality and convenience.