
2. Disconnect the battery.
3. Paste the upholstery of the ceiling near the ceiling in the place where the ceiling will pry off with a screwdriver, in order to avoid damage to the upholstery.
Attention! After replacing the old light bulb with a new one, check its performance.
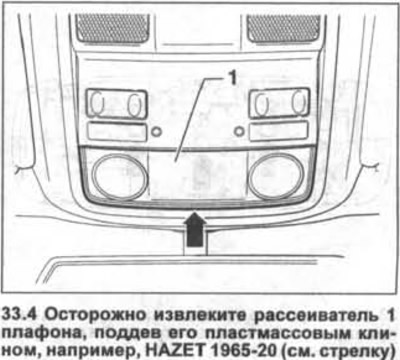
4. Carefully remove diffuser 1 of the cover by prying it with a plastic wedge, e.g. HAZET 1965-20 (see arrow in illustration).
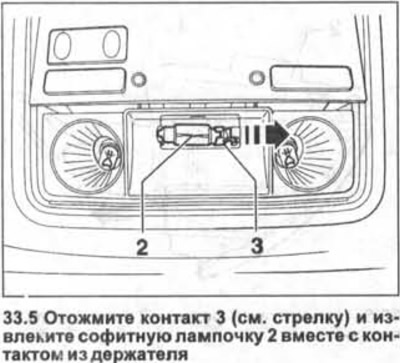
5. Press pin 3 (see arrow in illustration) and remove the soffit bulb 2 together with the contact from the holder.
6. Remove the contact from the spotlight bulb.
7. Insert a new light bulb with contact into the holder.
Front cover
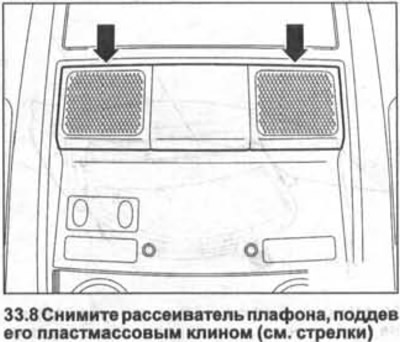
8. Remove the cover diffuser by prying it with a plastic wedge (see arrows in illustration).
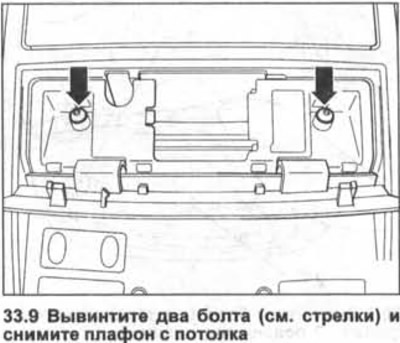
9. Remove two screws (see arrows in illustration) and remove the cover from the ceiling.
10. Disconnect the power plug located on the back of the cover.
11. Turn the bulb holder on the back of the lampshade counterclockwise (see arrows in illustration) and remove the cartridge together with the light bulb.
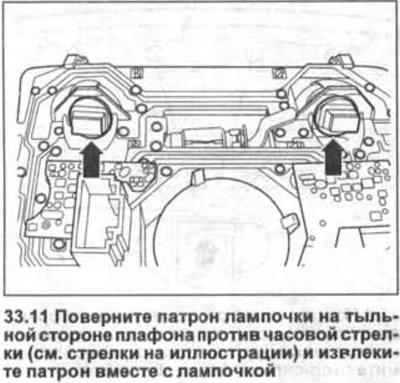
12. Remove the defective light bulb from the socket and insert a new one.
Rear dome light
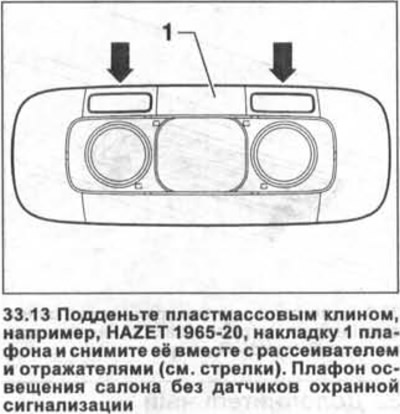
13. Interior lighting dome without alarm sensors. Use a plastic wedge, for example, HAZET 1965-20, to cover 1 ceiling lamp and remove it together with the diffuser and reflectors (see arrows in illustration).
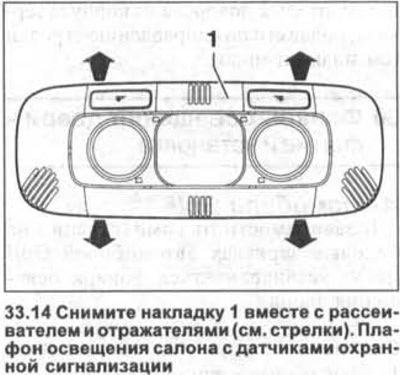
14. Ceiling light interior with alarm sensors.
Remove trim 1 together with diffuser and reflectors (see arrows in illustration).
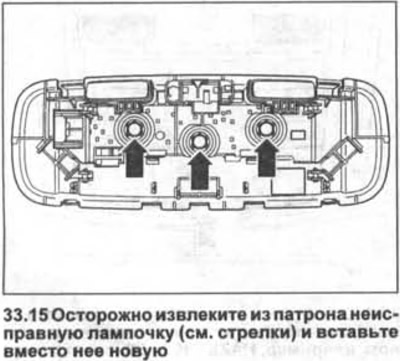
15. Carefully remove the defective light bulb from the socket (see arrows in illustration) and put a new one in its place.
Attention! If the cover needs to be removed from the mounting location on the ceiling, then after detaching the trim, release the two latches and only then disconnect the cover from the ceiling.
Glove box/footwell light
16. Open the storage box.
17. Pry off the lantern of the glove box with a flat screwdriver and remove it from the mounting location.
18. Disconnect the plug 1 powering the flashlight (see illustration).
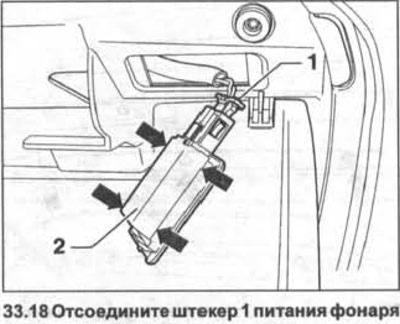
19. Release the protective pad 2 from the latches (see arrows in illustration 33.18) and remove it from the lamp diffuser.
20. Remove the light bulb from the socket by prying it with a screwdriver.
21. Insert a new bulb into the cartridge and install the lamp in place.
Cosmetic mirror lamp/ Trunk lighting
22. Cosmetic mirror. Fold down the protective visor.
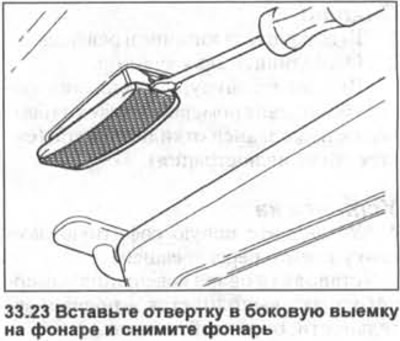
23. Insert a screwdriver into the side recess on the lantern and remove the lantern (see illustration).
24. Press contact 1 in the direction as shown by the arrow in the illustration and remove spotlight bulb 2 from the holder.
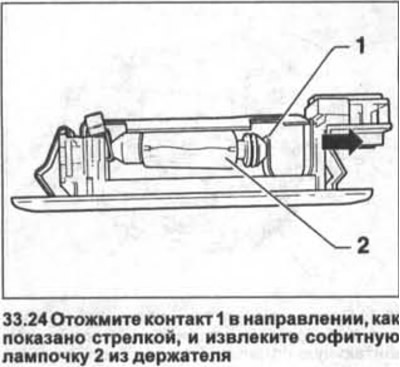
25. Put a new bulb in the holder and install the lamp in place.
Visitor comments