



Contents: Removal ↓ Adjusting the optical axis of the…↓
Removal
1. Turn off the ignition and external lights.
2. Open the hood.
3. Disconnect the battery.
4. Release the connector on the back of the headlight and disconnect it (see illustration22.4).
Golf cars
Remove the radiator grille, see the relevant chapter.
6. Carefully release bumper 1 under the headlight, using a plastic wedge, such as HAZET 1965-20, and remove the bumper (see illustration).
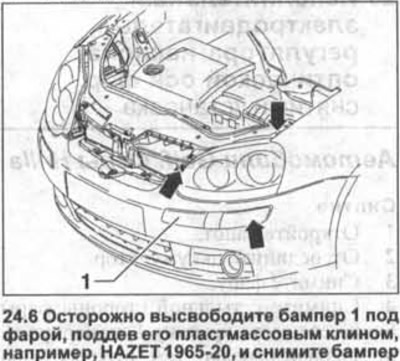
7. Unscrew the three bolts (see arrows in illustration 23.6), which secure the headlight, and remove it by pushing it forward.
Touran cars
8. Remove the bumper, see the relevant chapter.
9. Unscrew the three bolts (see arrows in the illustration).
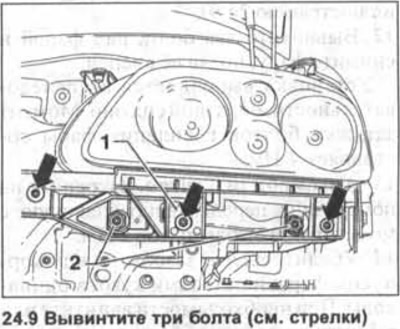
10. Remove guide 1 from the upper front cross member (see illustration 24.9).
11. Unscrew the two bolts 2 under the headlight (see illustration 24.9).
12. Unscrew the two bolts above the headlight and remove the headlight by pushing it forward.
Installation is performed in the reverse order of removal. The tightening torque of the headlight mounting bolts is 4 Nm.
13. Touran vehicles. Secure the guide to the front crossmember with a tightening torque of 2 Nm.
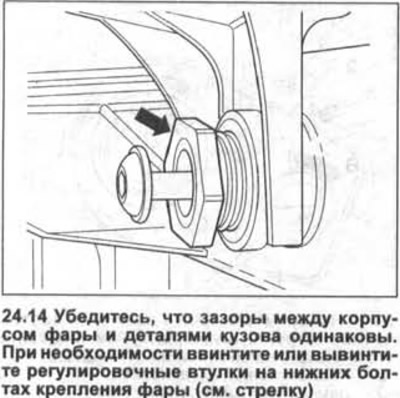
14. Make sure that the gaps between the headlight housing and the body parts are the same. If necessary, screw or unscrew the adjusting sleeves on the lower headlight mounting bolts (see arrow in illustration).
[The original text can be found on the portal vwmanual]
15. Have the headlight angle checked at a workshop as soon as possible and adjusted if necessary.
Attention! After dismantling and installing xenon headlights, they must be adjusted in a workshop.
Adjusting the optical axis of the headlights
Golf cars
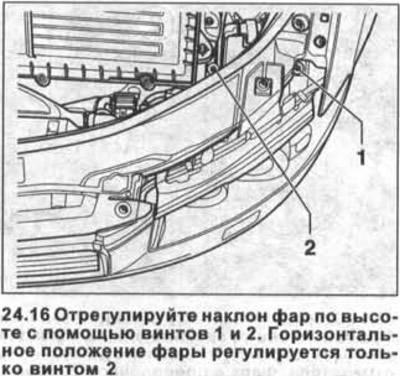
16. Adjust the headlights in height using screws 1 and 2. The horizontal position of the headlight is adjusted only by screw 2 (see illustration).
Attention! Precise adjustment of the optical axis of the headlights is possible only in a workshop using special equipment.
Touran cars
17. Low beam headlight. Adjust the headlights' height using screw 1.
The horizontal position of the headlight is adjusted only by screw 2 (see illustration).
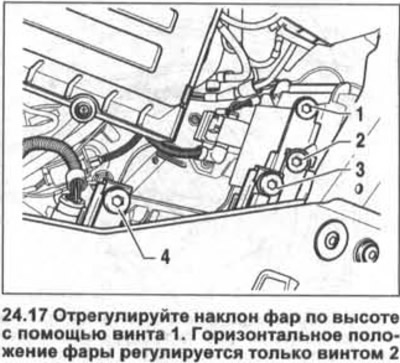
18. High beam headlight. Adjust the headlights' height using screw 4.
The horizontal position of the headlight is adjusted only by screw 3 (see illustration 24.17).
Visitor comments