
Removing
1. Turn off the ignition and taillights.
2. Disconnect the battery.
3. Open the tailgate.
4. Remove trim 1 by releasing it from the latches (see arrows in illustration).
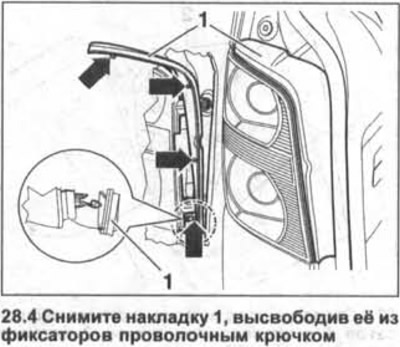
To do this, use a wire hook that goes into a small hole at the bottom on the inside of the lining. The cover must first be removed from the bottom and then from the top.
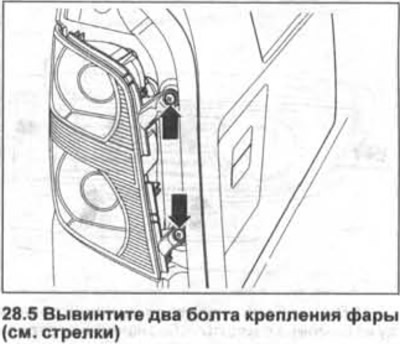
5. Unscrew the two headlight mounting bolts (see arrows in illustration).
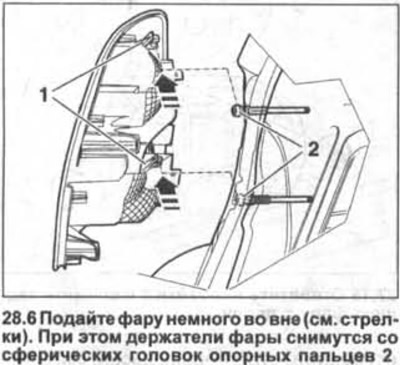
6. Move the headlight a little outside (see arrows in illustration). In this case, the headlight holders will be removed from the spherical heads of the support pins 2.
7. Disconnect the plugs on the back of the headlight and remove the headlight.
Installation
Installation of a back headlight is carried out in sequence, return to removal. When installing, place the headlight holders on the support pins with spherical heads and press on the headlight to fix it.
8. Make sure that the gaps between the headlight and body parts are parallel and correspond to the nominal ones. The gap should not be wider than 0.5 mm. If necessary, achieve the desired gap width by slightly screwing in or unscrewing the spherical pins.
9. Reinstall the headlight trim, securing it first at the bottom.
Take some care not to damage the lining tabs.
Bulb replacement
10. Remove the headlight and place it on a suitable pad.
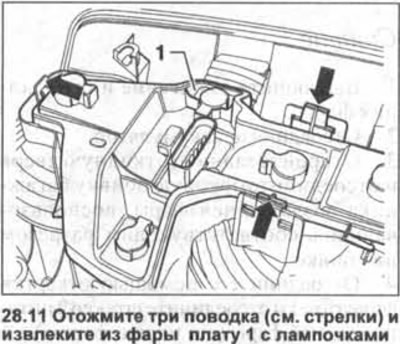
11. Wring out three leashes (see arrows in illustration) and remove board 1 with bulbs from the headlight.
12. Press on the light bulb, turn it counterclockwise and remove it from the board.
13. Insert a new light bulb into the board and turn it clockwise to fix it.
14. Install the board with bulbs in the headlight and fix it.
15. Check the function of the new light bulb.
Visitor comments