



Filter element replacement
When replacing the filter element, be sure to remove accumulated oil, dust and dirt from the inside surface of the air filter housing. If the vehicle is operated in dusty conditions, the filter should be replaced more frequently than indicated in "Maintenance Schedule".
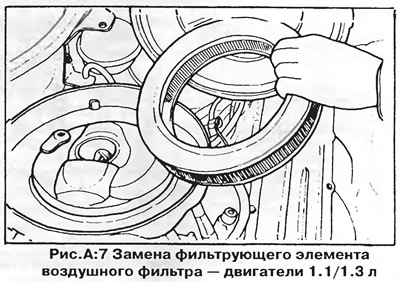
On 1.1 and 1.3 liter engines, the air filter cover is held by spring clips. Release the clips and lift the lid. Be careful not to accidentally drop foreign objects into the carburetor (bolts, nuts, etc.). Replace filter element (pic. A:7) and reinstall the cover, making sure that all clamps are closed.
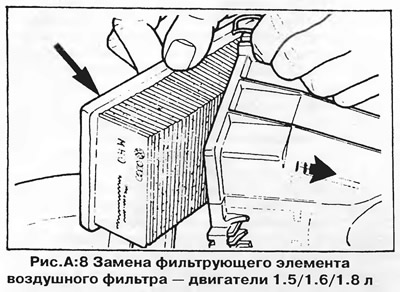
On 1.5, 1.6 and 1.8 liter engines, the air filter housing consists of two parts and is fixed to the valve cover. To replace the filter element, unfasten the latches and slide the front of the air filter housing forward (pic. A:8). On later models, the filter housing has an additional fastening nut at the front. Replace the filter element, reinstall the front of the housing and secure it with locks.
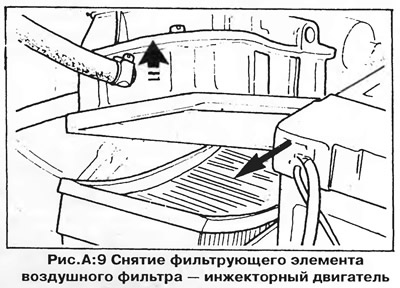
On injection engines, the air filter is located under the air flow sensor housing (11, fig. A:3). To replace the filter element, you need to unfasten the locks of the air flow sensor housing and lift the entire assembly up; this will open access to the filter element (pic. A:10). Replace the filter element and reinstall the sensor. Make sure the locks are securely fastened.
Air filter thermostat
To check the operation of the thermostatic damper, disconnect the vacuum tube connected to the thermostatic diaphragm and apply vacuum to it by sucking air through your mouth. The thermostatic damper should open with a characteristic sound. If you don't hear the shutter opening sound, check the vacuum connections. On early models, instead of a thermostat, there is a flexible air intake hose, which in winter should be connected to a deflector mounted on the exhaust manifold, and in summer to an air intake on the inner panel of the front fender.
Visitor comments