
English Русский
Български
Беларускі
Український
Српски
Hrvatski
Română
Polski
Slovenský
Magyar
  |  Articles  |  Sitemap  |  Contacts  |    |
Car maintenance Ford Car maintenance Hyundai Car maintenance Chevrolet Car maintenance BMW Car maintenance Audi Car maintenance Opel Car maintenance AvtoVAZ
VWmanual.ru


Main   Passat   Golf   Polo   Touareg   Tiguan   Sharan   Transporter   Others  
Tiguan 1 (2007-2015)

Removal and installation the compressor (VW Tiguan 1)

  • Main
  • Tiguan
  • Tiguan 1
  • Power unit
  • Petrol engine 1.4 BWK
  • Removal and installation the compressor
            0


Disconnect the battery. Open and close the expansion tank cap again to relieve pressure in the cooling system. Drain the coolant. Disconnect the vacuum hose "arrow".

Lift the engine casing at points "1" and remove the casing by moving it forward in the direction of the "arrow". Release the spring clamp from the suction hose "arrow".
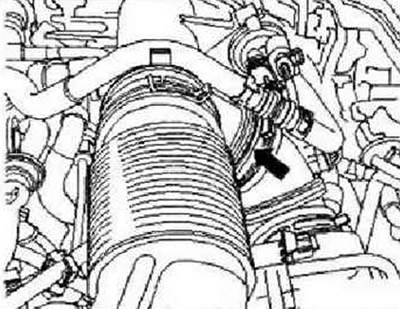
Lift the engine casing at points «1» and remove the casing by moving it forward in the direction of…


Disconnect the fuel supply line "1" and the line to the activated carbon canister "2". To do this, press the release buttons.
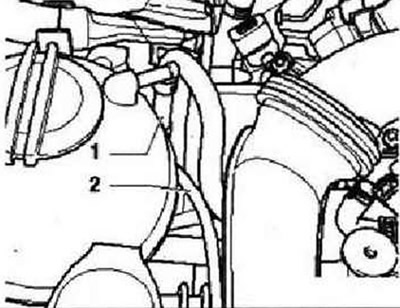
Disconnect the fuel supply line «1» and the line to the activated carbon canister «2». To do this,…


Loosen the hose clamp "1" in the boost air pipe. Loosen the screw securing the boost air pipe "2".
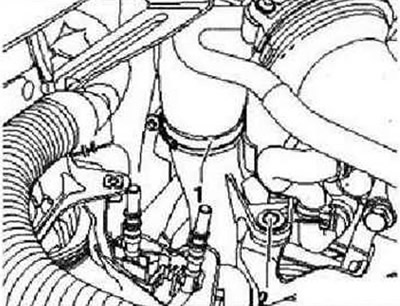
Loosen the hose clamp «1» in the boost air pipe. Loosen the screw securing the boost air pipe «2».


Depending on the vehicle configuration, remove the sound insulation or underride guard. Remove the poly V-belt. Remove the right drive shaft. Remove the lambda probe after the catalytic converter "G130" "1". Unscrew the exhaust pipe on the main catalytic converter "arrows".
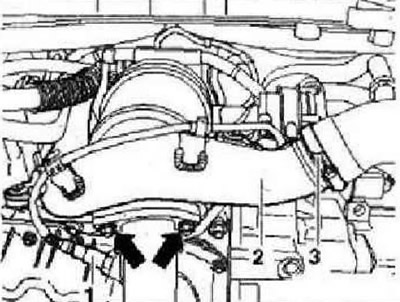


Depending on the vehicle configuration, remove the sound insulation or underride guard. Remove the…


Unscrew the fastening bolts "1" and "2" of the exhaust pipe. Remove the exhaust pipe support downwards.
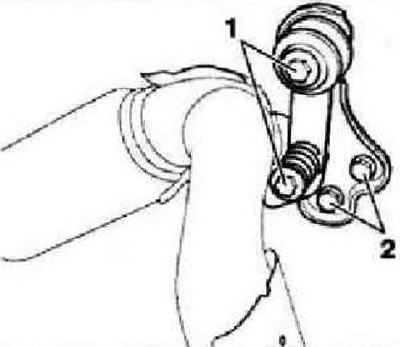
Unscrew the fastening bolts «1» and «2» of the exhaust pipe. Remove the exhaust pipe support…


Unscrew the nuts of the double clamp "arrows" and move it forward along the exhaust pipe "1".
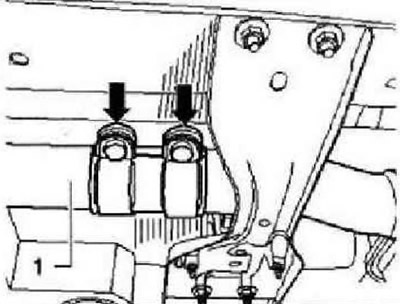
Unscrew the nuts of the double clamp «arrows» and move it forward along the exhaust pipe «1».


Unscrew the nuts "arrows" and pull the exhaust pipe back. Press the exhaust pipe back from the suspension mount "1".
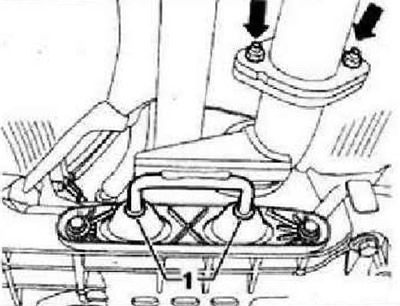

Unscrew the nuts «arrows» and pull the exhaust pipe back. Press the exhaust pipe back from the…


Lower the subframe. Remove the exhaust pipe forward. Remove the angular gearbox. Press the safety clip in the intercooler in the direction of the arrow and remove the hose "arrow".
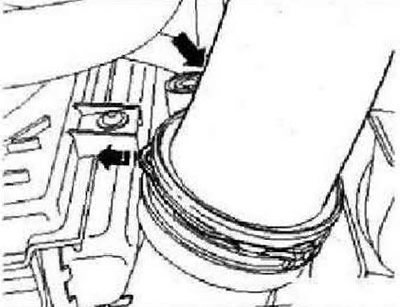
Lower the subframe. Remove the exhaust pipe forward. Remove the angular gearbox. Press the safety…


Unscrew the screw securing the charge air pipe "arrow" and remove the charge air pipe "1".
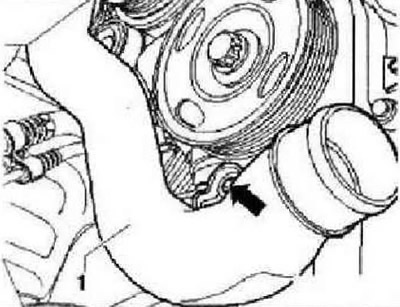
Unscrew the screw securing the charge air pipe «arrow» and remove the charge air pipe «1».


Remove the load from the compressor poly V-belt by turning the tensioner element with a 16 mm spanner in the -direction of the arrow-. Secure the tensioner element with the locking pin -T10060A-.
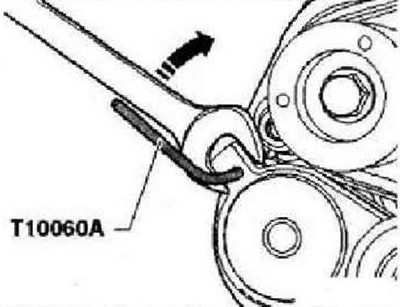
Remove the load from the compressor poly V-belt by turning the tensioner element with a 16 mm…


Unscrew the tension element "arrow" fastening screws and remove the tension element. Hold the compressor shaft with spanner "1".
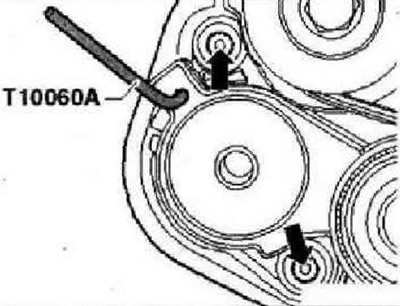
Unscrew the tension element «arrow» fastening screws and remove the tension element. Hold the…


Remove the screw "2" of the belt pulley and remove the belt pulley and the poly V-belt on the compressor "3".
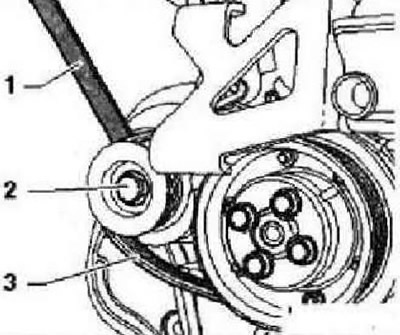
Remove the screw «2» of the belt pulley and remove the belt pulley and the poly V-belt on the…


Disconnect both cooling system hoses "1" in the heater heat exchanger. Open the hose guide clips "2" and press the hoses from the side. Carefully press outward the locking tabs in the noise insulation screen housing "arrows".
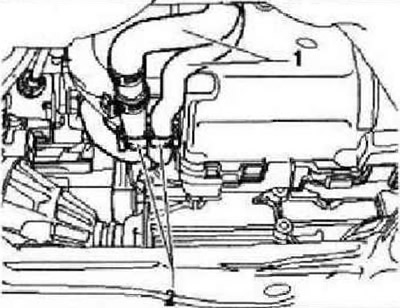
Disconnect both cooling system hoses «1» in the heater heat exchanger. Open the hose guide clips…


Remove the front part of the case with the noise insulation screen.
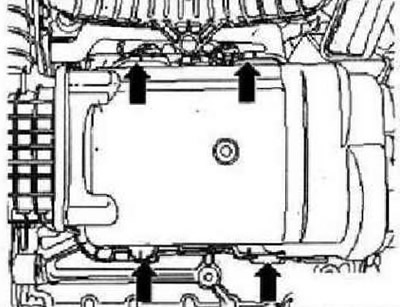
Remove the front part of the case with the noise insulation screen.


Unscrew the screws "1" of the compressor and remove the compressor together with the intake air muffler. Remove the boost air muffler.
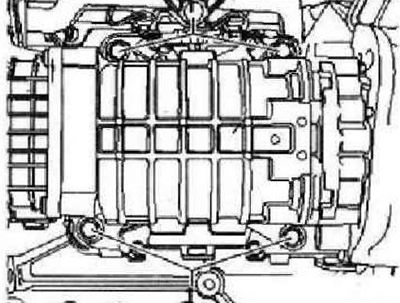
Unscrew the screws «1» of the compressor and remove the compressor together with the intake air…


Pull the charge air silencer "2" together with the pressure pipe in the -direction of the arrow-.
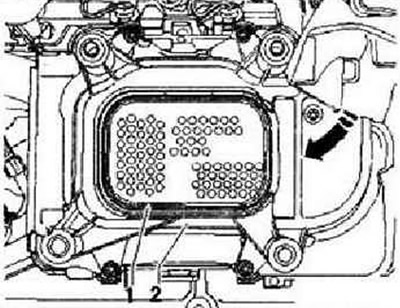
Pull the charge air silencer «2» together with the pressure pipe in the -direction of the arrow-.


Installation


Caution: When installing the poly V-belt, pay attention to the direction of travel and the correct fit on the pulleys and tension elements. Replace the sealing ring on the pressure pipe. Before installation, lightly lubricate the sealing rings with engine oil. The pressure pipe can only be pressed in one position, towards the charge air muffler (pay attention to the anti-rotation stop).


Press the charge air silencer "2" together with the pressure pipe in the -direction of the arrow- into the intake manifold. Press the charge air silencer "2" towards the engine crankcase so that both fitted bushings "3" are installed in the holes.
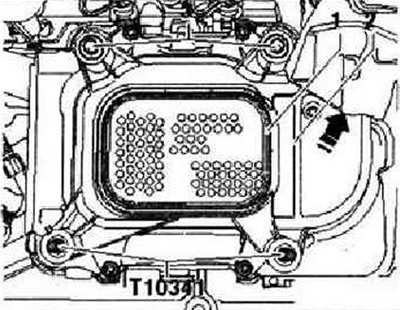
Press the charge air silencer «2» together with the pressure pipe in the -direction of the arrow-…


Turn the guide pins "T10341" by hand until they stop in both lower threaded holes. Replace the lip seal "1" and make sure it is correctly positioned in the groove. Push the compressor with the intake air silencer onto the guide pins "T10341" and tighten the upper fastening screws by hand. Unscrew the guide pins "T10341". Tighten the lower fastening screws by hand. Tighten the fastening screws evenly, crosswise. Tightening torque: 25 Nm. Install the housing with the noise-insulating screen on the compressor.

Instructions: Ensure that the noise insulation screen is positioned correctly in the housing.


Press the housing with noise suppression towards the compressor until the locking tabs "arrow" snap into place with an audible click. Further installation is carried out in the reverse order, while observing the following instructions. Loosen the compressor belt pulley mounting bolts. Tightening torque: 40 Nm + tighten by 90°. Gaskets, lip seals and self-locking nuts must be replaced. Degrease the hose connections and turbocharger hoses before installation. Use clamps of the appropriate series to secure all hose connections. Install the exhaust system and align it without mechanical stress. When installing the air duct pipes with a connector, ensure that the safety clip "arrow" clicks into the fastening "A" with an audible click.
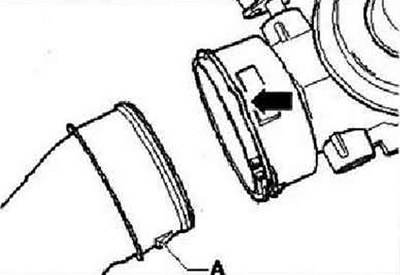
Press the housing with noise suppression towards the compressor until the locking tabs «arrow» snap…


The article is posted on the portal VWmanual

Press the engine casing at points "1" in the direction of the arrow down until it is fixed at these points by latches. Put the vacuum line on the connecting nipple "arrow". Upon completion of the work, it is mandatory to. Start the engine and check the drive belt movement.

This article is available at russian, bulgarian, belarusian, ukrainian, serbian, croatian, romanian, polish, slovak, hungarian
The text has been checked: Tarasov Ivan

Share information:

Previous articles
Compressor device
Removal and installation the turbocharger vacuum block
Removal and installation a turbocharger
Turbocharger device
Removal and installation of power supply system components
Removal and installation of the fuel tank
Next articles
Turbocharging system
Removal and installation the intercooler
Fuel injection system
Checking the operation of the intake manifold flap
Removal and installation the throttle valve control unit and the throttle valve control unit
High pressure fuel pump


Similar articles from other manuals for VW cars:
Compressor V-belt tension Passat B3 (1988-1993)
Air Conditioning Compressor Brackets Golf 4 (1997-2004)
Air conditioning compressor bracket (ARE engine) Polo 3 (1995-2003)
Removal and installation a compressor without a solenoid valve… Touareg 1 (2002-2006)
Removal and installation the alternator drive belt, coolant pump… LT 2D (1996-2003)
Link to this page in different formats


Visitor comments


No comments yet


How much will 45 + 13 =


Tiguan 1 
  • General information
  • Characteristics
  • Vehicle overview
  • Power unit
  • Petrol engine 1.4 BWK
  • Petrol engine 1.4 CAVA
  • Engine 2.0 (petrol)
  • Engine 2.0 (diesel)
  • Transmission
  • 6-speed manual gearbox 0A6
  • 6-speed automatic gearbox 09M
  • Drive shafts
  • Chassis
  • Front suspension
  • Rear suspension (2x4)
  • Rear suspension (4x4)
  • Air suspension
  • Wheels and rims
  • Brake system
  • Steering gear
  • Body
  • External equipment
  • Internal equipment
  • Electrical equipment
  • Power devices
  • Appliances and lighting
  • Communication systems
  • Heating and air conditioning
  • Electrical circuits
VWmanual.ru © 2016-2026 | Mobile version | News and articles | Sitemap: EN BG BY UA RS HR RO PL SK HU | Write message | Site search
Passat B2 • Passat B3 • Passat B4 • Passat B5 • Passat B6 • Golf 1, diesel • Golf 1, petrol • Golf 2, petrol • Golf 2 • Golf 3 • Golf 4 • Golf 5 • Polo 3 • Polo 4 • Touareg 1 • Tiguan 1 • Sharan 1 • Transporter T3 • Transporter T4 • LT 28 • LT 2D • Beetle • Caddy 3 •
Our website uses cookies to ensure functionality and convenience.