



Contents: Right side ↓ Left side ↓
Remove the sound insulation.
Place a drain pan underneath.
Mark the position of the nuts that secure the lower control arm to the shock absorber strut.
During reassembly, this position should be restored if possible.
Remove the lower control arm bolts from the shock absorber strut.
Press the drive shaft out of the gearbox. The procedure is described in.
Right side
Raise the right drive shaft as high as possible and secure it in this position.
In this case, you should not damage the protective coating of the shaft; for this, you can use plastic cable ties.
Note: Do not lower the vehicle.
Left side
Press the brake pedal. At this time, the assistant should unscrew the bolt of the left drive shaft.
Remove the left drive shaft.
Use a clean cloth to cover the hole under the drive shaft in the gearbox.
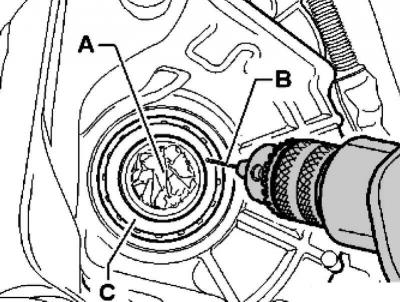
Fig. 3.95. Drilling a hole
Carefully drill a hole B (2–4 mm in diameter) in the outer sheet metal ring C of the sealing ring (Fig. 3.95).
Note: Lubricate the B drill bit to help the chips stick to the drill bit.
Note: Drill only through the C-ring, otherwise the gearbox may be damaged.
Screw a self-tapping screw with a diameter of about 4 mm into the drilled hole of the sealing ring.
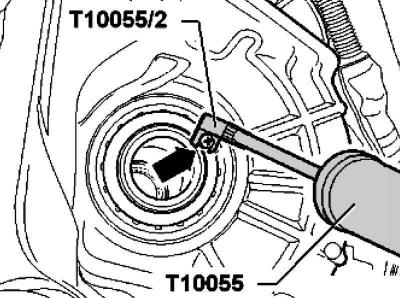
Fig. 3.96. Screwing in a self-tapping screw
Note: Do not screw the self-tapping screw too deeply to avoid damaging the bearing located there (fig. 3.96Note:).
Remove the sealing ring using a puller and adapter.
Remove the rag and thoroughly clean the gearbox and drive shaft bore.
There should be no metal shavings in the gearbox or the drive shaft hole; if necessary, remove the shavings with a vacuum cleaner.
If only the metal O-ring was removed, carefully remove the remaining O-ring with a screwdriver.
Visitor comments