



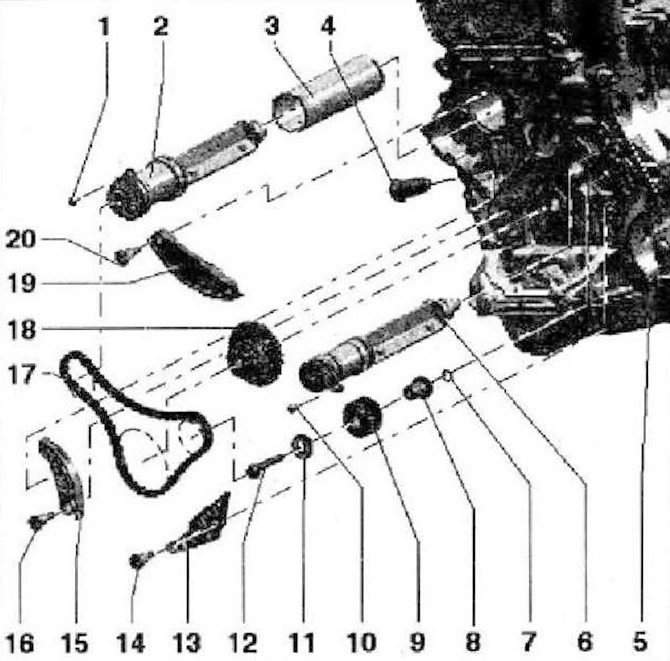
- 1 - Bolt, 9 Nm
- 2 - Balance shaft, replace after removal. Exhaust side, lubricate the support with engine oil
- 3 - Tube for balancer shaft
- 4 - Chain tensioner, 65 Nm, insert with thread varnish
- 5 - Cylinder block
- 6 - Balance shaft, replace after removal. Inlet side, lubricate the support with engine oil
- 7 - O-ring, lubricate with engine oil
- B - Support pin, lubricate with engine oil
- 9 - Asterisk of the intermediate shaft, balancing shaft. If the mounting bolt has been removed, replace the intermediate shaft sprocket
- 10 - Bolt, 9 Nm
- 11 - Washer
- 12 - Mounting bolt, if the mounting bolt was removed, replace the intermediate shaft sprocket
- 13 - Plank damper for the timing chain
- 14 - Guide pin, 20 Nm
- 15 - Timing chain tensioner bar
- 16 - Guide pin, 20 Nm
- 17 - Timing chain
- 18 - Asterisk
- 19 - Plank damper for the balancer shaft drive chain
- 20 - Guide pin, 20 Nm
Balance shaft tube - mounting position
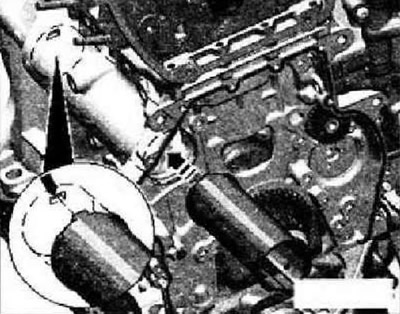
The stud of the balance shaft tube must engage in the groove -arrow-.
Support pin - mounting position
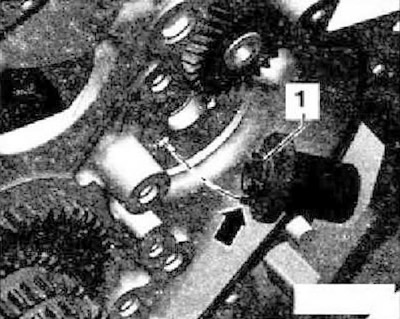
Replace and lubricate O-ring -1-. The locating pin -arrow- of the support pin must engage in the bore of the cylinder block. Lubricate the pivot pin.
Asterisk - tightening sequence
Caution: The intermediate gear must be replaced. Otherwise, side clearance is not created and, as a result, engine damage is not created. The new layshaft sprocket has a smooth lacquer coating that wears off after a short time and thus automatically creates side play.
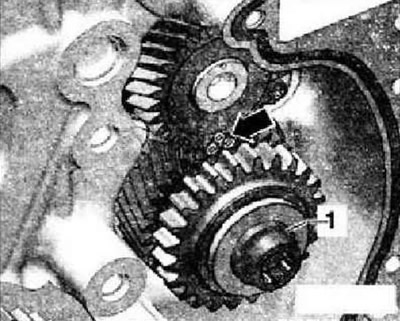
Tighten the bolt in the following order.
- 1. Pre-tighten with a torque wrench to 10 Nm.
- 2. Rotate the sprocket. The sprocket must not have any play, otherwise loosen and re-tighten.
- 3. Tighten with a torque wrench to 30 Nm.
- 4. Tighten 90°with a hard wrench.
Visitor comments