
V-ribbed belt drive
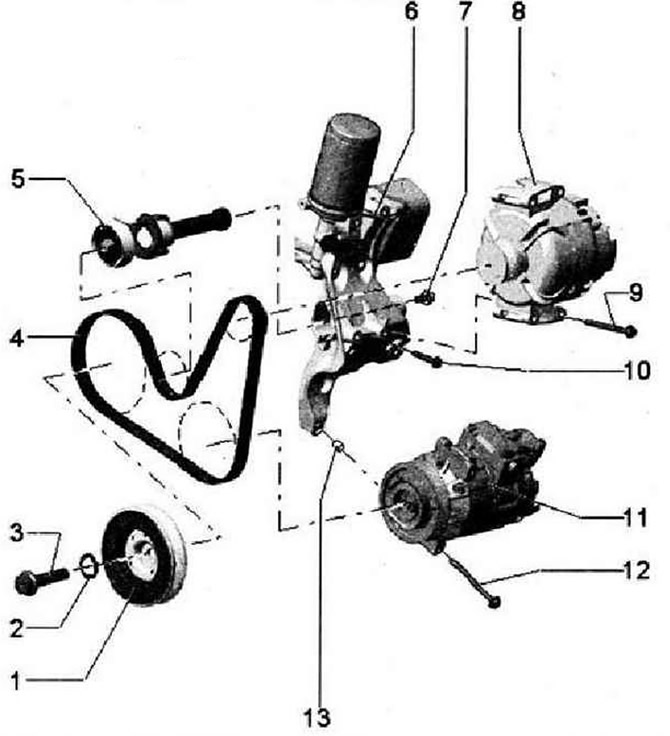
- 1 - Vibration damper with V-ribbed belt pulley
- 2 - O-ring, replace
- 3 - Bolt, replace, 150 Nm and tighten by 90°. Use counterholder -T10355- for loosening and tightening
- 4 - V-ribbed belt, check for wear, do not bend. Risk of damage to a previously used V-ribbed belt when changing its course. For re-installation, before removing the V-ribbed belt, mark the direction of its running with chalk or a felt-tip pen. When installing, ensure the correct position on the pulleys
- 5 - V-ribbed belt tensioner. To loosen the tension of the V-ribbed belt, turn the tensioner with a regular wrench. Secure with locking pin -T10060 A-
- 6 - Bracket for auxiliary units with oil pressure switch -F1-, oil filter and oil cooler
- 7 - Bolt, 10 Nm
- 8 - Generator
- 9 - Bolt, 23 Nm
- 10 - Bolt
- 11 - Air conditioning compressor, do not unscrew or disconnect refrigerant lines
- 12 - Bolt, 25 Nm
- 13 - Centering sleeve for air conditioning compressor
Individual parts of the V-ribbed belt tensioner
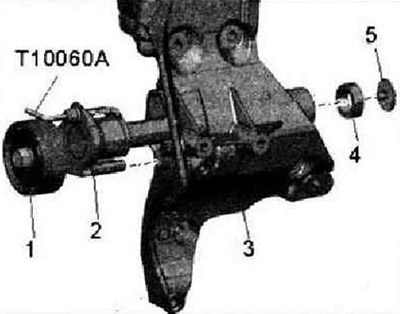
- 1 - V-ribbed belt tensioner
- 2 - Support piece
- 3 - Bracket for additional units
- 4 - Centering sleeve
- 5 - Bolt
Ancillary bracket bolt tightening sequence
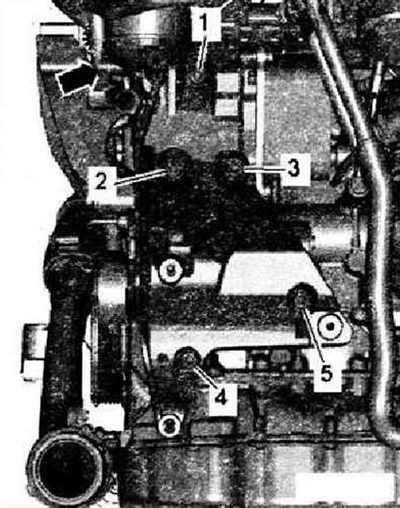
Install bracket for auxiliary units and first screw in bolt -4-. Tighten bolts in order -1...5- in 3 stages.
- 1. Tighten the screws by hand.
- 2. Tighten the bolts to 20 Nm.
- 3. Tighten the screws by 90°.
Removal and installation of poly V-belt
Caution: Risk of damage to a previously used V-ribbed belt if the belt is changed. For re-installation, before removing the V-ribbed belt, mark the direction of its running with chalk or a felt-tip pen.
Remove soundproofing. Remove right air hose -arrows-.
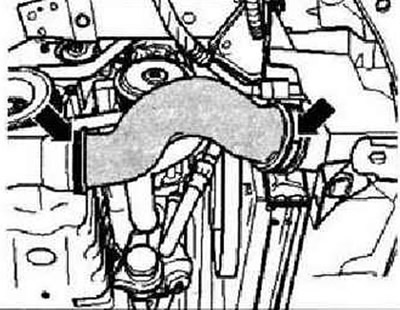
To loosen the V-ribbed belt, turn the tensioner from below in the direction of the - arrow.
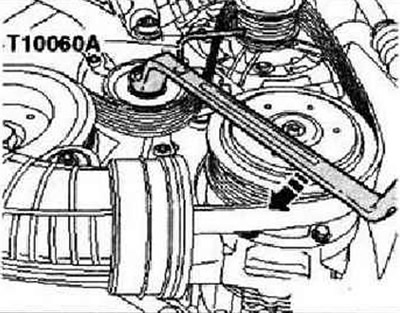
Secure belt tensioner with locking pin -T10060 A-. Remove poly V-belt.
Installation is carried out in the reverse order, while observing the following.
Note: Before installing the V-ribbed belt, the alternator and air conditioner compressor must be installed.
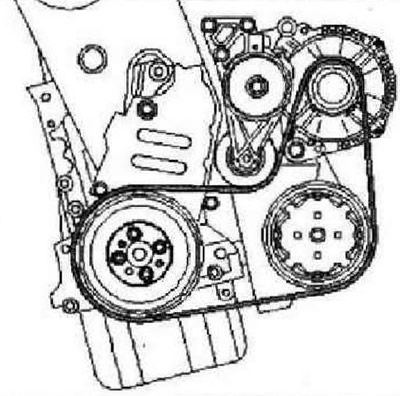
Place the V-ribbed belt first on the crankshaft pulley and then on the air conditioner compressor and alternator.
Slightly turn tensioner with ring spanner and remove locking pin -T10060 A-. Loosen tensioner. Check whether the V-ribbed belt is correctly laid. Start the engine and check that the V-ribbed belt runs correctly.
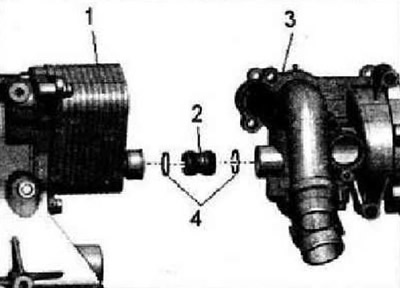
Removal and installation of an accessory bracket
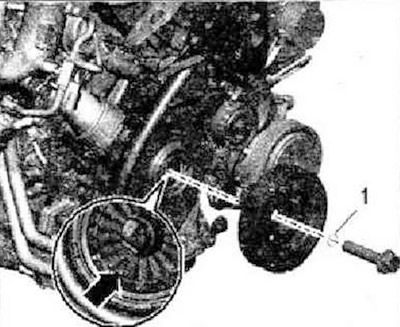
Drain coolant. Remove poly V-belt. If equipped, remove the charge air duct to the resonator. Remove generator. Unplug electrical connector -1- at air conditioner compressor regulating valve -N280-.
WARNING: Risk of injury from coolant. Do not depressurize the refrigerant circuit of the air conditioner.
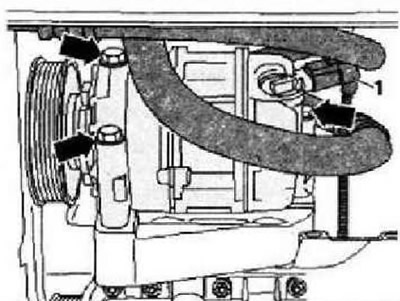
Unscrew bolts -arrows- for air conditioner compressor.
Caution: Risk of damage to refrigerant lines and hoses. Do not kink, kink or bend refrigerant lines and hoses.
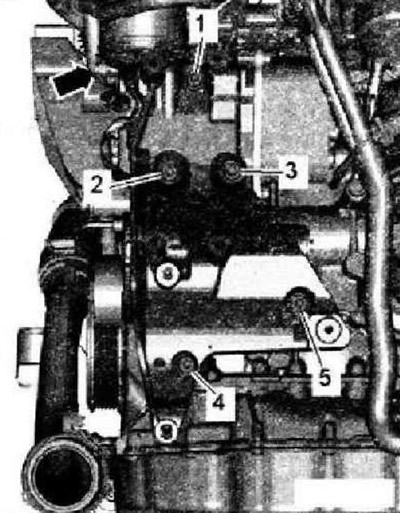
Tie up air conditioner compressor with connected hoses to side member. Remove screw -arrow- for oil dipstick guide tube. Remove bolts -1...5- and remove accessory bracket from coolant pump housing.
Installation
Instruction: Replace bolts/screws that are tightened at a certain angle. Replace sealing rings and gaskets.
Lubricate O-rings -4- with concentrate «G12 plus-plus». Insert connector -2- into coolant pump housing -3-. Push bracket for auxiliary units -1- onto connector -2-.
Install bracket for auxiliary units and first screw in bolt -4-. Tighten the bolts in order in 3 steps.
- 1. Tighten the screws by hand.
- 2. Tighten the bolts to 20 Nm.
- 3. Tighten the screws by 90°.
Further assembly is carried out in the reverse order, while observing the following. Install the air conditioning compressor. Install generator.
Removal and installation of a vibration damper
Remove soundproof screen. Remove the front right fender liner or the front right fender liner.
Vehicles with auxiliary heater
Detach clamp -1- and unscrew bolt -2-. Sow the silencer of the auxiliary heater.
All
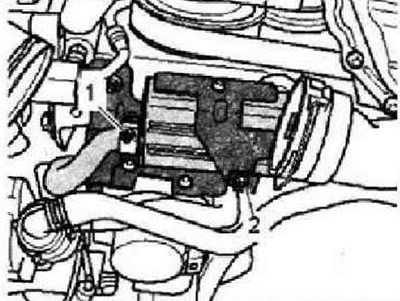
Remove screws -arrows-. Remove the air duct, to do this lift the clips -1 and 2-. Remove poly V-belt.

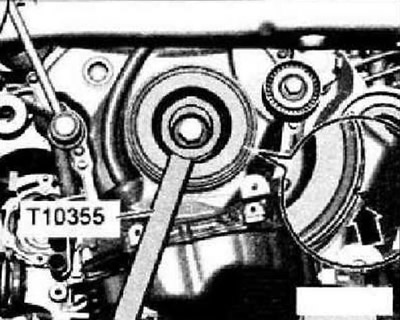
Turn vibration damper with stop -T10355- to position "TDC"-arrow-. The notch on the damper should be opposite the arrow mark on the bottom cover of the chain drives. Unscrew bolt for vibration damper, to do this use stop -T10355-.
Caution: Risk of engine damage. In order not to adjust the valve timing, it is impossible to turn the crankshaft with the vibration damper removed from the position "TDC".
Installation
Installation is carried out in the reverse order, while observing the following.
Instruction: Replace vibration damper bolt. Replace o-ring
Lubricate the sealing lips of the shaft seal with gear oil. Install vibration damper, while paying attention to tooth contour -arrow-.
Visitor comments