



Contents: Removal ↓ Installation ↓
Starter
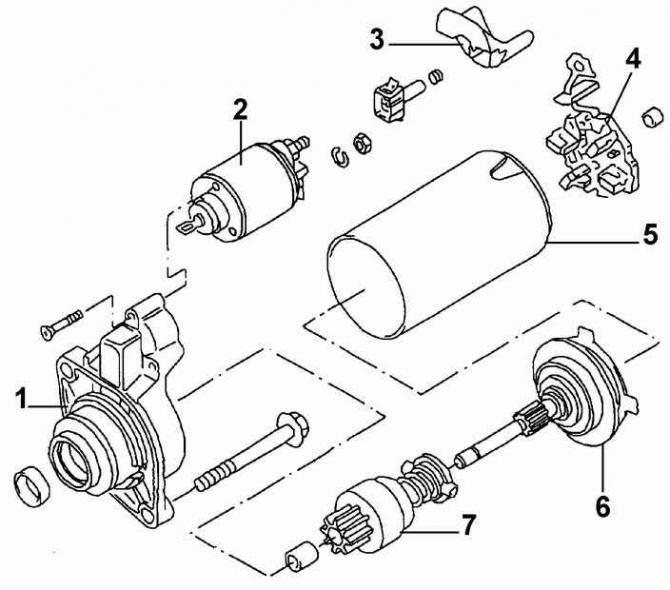
- 1 - front cover,
- 2 - traction relay,
- 3 - casing,
- 4 - brush holder,
- 5 - stator,
- 6 - rotor,
- 7 - drive gear with overrunning clutch
The location of the contacts on the back of the traction relay
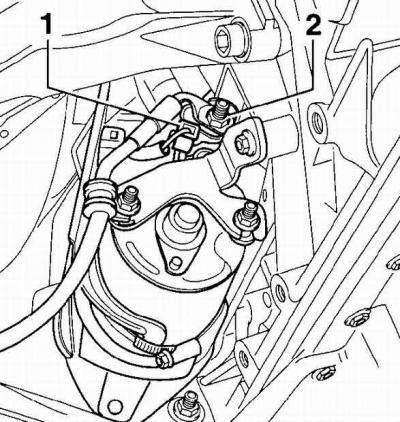
- 1 - terminal 50,
- 2 - terminal 30
Starter Rear Support Bracket Mounting Bolt Location
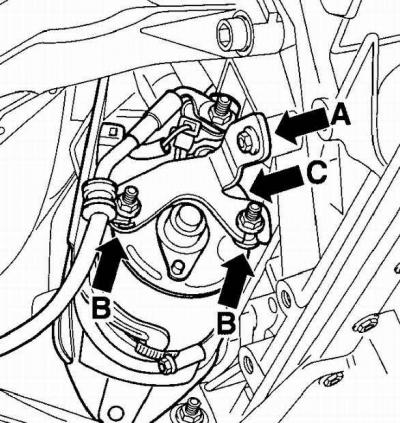
- A - bolt for fastening the bracket to the cylinder block,
- B - nuts for fastening the starter to the bracket,
- C - bracket
The starter is a DC electric motor with mixed excitation with an electromagnetic traction relay. The starter consists of a housing or stator with excitation windings, an anchor with an overrunning clutch, a cover with brush holders and a traction relay.
When the starter is turned on, current from the battery begins to flow through the winding of the starter traction relay. The relay anchor is pulled in and the relay contacts close. At the same time, the relay anchor moves the overrunning clutch with the gear through the lever. The hub of the overrunning clutch rotates on the helical splines of the starter anchor shaft and also rotates the gear, which facilitates its engagement with the flywheel ring gear. Current flows through the closed contacts of the traction relay, feeding the stator and anchor windings, and the starter anchor begins to rotate together with the hub and overrunning clutch.
After the engine is started, the rotation speed of the pinion exceeds the rotation speed of the starter anchor. In this case, the overrunning clutch rotates freely, and the torque is not transmitted from the engine flywheel to the starter anchor shaft. After releasing the ignition key, the power supply circuit of the traction relay windings through the ignition switch is opened, the anchor of the traction relay is pressed back to its original position by the spring, the relay contacts are opened and the drive pinion disengages from the flywheel ring gear.
Removal
1. Turn off the ignition and remove the ground cable from the battery.
2. Apply the handbrake, then raise the front of the car and secure it on stands.
3. Remove the lower engine splash shield.
4. Remove the electrical connector from terminal 50 of the traction relay, see Fig. Location of contacts on the back of the traction relay.
5. Disconnect the wire from terminal 30 of the traction relay.
[View the original on the website: VWMANUAL]
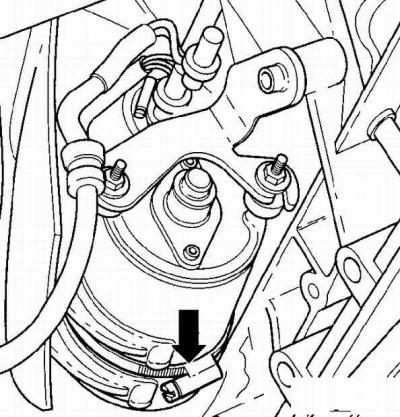
6. Loosen the clamp securing the starter heat shield plate.
7. Remove the bolt securing the starter rear support bracket to the engine block, see Fig. Location of the bolts securing the starter rear support bracket.
8. Unscrew the two nuts (arrow B) securing the starter to the bracket and remove the bracket.
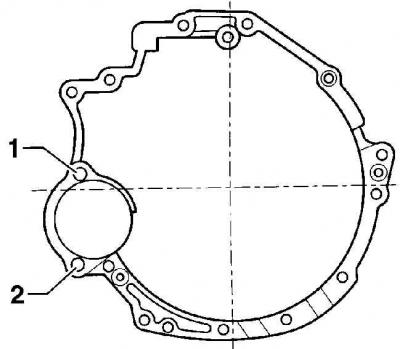
9. Unscrew the bolt (1) M12x90 securing the upper part of the starter and the bolt (2) M12x67 securing the lower part of the starter to the gearbox housing.
10. Remove the starter from the gearbox housing and remove it from under the vehicle.
Installation
1. Install the starter and secure it with bolts, tightening them to a torque of 65 Nm. Keep in mind that the starter mounting bolts have different lengths.
2. Install the bracket supporting the rear of the starter and secure it with bolts and nuts. Tighten the bolt to 22 Nm and the nuts to 4 Nm.
3. Tighten the starter heat shield plate mounting clamp.
4. Screw the wire to terminal 30 of the traction relay and tighten the fastening to a torque of 30 Nm.
5. Connect the electrical connector to terminal 50.
6. Install the lower engine splash shield.
7. Connect the ground wire to the battery.
Visitor comments