
Warning. When checking injection start pressure, take care to protect your hands from high pressure fuel jet, which can cause serious injury.
Attach the injector to the tool with a manometer to check the injection pressure. Operating device pump handle. build up fuel pressure and check the start of injection. If the test result does not fit within the required limits, achieve the required value by selecting the thickness of the shims. With an increase in the thickness of the washers, the injection start pressure increases, and vice versa.
Note. A change in the thickness of washers by 0.5 mm corresponds to a change in pressure by 5 kgf/cm2.
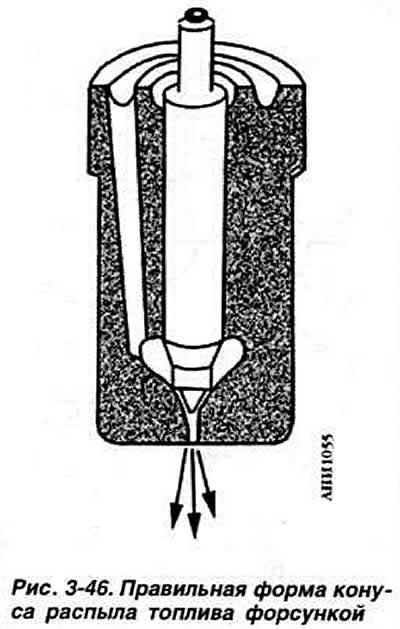
Checking the fuel spray cone with injectors
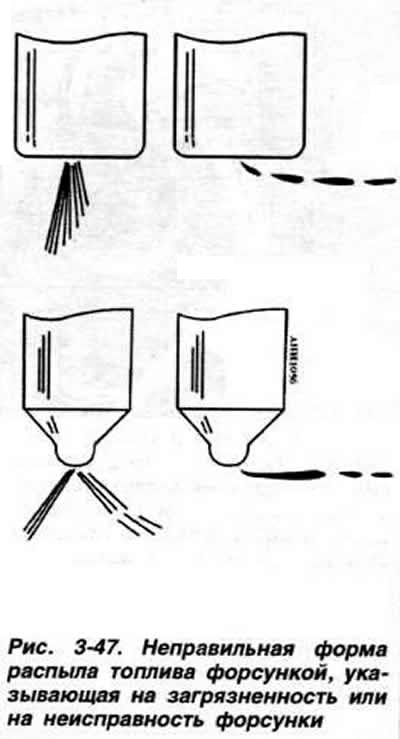
Attach the injector to the tool with a manometer to check the injection pressure. Position the nozzle over a suitably sized container and operating the tool pump handle, create fuel injection pressure. Check the fuel spray cone with a nozzle, which must correspond to the shape shown in fig. 3-46. If fuel spray occurs at an angle, with breaks or a forked cone (pic. 3-47), this indicates that the injector is dirty or defective. Clean nozzle or replace.
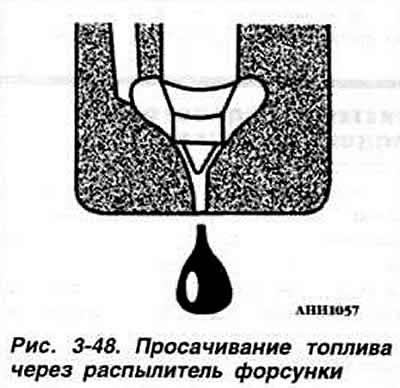
Injector leak test
Attach the injector to the jig with a pressure gauge to check the injection pressure. By slowly moving the device pump handle down, create a pressure on the pressure gauge of about 110 kgf / cm2 and, holding the handle in the lower position for 10 s, make sure that there is no seepage of fuel through the nozzle spray. Fuel leakage through the injector nozzle (pic. 3-48) easy to detect if you place a sheet of blotting paper under the sprayer. If fuel seepage occurs on a cleaned and kerosene-flushed injector and injector needle valve, replace the injector.
Visitor comments