
Front sill trim
Removing
1. Remove the side cover from the instrument panel.
2. Remove an average part of facing of a forward rack.
3. Driver's side. Remove the hood release handle.
4. Remove the top and bottom parts of facing of the central rack.
Attention! The seat belt anchor does not need to be removed.
5. Remove screw 1 (see illustration).
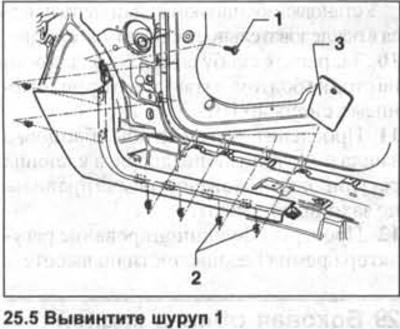
6. Release the lining from the fasteners 2 on the threshold, prying it with a plastic wedge 3, and release the lining from under the door seal (see illustration 25.5).
Installation
7. Make sure the pad retainers are not damaged and are properly seated on the pad. If necessary, replace damaged clips with new ones.
Installing the threshold lining is carried out in the reverse order of removal. Make sure that the fasteners are properly seated in the holes.
Rear side door sill trim
Removing
8. Remove the top and bottom parts of facing of the central rack.
Attention! The seat belt anchor does not need to be removed.
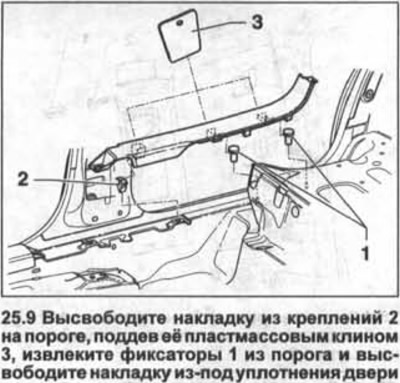
9. Release the trim from the fasteners 2 on the threshold by prying it with a plastic wedge 3, remove the clips 1 from the threshold and release the trim from under the door seal (see illustration).
Installation
10. Make sure that the trim and sill retainers are not damaged and are correctly seated on it.
If necessary, replace damaged clips with new ones.
Installing the threshold lining is carried out in the reverse order of removal. Make sure that the latches fit properly into the holes and that the ends of the trim fit under the door seal.
Visitor comments