
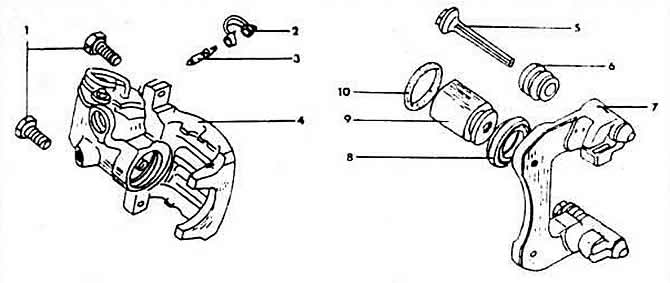
1 - self-locking screws, 35 Nm
2 - dust cap
3 - screw plug to the air outlet
4 - brake seat cylinder
5 - guide bolt
6 - protective cap
7 - brake seat support
8 - anti-dust ring
9 - brake seat piston
10 - cylinder sealing ring
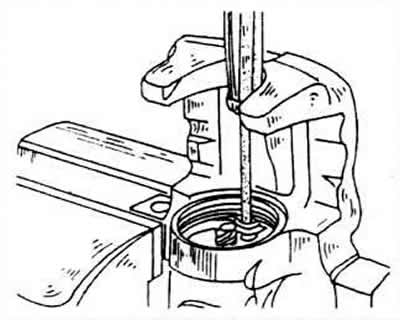
The piston is unscrewed using a special tool.
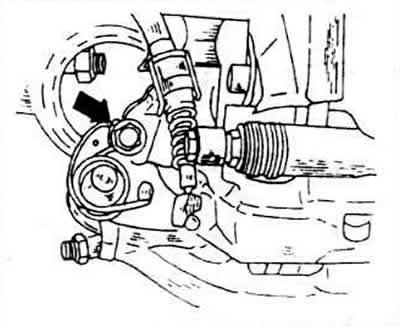
Clamp the cylinder in a vise and unscrew the handbrake cable mount.
Using a special wrench, unscrew the piston from the brake seat.
Using a screwdriver, carefully pry up the sealing ring placed on the inside of the cylindrical hole.
Thoroughly clean all parts and if the cylinder is in good condition, use the spare parts for reassembly. If the brake seat support is replaced, it is well covered and moved to the guide pin, the support must be replaced in case of damage to the protective cuffs or guide pin, the supports come as spare parts.
Insert a new O-ring into the groove, covering it with brake fluid or brake grease.
Position the dust ring with the outer sealing lip towards the piston and insert the piston into the cylinder bore. Lubricate the piston surface with fluid or brake grease.
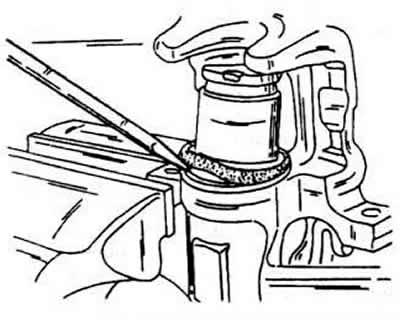
Using a screwdriver, carefully insert the inner sealing lip of the dust ring into the groove of the cylinder.
Insert a special key into the piston and turn the piston inward. When screwing in, press the piston evenly. When the piston is in place, the outer sealing lip of the dust ring will fit into the groove of the piston.
Lubricate the air valve with brake grease and screw in. Air should first be bled from the brake seat, to do this, put a hose to remove air on the air valve, and put the other end of the hose on a syringe filled with brake fluid. You can, for example, use an acid siphon used to control battery acid; it must, of course, be impeccably cleaned beforehand. Inject brake fluid until until bubbles appear at the connection point with the brake hose.
The brake seat is now ready for installation again.
Visitor comments