
On the mating plane of the block head, fix the indicator holder (pic. 187). Slide the valve out of the sleeve so that the end of the rod is flush with the end face of the sleeve on the other side of the head.
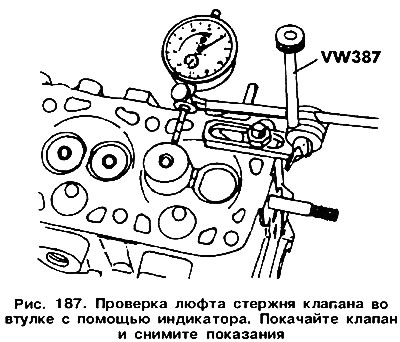
Swing the valve in the transverse direction by the valve disc and take the indicator readings. If they exceed 1.3 mm, then the bushing should be replaced. Before replacing the bushing, the general technical condition of the block head should be assessed. Small cracks between valve seats are acceptable if the width does not exceed 0.5 mm (see fig. 47). To replace the bushing, it is necessary to press it out of the head of the block on the side of the camshaft using a rod equal to or very close in diameter to the diameter of the bushing. The work can be facilitated by preheating the head. The rod used for pressing must have a groove of a smaller diameter corresponding to the diameter of the hole. The mandrel for this operation is shown in fig. 188. Together with the replacement of bushings, the valves are also replaced, and the parameters of the valve seats are adjusted by milling (see below). Lubricate the new bushings well and press them into the cold head of the block from the side of the camshaft until the shoulder of a larger diameter rests against the head of the block. From this point on, it is impossible to increase the pressure on the mandrel, as this can lead to cutting off the shoulder.
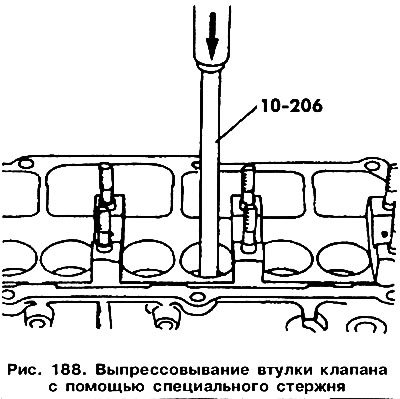
After installing the sleeve, process its inner diameter with a special reamer. If there is no such reamer, you can use another 8 mm reamer for the intake and exhaust valves.
Attention! Valve seats should only be milled after the bushings have been replaced.
Visitor comments