
2. On the rear cover of the generator, unfasten the springy latch 20 that secures the plug of the wire bundle (pic. 4.3).
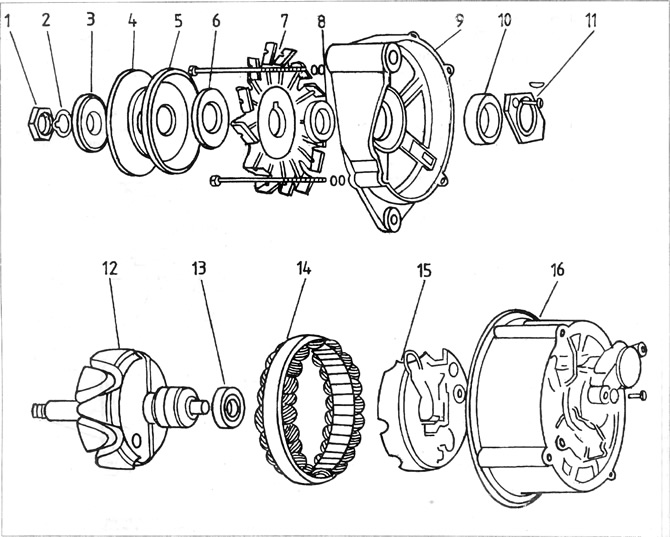
Pic. 4.3. Motorola alternator
1 - pulley nut; 2 - washer, 3 - pulley; 4 - fan; 5, 6 and 7 - washers; 8 - front bearing cover; 9 - ball bearing; 10 - remote washer; 11 - rotor; 12 - ball bearing; 13 - stator winding; 14 - O-ring type o-ring; 15 - back cover; 16 - brush holder; 17 - voltage regulator; 18 - plate with diodes; 19 - plastic cover; 20 - spring latch
3. Pull out the plug.
4. Unscrew the top bolt securing the generator to the bracket with an extended hole.
5. Loosen the bolt that secures the bracket with an elongated hole to the motor housing.
6. Tilt the alternator towards the radiator and remove the V-belt.
7. To take out up to the stop a bolt with a head and with a six-sided socket, to take out the generator.
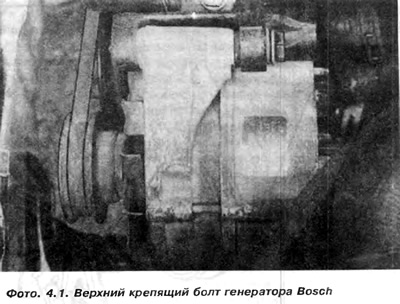
8. Removing the Bosch type generator is similar, but the Bosch generator mounting has some differences. From above, the generator is fastened with a bolt, which is also the axis of rotation of the generator (photo 4.1).
From below, the generator is fixed with a bolt screwed to a bracket with an oblong hole (photo 4.2).
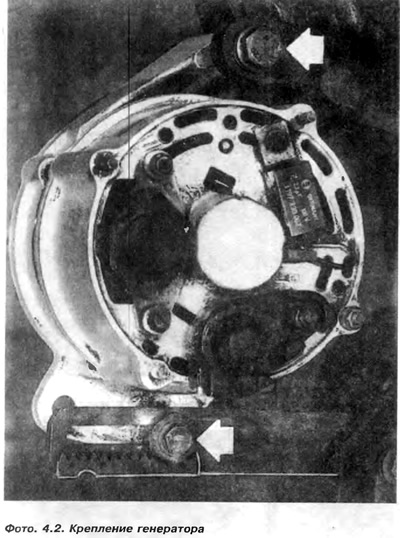
When removing the generator, both bolts must be unscrewed.
Installation
Installation is made in sequence, return to removal.
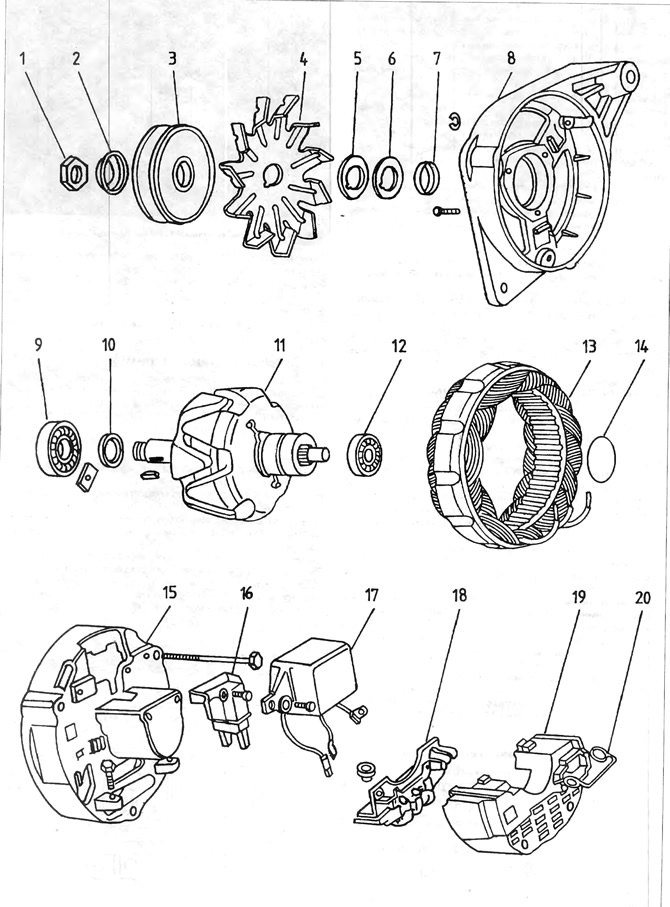
Pic. 4.2. Bosch alternator
1 - pulley nut; 2 - spring washer; 3 - remote washer; 4 - pulley; 6 - remote washer; 7 - generator fan; 8 - remote washer; 9 - front bearing cover; 10 - ball bearing; 11 - ball bearing cover; 12 - generator rotor; 13 - ball bearing; 14 - stator winding; 15 - plate with diodes; 16 - back cover.
Visitor comments