
2. Remove the steering wheel.
3. To turn away bolts and to take out the lower casing of a steering column (pic. 9.1).

Pic. 9.1. Steering column lower cover
4. Loosen the three screws and remove the combination switch. Disconnect the electrical wires.
5. Unscrew the bolts and remove the lower casing of the indicator set on the switchboard.
6. Unscrew and remove the bolts securing the column. Where shear bolts are installed, it will be necessary to drill the heads and unscrew the threaded parts or use a punch to extract them. In some car models, one of the mounting bolts may have a faceted head.
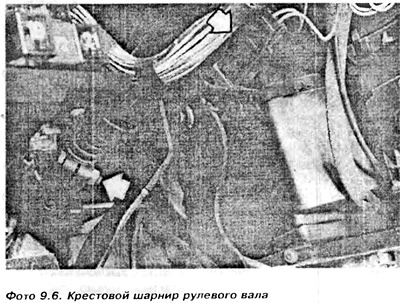
7. Unscrew and remove the clamping bolt that secures the cross hinge to the column (photo 9.6). Unscrew the transverse bolt of the lower attachment to the column, then remove the column from the cross hinge and remove the bolt spring.
8. Models prior to July 1984 had a two-piece column. With this type of column, it is necessary to push the two parts together to disengage the kingpins connected in the form of a rectangular parallelepiped inside the body, remove the separating rubber casings and remove the bottom part up through the body tube
9. Check components for wear. If the steering column has been damaged, it must be replaced as a set. In case of replacement column over old! About the type in the kit, it is possible to fit a new-made telescopic column assembly, but then it is necessary to install a new type of bottom bracket. because the old one won't fit.
10. To disassemble the upper case (for two types of speakers), it is necessary to lift and remove the safety washer from the inner column, remove the spring and the contact ring. Replace the washer with a new one
11. Check the condition of the oil seal bushings and replace them if necessary. Remove the old bushings by lifting with a screwdriver, immerse the new ones in a soapy solution and press them in place of the old ones.
12. Using a hex wrench, unscrew the clamping bolt protecting the steering lock lock and remove the lock. It must be remembered that the ignition key is inserted and the lock is released.
13. Take out the axis of the column and remove the support ring (pic. 9.2)
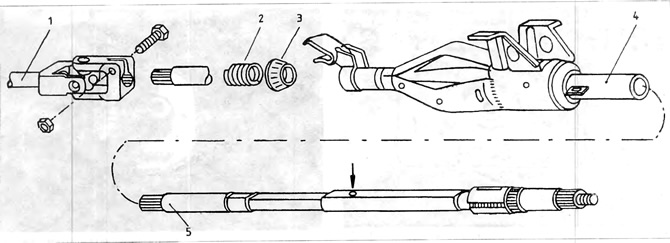
Pic. 9.2. steering shaft
1 - articulated shaft of the steering column; 2 - spring; 3 - supporting ring; 4 - steering shaft housing.
14. Clean components and check for wear. If necessary, replace them with new ones.
15. Installation is carried out in the reverse order to dismantling. The bearing surfaces must first be lubricated with multipurpose grease.
16. In newer models of cars equipped with a telescopic column, consisting of one part, the installation is different.
Secure the lower end of the column axle in a soft jaw vise so that the upper section is in the jaws and the two parts of the column cannot move together. Small protrusion at the bottom of the steering shaft (indicated by an arrow in Figure 9.2) must be visible through the hole in the steering shaft housing. Install together retaining ring with dispenser switch and lock housing, slip ring, spring and safety washer (pic. 9.3).
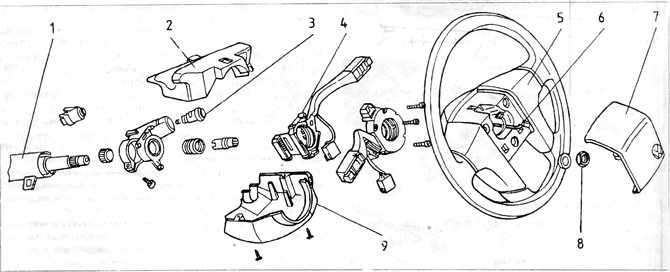
Pic. 9.3. Steering wheel VW Jetta
1 - steering column; 2 - upper casing of the steering column; 3 - lock insert; 4 - combined switch; 5 - steering wheel; 6 - signal wiring; 7 - steering wheel cover; 8 - nut; 9 - the lower casing of the steering column.
17. In columns of both types, the safety washer is installed by driving into the steering shaft until it is completely pressed in. In the older two-piece type, squeeze the two column elements together with the appropriate pliers until the washer is in place.
18. When connecting a column with a cross joint, check whether the axis of the column is installed correctly. Tighten the fixing bolts and nuts with a torque of a certain value. Tighten the shear head bolts until their heads come off.
19. At the end, it is necessary to check the operation of the steering wheel, all switches on the column and the sound signal.
Visitor comments