
Front oil seal (pulley side) - replacement
Remove the toothed belt as described earlier.
1. Remove the crankshaft pulley bolt and remove the sprocket and key from the crankshaft.
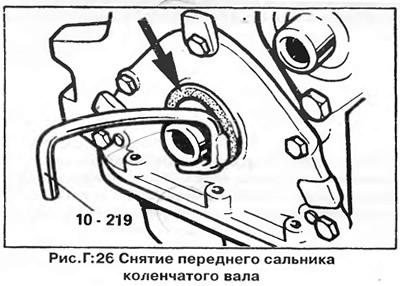
2 Remove the oil seal from the housing using a special extractor (pic. D:26), or pry it out with a screwdriver so as not to damage the aluminum casting of the housing.
3. Inspect the seal seat for dirt, oil, and nicks or other damage that could prevent the seal from seating properly. Clean the surfaces of the oil seal seat and the crankshaft journal and lubricate them.
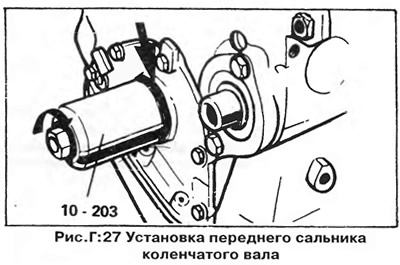
4 Press the new oil seal into the housing using the tool shown in fig. D:27, or a socket wrench of a suitable size to a depth of 2 mm from the surface of the body. The stuffing box must be installed in the housing socket evenly, without distortion.
5. Install the key and sprocket onto the crankshaft. Secure the sprocket with a bolt and tighten it with a torque of 8.0 kgm.
6. Install the toothed belt and related parts as previously described.
Rear oil seal (flywheel side) - replacement
The crankshaft rear oil seal can be replaced without removing the engine from the vehicle, but the gearbox, flywheel and clutch must be removed - see chapter "Clutch and manual transmission".
1. On models with automatic transmission, remove the drive plate installed in place of the clutch and flywheel. Be careful not to lose the adjusting plate installed between the drive disc and the crankshaft.
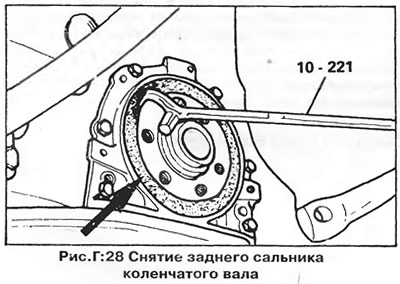
2. Remove the gland from the housing using a screwdriver. Be careful not to damage the socket in the aluminum gland housing.
3. Clean the oil seal seat and the surface of the crankshaft journal. Lubricate the crankshaft journal.
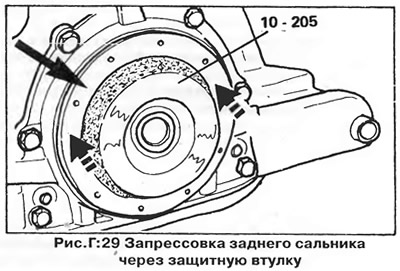
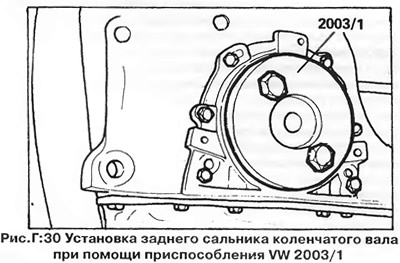
4. Insert a new stuffing box into the body and press it evenly, without distortion, into place. Use a 10-205 protective sleeve to ensure seal lips are intact and to ensure correct installation (pic. D:29). Although there is a special VW tool to install the oil seal (pic. D:30), with the same success, the gland can be pressed in by hand.
5. Install the clutch, flywheel and gearbox as described in chapter "Clutch and manual transmission".
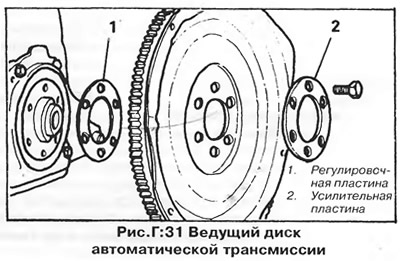
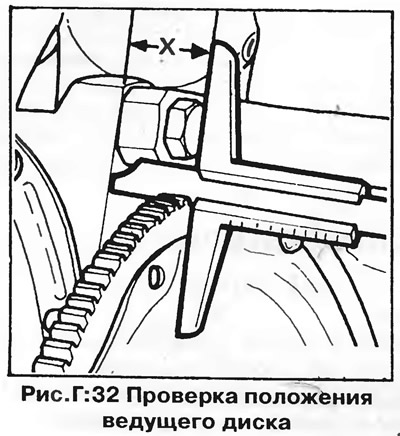
6. On models with automatic transmission, after installing the drive disc on the crankshaft, check the distance between the outer edge of the disc and the surface of the cylinder block (pic. D:32), which should be within 30.5-32.1 mm. If necessary, adjust this distance by installing an adjusting plate of a different thickness between the drive plate and the crankshaft flange (1, fig. D:31). Before tightening the bolts, check that the reinforcing plate is present (2) outside of the drive disk. Apply threadlocker to bolt threads (type "Loctite").
Visitor comments