



Replacing the front and inner seals
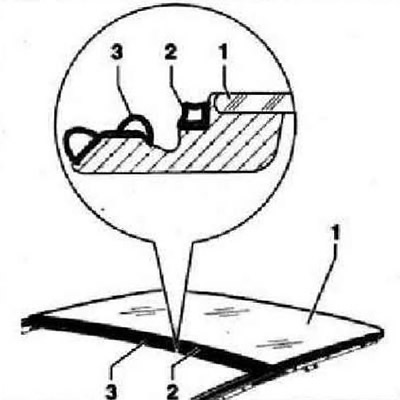
Remove the corresponding rear section seal -1-.
- 2 - front seal
- 3 - internal seal
Remove adhesive residue with nozzle -VAS 6349- The adhesive surface on the rear section must be free of dust and grease. Clean the bonding surface with solvent -D 009 401 04-. Wipe the adhesive surface on the rear section with the provided cloth.
Instructions: It should be borne in mind that the cleanser quickly disappears from the napkin.
Remove the protective film from the adhesive surface of the new seal and press the seal on both ends. Distribute the excess length of the seal evenly. Roll on the seal evenly using the door sound insulation adhesive roller -3356-. Install the rear section.
Side seal replacement
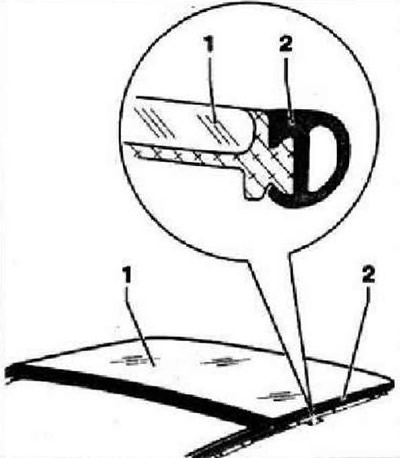
Remove side seal -2- from edge of rear section -1-.
Instructions: A new seal is supplied with a margin of length. Measure the desired length of the new seal and cut off. It is recommended that you measure the new seal with a margin of 1-2 mm, and distribute the excess length evenly.
Remove adhesive residue with nozzle -VAS 6349-. The adhesive surface on the rear section must be free of dust and grease. Clean the bonding surface with solvent -D 009 401 04-. Wipe the adhesive surface on the rear section with the provided cloth.
Instructions: It should be borne in mind that the cleanser quickly disappears from the napkin.
Remove the protective film from the adhesive surface of the new seal. Attach new seal -2- with retainer -1- to sash -3-. Press seal on both ends.
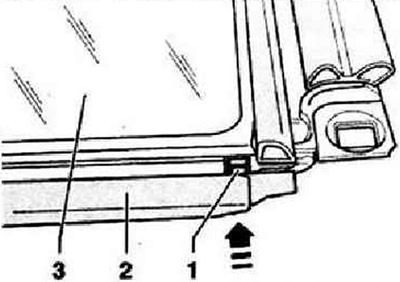
Push the seal -2- over the edge of the section -1- and straighten the excess length evenly. Roll the seal evenly with the door soundproofing roller -3356-. Install the rear section.
Replacing the outer seal
Remove the front sunroof section. Remove the rear sunroof. Detach outer seal -1- from roof -2- at adhesive points -3-.
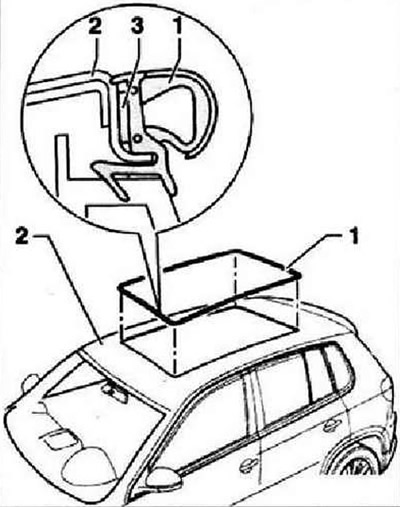
Cut through the profile of the outer seal -1- in the area -arrow- close to the perimeter edge of the roof -4-. A part of the seal -3- will remain between the roof -4- and the frame -2-. Remove adhesive residue with nozzle -VAS 6349-. The surface to be applied along the edge of the roof must be free of dust and grease. Clean the bonding surface with solvent -D 009 401 04-. Wipe the bonding surface on the roof edge with the supplied cloth. Keep in mind that the cleanser quickly disappears from the napkin.
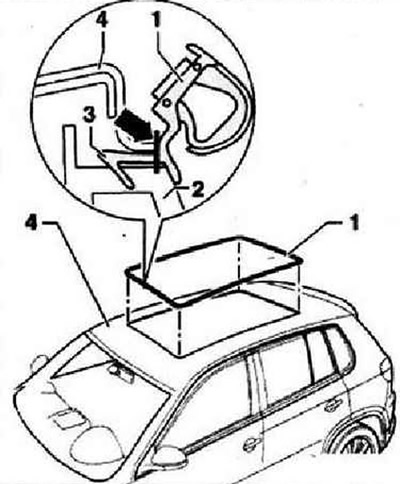
Position the new seal -1- so that the joint -arrow- is in the middle of the trailing edge of the roof opening. Remove the protective film from the adhesive surface -4- of the new seal -1- and press the seal against the roof -3-. Distribute the excess length of the seal evenly. Roll on the seal evenly using the door sound insulation adhesive roller -3356-. Install the rear sunroof. Install the front hatch section.
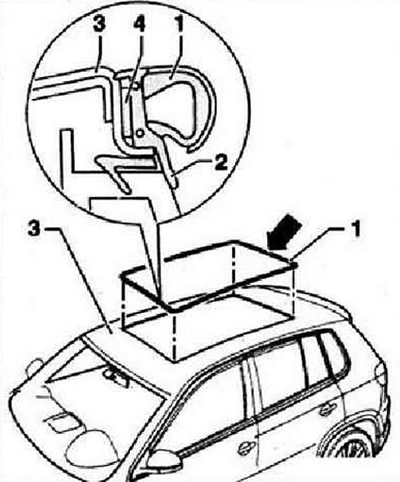
Replacing the inner seal
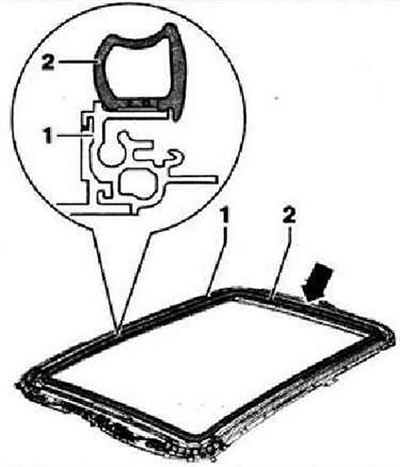
Remove the front sunroof section. Remove the rear sunroof. Remove inner seal -2- from frame -1-. Remove adhesive residue with nozzle -VAS 6349-. The surfaces to be bonded must be free of dust and grease. Clean the bonding surface with solvent -D 009 401 04-. Wipe the bonding surface on the frame with the supplied cloth. Position the inner seal -2- so that the joint is on the frame -1- opposite the center of the trailing edge of the roof opening. Remove the protective film piece by piece from the adhesive surface of the new seal and press it down. Distribute the excess length of the seal evenly. Roll the seal evenly around the entire perimeter twice using the door sound insulation adhesive roller -3356-. Install the rear sunroof. Install the front hatch section.
Visitor comments