



Contents: Removal ↓ Installation ↓
Removal

Move section "1" so far that strip "2" can be removed. Move strip "2" down in the direction of "arrow A" and carefully remove it from the fastening "3" on the rear side. Unfasten the latches "4" on the rear side of the strip by pressing them "arrow B". Move strip "2" forward in the direction of "arrow C" and then remove it. Unscrew the bolts "2" fastening section "1" on the left and right sides.
Instructions: When unscrewing the bolts, use a magnetic screwdriver to prevent the bolts from falling into the hatch mechanism.
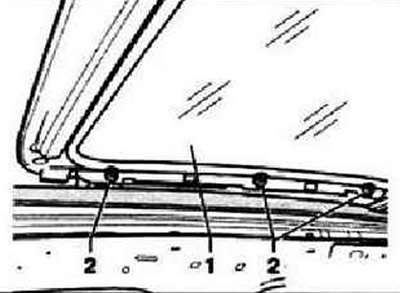
Remove the hatch section by lifting it upwards.
Caution: Do not operate the lift mechanism drive when the section is removed, as this may damage the (scratch) cowl.
Installation
Instructions: Always use new bolts when installing the section. When tightening the bolts, use a magnetic screwdriver to prevent the bolts from falling into the hatch mechanism.
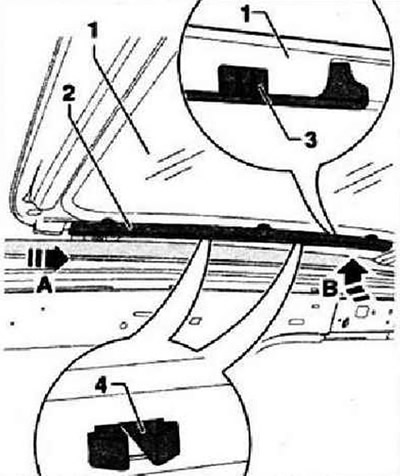
Install section "1" in place on top and slightly tighten bolts "2". Adjust the position of the front section. Tighten bolts "2" to 5 Nm. Install strip "2" in the front section "1" and move it in the direction of "arrow A". Insert latches "4" in place. Insert holder "3" on the back of the strip "arrow B". After completing all work, initialize the electric motor of the sliding sunroof.
Visitor comments