



Contents: Checking the piston position at top…↓ Piston and cylinder dimensions ↓ Checking the thermal clearance of…↓ Checking the piston ring clearance…↓ Checking the cylinder diameter ↓ Checking the axial displacement of…↓ Work execution procedure ↓ Valve sizes ↓ Camshaft marking (valve timing) ↓
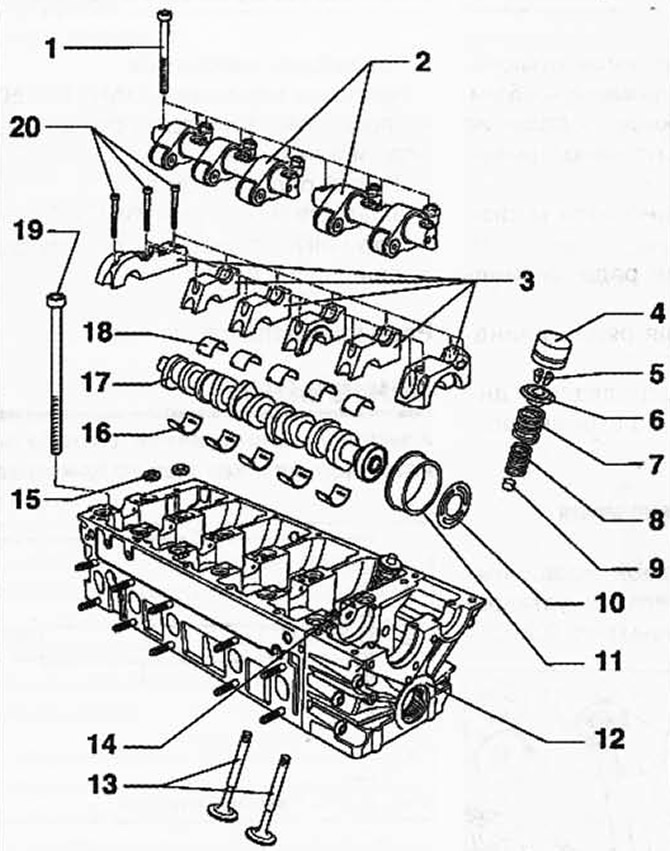
Fig. 2.207. Valve mechanism components:
1 - bolt 20 Nm + tighten by 1/4 turn (90°); 2 - roller lever axis; 3 - bearing cap; 4 - plate pusher; 5 - conical cracker; 6 - valve spring plate; 7 - outer valve spring; 8 - internal valve spring; 9 - valve stem seal; 10 - diamond coated washer; 11 - bushing; 12 - cylinder head; 13 - valves; 14 - pump nozzle; 15 - washer; 16 - bearing shell; 17 - camshaft; 18 - bearing shell; 19 - cylinder head bolt; 20 - bolt 8 Nm + tighten by 1/4 turn (90°).
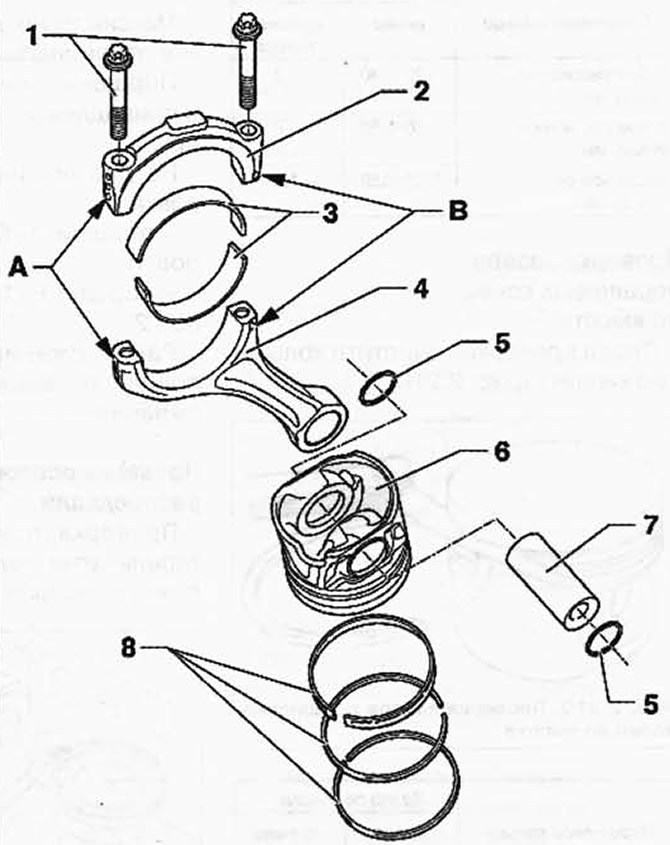
Fig. 2.208. Piston and connecting rod:
1 - connecting rod bolt, 30 Nm + turn further by 1/4 turn (90°); 2 - connecting rod cover; 3 - support insert; 4 - connecting rod; 5 - retaining ring; 6 - piston; 7 - piston pin; 8 - piston rings.
Checking the piston position at top dead center
It is impossible to measure the piston protrusion in the service station conditions. The cylinder head is connected to the aluminum cylinder block using the anchor principle with anchor bolts. This achieves such compression of the cylinder block that it is impossible to achieve with the cylinder head removed. For this reason, when replacing the cylinder head gasket, it is necessary to install a new cylinder head gasket with identical index marking.
Piston and cylinder dimensions
NOTE: Repair sizes are not provided.
| Grinding size | Piston | Cylinder |
| Nominal size, mm | 80,97 | 81,01 |
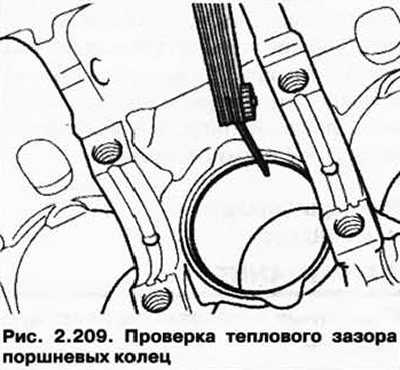
Checking the thermal clearance of piston rings
Drive the piston ring from above, at a right angle to the cylinder wall, to the bottom hole of the cylinder, at a distance of about 15 mm from its edge (fig. 2.209).
| Piston ring | Thermal gap | |
| new | wear limit | |
| 1. Compression ring, mm | 0,20-0,40 | 1,0 |
| 2. Compression ring, mm | 0,30-0,50 | 1,0 |
| Oil scraper ring, mm | 0,25-0,50 | 1,0 |
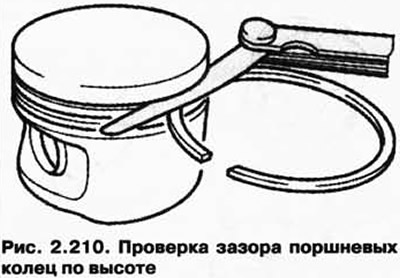
Checking the piston ring clearance by height
Clean the ring groove before checking (fig. 2.210).
| Piston ring | Height clearance | |
| new | wear limit | |
| 1. Compression ring, mm | 0,04-0,09 | 0,15 |
| 2. Compression ring, mm | 0,03-0,06 | 0,15 |
| Oil scraper ring, mm | 0,02-0,06 | 0,15 |
Checking the cylinder diameter
Measure the transverse distance A and the longitudinal distance B in three places in a cross shape (fig. 2.211).
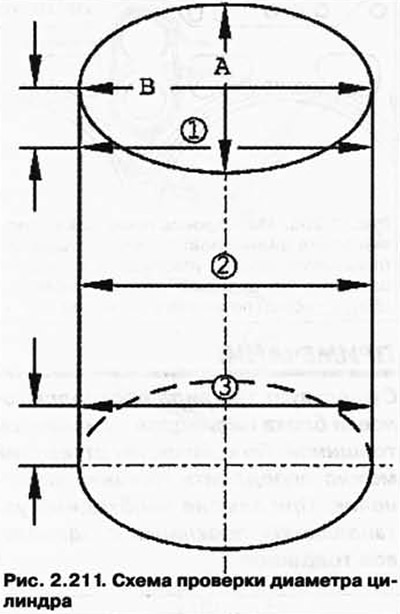
Maximum permissible deviation from the nominal size: 0.05 mm.
Piston: mounting position and piston/cylinder assignment-
The following markings are applied to the bottom of the piston:
- pistons 1-5 for cylinder bank 1;
- pistons 6-10 for cylinder bank 2.
Position: The arrow on the bottom of the piston points to the suction side.
Checking the axial displacement of the camshaft
Checking with the plate tappets removed and the bearing caps installed (fig. 2.212).
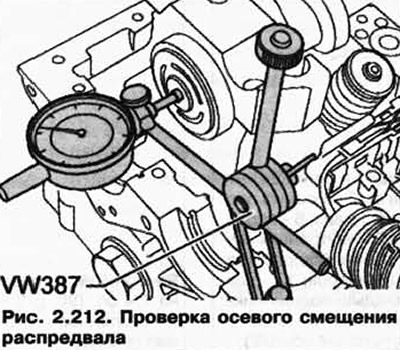
First row of cylinders:
- bearing caps 2, 4 and 6 are installed
Second row of cylinders:
- bearing caps 9, 11, and 13 are installed
Wear limit: max. 0.15 mm/
Apply sealant to the seating surfaces of the outer bearing caps.
Work execution procedure
Apply sealant AMV 176 501 to the surfaces in a thin, even layer 1 (fig. 2.213).
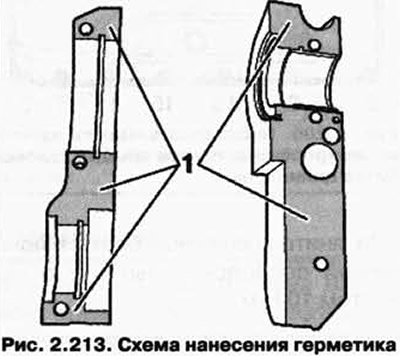
First row of cylinders:
- Apply sealant - AMV 176 501 to the seating surfaces of bearing caps 1 and 7
Second row of cylinders:
- Apply sealant AMV 176 501 to the seating surfaces of bearing caps 8 and 14
Valve sizes
NOTE: Valves must not be machined. Only lapping is permitted.
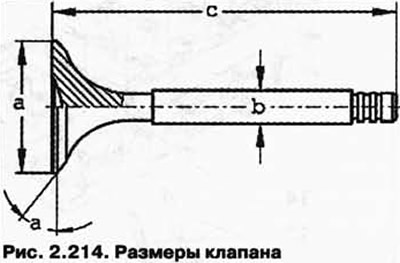
| Size | Short intake valve | Long intake valve |
| a, mm | 35,950 | 31,450 |
| b, mm | 6,980 | 6,956 |
| s, mm | 89,950 | 89,950 |
| a, hail | 45 | 45 |
Camshaft marking (valve timing)
Main circumference of the valve cam: a = 52.8 mm. Marking is applied in the form of stamped numbers and letters on the end surface of the camshaft drive side (fig. 2.215).
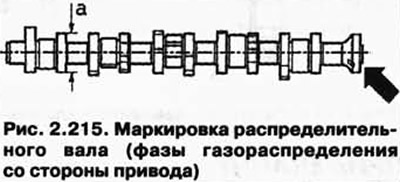
Drive side
- First row of cylinders: 07Z G.
- Second row of cylinders: 07Z H.
Valve timing with a valve stroke of 1 mm
| The intake opens after TDC | 12,0° |
| The intake closes after BDC | 21,5° |
| The issue opens before NMT | 30,0° |
| The release closes before TDC | 20,5° |
Visitor comments