
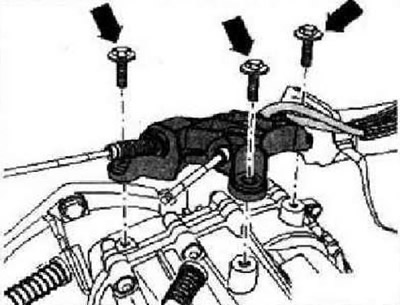
Unscrew bolts -arrows- for drive cable support bracket on gearbox, place to one side and tie up.
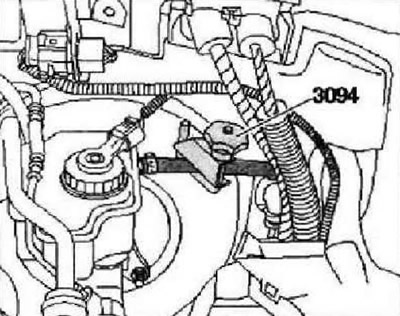
Clamp hose to clutch master cylinder with clamp -3094-.
Pull the retaining clip -arrow- out of the pipes and hoses or the plastic pipe as far as it will go. Disconnect line from slave cylinder (from pipes and hoses or plastic pipeline) and plug the pipeline (the fitting is on the tee).
Caution: Do not press the clutch pedal again.
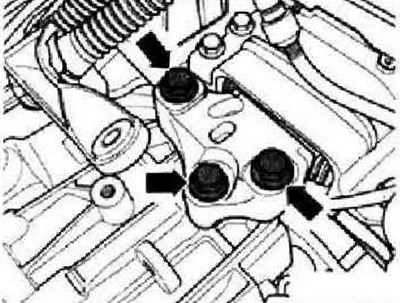
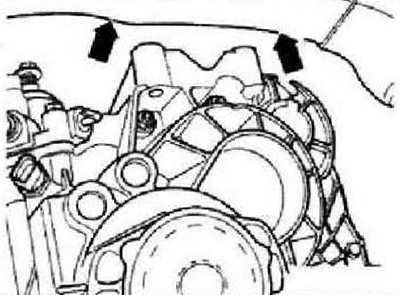
Remove upper bolts securing gearbox to engine -arrows-. Loosen the top starter bolt. Remove soundproof cover.
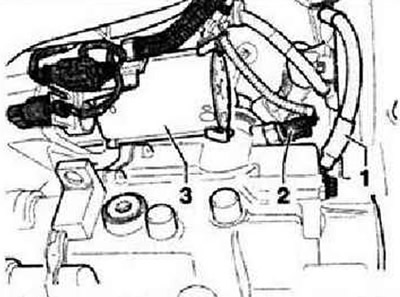
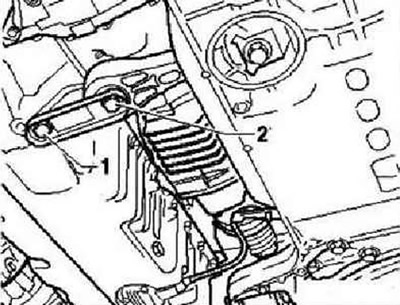
Detach earth cable -1- from bottom of gearbox. Unplug connector -2- from reversing light switch -F4-. Disconnect connectors and wires from starter. Remove starter -3-.
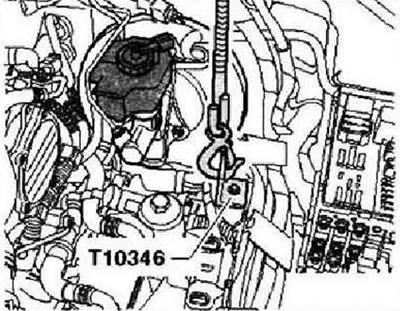
Screw on bracket -T10346-, use one of the three mounting holes for the battery bracket (bottom hole). Use an M6x80 shoulder bolt or one of the battery bracket mounting bolts. Detach all hoses and wires in the area of the lugs for attaching to the engine of the traverse -10-222 A-.
A / and with gasoline engines
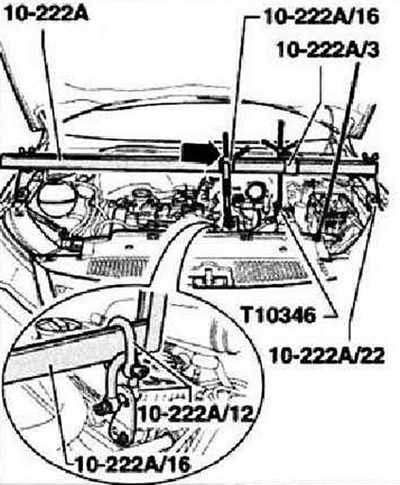
Install cross member -10-222 A- behind bonnet support. Use: adapter -10-222 A/3-, adapter -10-222 A /16-, adapter -10-222 A /22-, earring -10-222 A /12-. Fit earrings -10-222 A /12- with adapter -10-222 A /16-. Connect bracket -T10346- to traverse (previous fig.). Slightly raise the power unit on the crosshead using the spindles.
Vehicles with turbocharged diesel engines
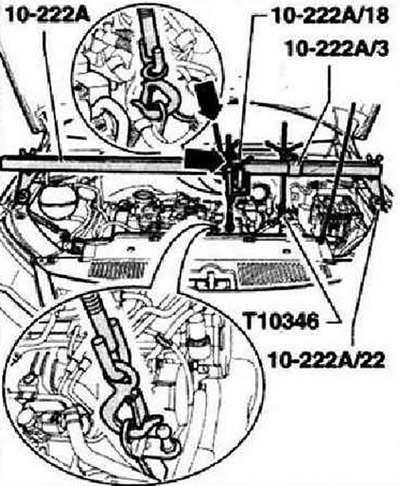
Install cross member -10-222 A- behind bonnet support. Hang the engine at the eye on the spindle -arrows-. Connect bracket -T10346- to traverse (previous fig.). Slightly raise the power unit on the crosshead using the spindles.
All
Loosen the wheel bolts of the left and right front wheels. Raise the car. Remove front wheels. Remove the front left fender liner fasteners from the front wheel housing. If present, remove front vehicle level sender -arrows-.
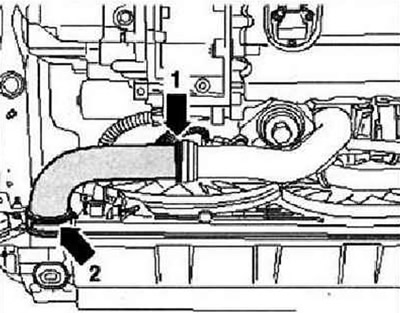
Detach charge air hose at -arrow 1- or at -arrow 2-. If fitted, remove bracket for fastening of exhaust system from gearbox.
Remove bracket for exhaust system -arrows- from subframe.
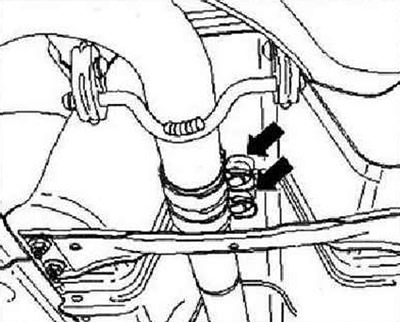
Separate the exhaust system at its attachment point using a double clamp -arrows-. Remove the left and right stabilizer links.
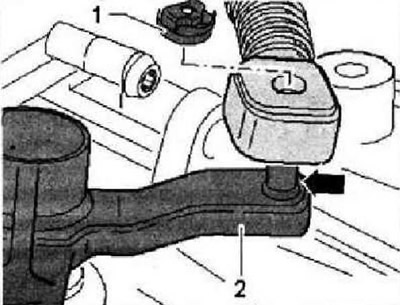
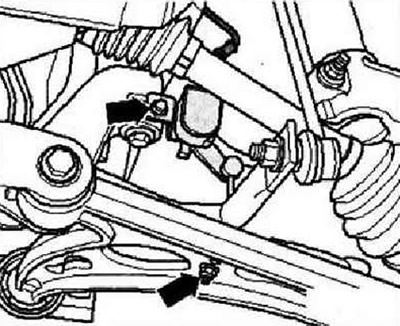
Unscrew nuts securing ball joint to wishbone -arrows-.
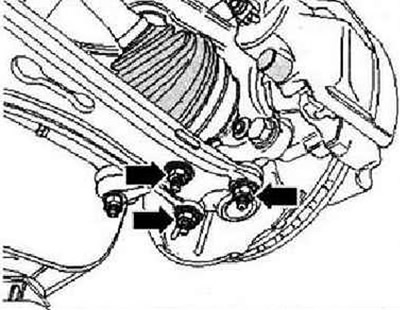
Unscrew the lower support of the power unit from the gearbox. To do this, unscrew bolts -1- and -2-. Before removing the subframe, fix its position. Remove subframe with steering gear.
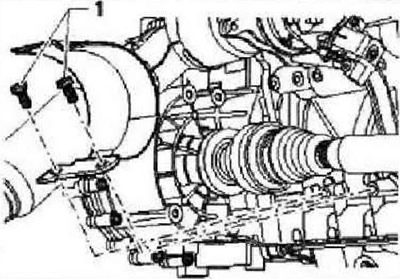
If present, remove the heat shield from the drive shaft from the engine (bolts -1-). Detach drive shafts from gearbox and tie them up.
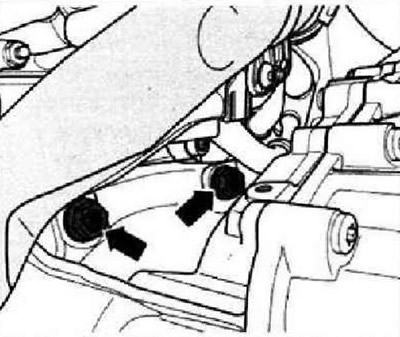
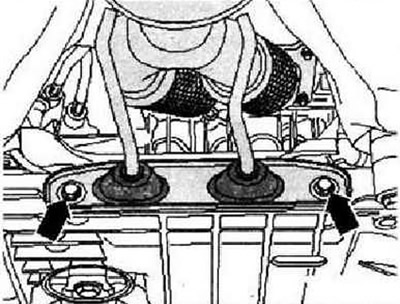
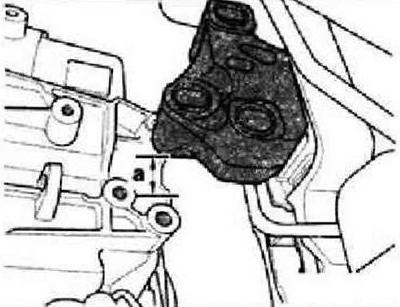
Remove bolts -arrows- for left power unit support. Lower the gearbox using the spindles fixed to the engine.
Dimension -a- = approx. 80 mm.
Note: When moving the gearbox, make sure that the coolant hose from the engine to the heat exchanger is not stretched,
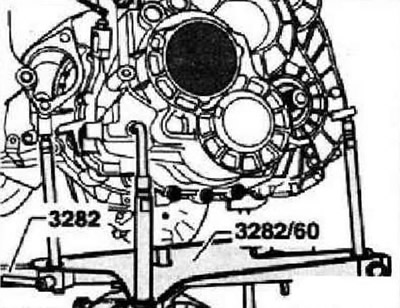
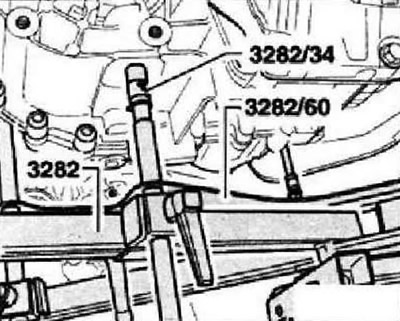
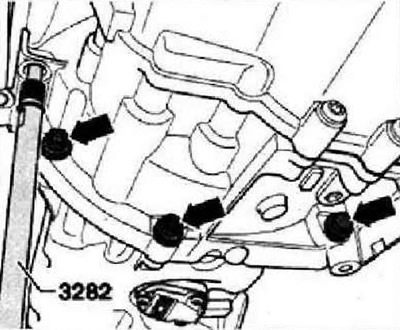
Remove bolt securing gearbox to engine -arrow-. Mounting Bracket-3282-Adjustable for gearbox removal "0А6" using installation template -3282/60-. Attach mounting bracket -3282- to engine and gearbox jack -VAG 1383 A-. Align the tabs of the mounting bracket with the holes in the mounting template.

Screw in catches -A- as shown on the setting template. Screw in catch -C- = pin -3282/34-. Place gearbox on engine and gearbox jack -VAG 1383 A-.
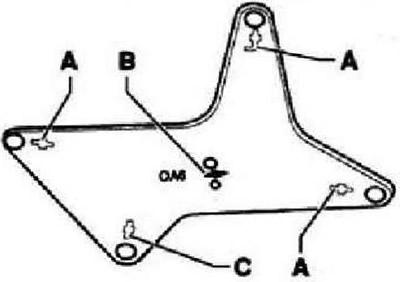
Align the setting template parallel to the gearbox.
Then screw bolt -3282/34- into the hole for the lower bearing of the power unit on the gearbox.
Remove bolts securing gearbox to engine -arrows-. Press the gearbox away from the engine.
Tilt mounting bracket -3282- to left side of gearbox with spindles. Carefully lower gearbox without touching longitudinal member -arrows-.
Instruction: When lowering the box transferred, make sure not to damage the pipelines and wires.
Visitor comments