
Raise the vehicle.
Remove the front wheels.
Remove the front right and left fenders.
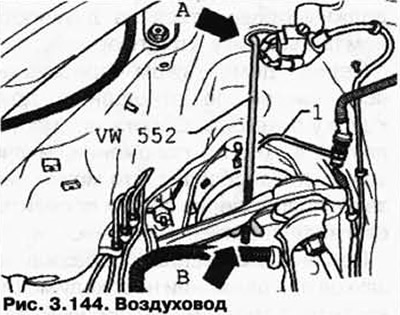
If the vehicles are equipped with pneumatic shock absorbers, it is necessary to disconnect the air duct 1 and bleed the air (pic. 3.144).
Then screw the connection with the tightening torque.
Install the spring clamp VW 552 on both sides of the vehicle into the upper hole in the wheel arch and onto the upper suspension arm.
Lightly tighten the lever so as not to damage the ball pin of the suspension joint.
Remove the noise insulation under the engine/gearbox.
If available, remove the bottom protection under the front final drive.
Remove the soundproofing holder.
Remove the front final drive screen (rice. 3.39).
Separate and secure the front propeller shaft front final drive A (rice. 3.130).
Unscrew the right and left cardan shafts. If necessary, use the nozzle T10099/1 to loosen the bolts.
If equipped, remove screen A from the steering gear (2 bolts) (pic. 3.145).
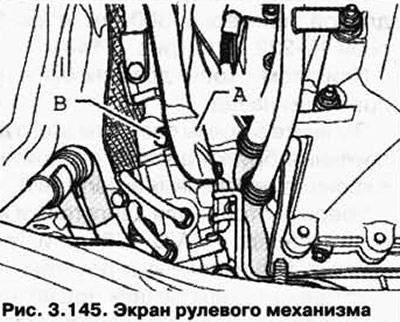
Unscrew the bolt B of the universal joint of the steering mechanism and remove the hinge from the steering mechanism.
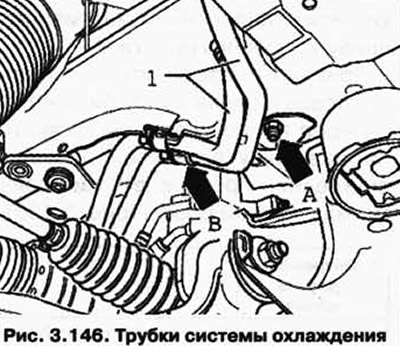
If necessary, remove the pipes of the cooling system 1 from the left side member. To do this, screw the nut and holder (pic. 3.146).
Insert axles 10-222A /11 into the hinges of the motor bracket on the right and left sides (pic. 3.147).

Insert a piece of wood A, approx. 300 mm long, into the axle brackets 10-222 A/11 (pic. 3.148).
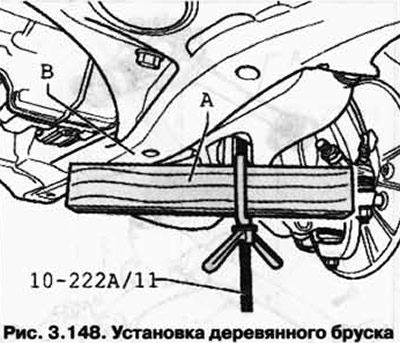
In this case, the brackets should be directed backwards.
Tighten the axle clamps, for this, wooden blocks should be supported in the bracket of mounted units B.
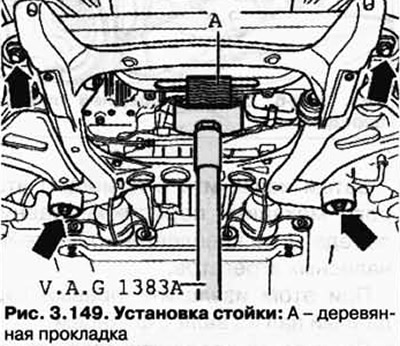
Install the tip of the rolling jack in the rack for the engine and gearbox VAG 1383 A.
Install the stand for the engine and gearbox VAG 1383 A under the engine bracket and press lightly (pic. 3.149).
Unscrew the fixing bolts of the attachment bracket.
Check the inner profile of the bushing in the rubber-metal bearing (pic. 3.150).
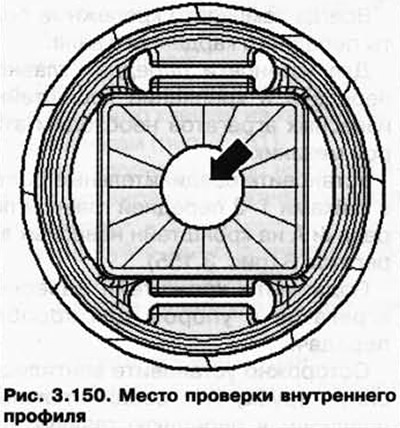
| Sleeve inner profile | |
| quadrangular | Attachment bracket cannot be fixed. Mark the position of the attachment bracket to the body with a felt-tip pen |
| round | Fix the subframe before removing |
Unscrew the fixing bolts of the attachment bracket to the body.
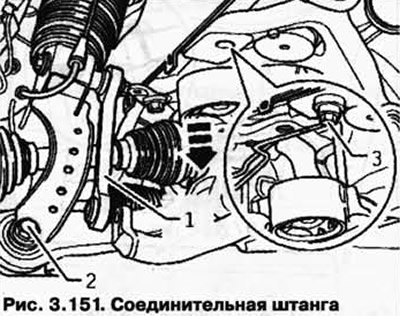
Unscrew the connecting rod on the left and right 1 of the stabilizer (pic. 3.151).
Unscrew the threaded connection of air or standard shock absorbers at the bottom of the suspension arm. In this case, it is necessary to lower the bracket of mounted units through axles 10-222 A/11 by about 50 mm in the direction of the arrow in order to remove bolts 2.
Use these bolts 2 with additional washers or M 14x1.5 bolts approx. 90 mm long to fix the engine bracket on the left and right on the body 3.
Remove the stand for the engine and gearbox VAG 1383 A from under the engine bracket.
Place the stand for the engine and gearbox VAG 1383A with a universal stop for the gearbox 1359/2 under the bracket for attachments and press lightly (pic. 3.152).
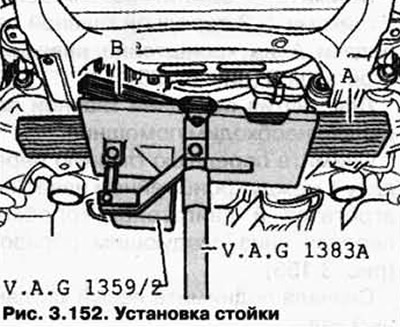
When doing this, place a piece of wood A under the attachment bracket and B in the front final drive.
Fix the attachment bracket with the universal stop belt for the VAG 1359/2 gearbox.
Remove the axles 10-222 A / 11 from the bracket of mounted units.
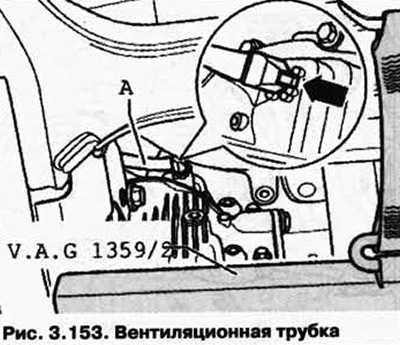
Carefully remove the vent tube A with nipple from the front final drive (pic. 3.153).
Carefully lower the ancillary bracket with the front final drive to the value A (approx. 200 mm) (pic. 3.154).
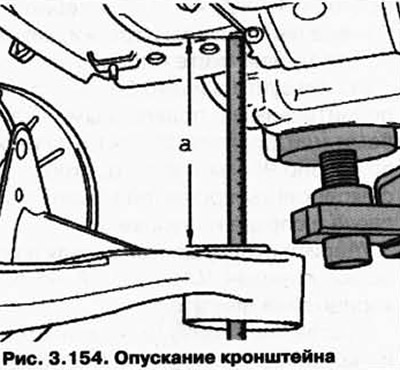
Measure value A between the body and the contact surface of the attachment bracket.
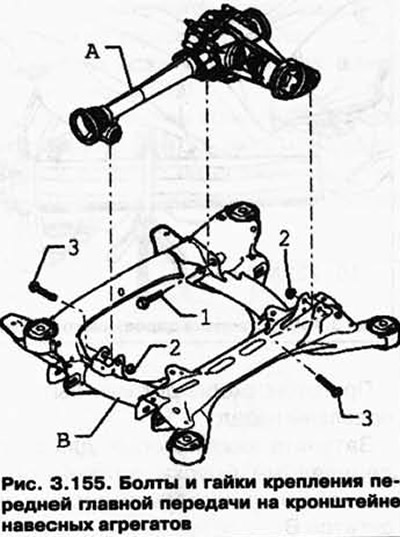
Remove the connecting bolts with nuts 1-3 of the front final drive A on the bracket of mounted units B (pic. 3.155).
An assistant is needed to remove the front final drive.
Remove front final drive 1 between attachment bracket and engine/gearbox downwards as follows (pic. 3.156).
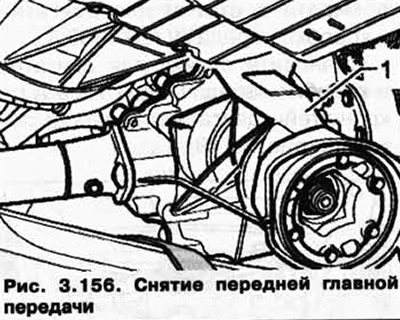
First lift the left propeller shaft.
Then, with the help of a second mechanic, remove the front final drive from the attachment bracket mounts.
At the same time, remove the right cardan shaft from the flanged shaft.
Raise the front final drive above the steering box and pull back.
Visitor comments