
English Русский
Български
Беларускі
Український
Српски
Hrvatski
Română
Polski
Slovenský
Magyar
  |  Articles  |  Sitemap  |  Contacts  |    |
Car maintenance Ford Car maintenance Hyundai Car maintenance Chevrolet Car maintenance BMW Car maintenance Audi Car maintenance Opel Car maintenance AvtoVAZ
VWmanual.ru


Main   Passat   Golf   Polo   Touareg   Tiguan   Sharan   Transporter   Others  
LT 28 (1975-1991) LT 2D (1996-2003) Beetle (1960-1986) Caddy 3 (2003-2010)

Cylinder head — removal (VW Lt 28)

  • Main
  • Volkswagen
  • LT 28
  • Power unit
  • Diesel engines
  • Cylinder head — removal
            0


Removal the head


Repair of the cylinder head is possible without removing the engine from the car. To make operations easier, it is recommended to remove the seats.
  • Remove the engine cover.
  • Drain the coolant.
  • Disconnect the battery.
  • Remove the filter and the exhaust and intake manifolds.
  • Disconnecting the glow plugs and injector wires.
  • Disconnect all wires from the head.
  • Remove the metal shields from the front and rear timing belts.
  • Remove the head cover.
  • Remove the outer disc of the vacuum pump belt pulley and remove the toothed belt.
  • Remove the surge tank and place it with the wires on the side.
  • Remove the air filter.

Caution! When tightening or loosening the bolts securing the camshaft and fuel pump drive gears, it is essential to lock the said gears using a special tool designated 3036 or a tool installed in such a way as to prevent excessive stretching of the timing belt.


Once the cylinder head is removed, it's recommended to set the No. 1 piston to TDC for ease of installation of the camshaft and fuel pump. The crankshaft must be rotated. For this purpose, you cannot use fan blades, which can break. You can turn the crankshaft with a screwdriver through the hole in the clutch housing. The marks on the fuel pump housing, on the engine housing and on the fuel pump gear ring must be in line, and the mark on the belt pulley must be opposite the mark on the clutch housing.
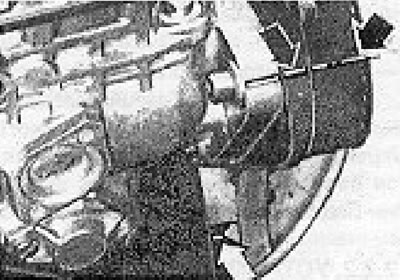
Figure 2.9. Fuel pump installation marks (the toothed belt is on). The marks should be on the same…

Figure 2.9. Fuel pump installation marks (the toothed belt is on). The marks should be on the same line, the mark on the flywheel opposite the mark on the clutch housing


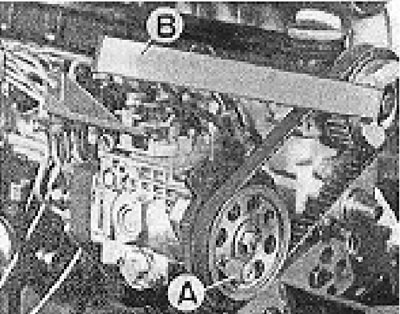
  • Lock the fuel pump gear with a pin (diameter 15.5 mm, length 70 mm), which should be located in the gear hole and in the console.

  • Figure 2.10. Removing the rear camshaft gear: A - Special device for locking the fuel pump gear; B…

    Figure 2.10. Removing the rear camshaft gear: A - Special device for locking the fuel pump gear; B - Lever that grips the camshaft gear.

  • Support the pump drive gear (the gear is mounted on the rear of the camshaft).
  • Unscrew the bolt and remove the gear and timing belt.
Important! Please note that the rear camshaft gear is not installed using a key, despite the presence of a groove in the gear sleeve and a milling on the end of the shaft. Also, remember that both gears are the same on both the camshaft and the fuel pump. At the front of the engine, after unscrewing the side and bottom bolts, remove the lower air duct element.

  • Remove the fan and air duct components.
  • Remove the V-belt from the generator.
  • Reduce timing belt tension. To do this, loosen the bolts securing the coolant pump, located in the housing on the left side of the front wall of the engine, and then lightly tighten the pump.
  • Raise the front crankshaft gear using a special tool inserted into the gear hole.
  • Loosen the gear mounting bolt on the front end of the camshaft by one turn.
  • Use a puller or knock out the gear with a punch by hitting the gear sleeve.
  • Remove the gear together with the timing belt.
  • Unscrew the head mounting bolts. Remove the head. Despite the fact that it is made of light alloy, it is still quite heavy and when lifting it you need to use the services of an assistant.

This article is available at russian, bulgarian, belarusian, ukrainian, serbian, croatian, romanian, polish, slovak, hungarian
The text has been checked: Kolesnikov Artem

Share information:

Previous articles
Engine installation
Removal the engine
Maintenance and repair (recommendation)
Tightening torques
Electrical equipment general information
Nozzle holders and nozzles
Next articles
Cylinder head — disassembly, inspection
Valve seats — inspection, replacement
Combustion chambers and valves
Assembling the head and installing the camshaft
Adjusting valve clearances
Installing the head


Similar articles from other manuals for VW cars:
Removal and installation the cylinder head Passat B3 (1988-1993)
Cylinder head Golf 1 (1974-1984, petrol)
Cylinder head Polo 3 (1995-2003)
Removal and installation the cylinder head cover Touareg 1 (2002-2006)
Cylinder head Tiguan 1 (2007-2015)
Removal the cylinder head Sharan 1 (1995-2000)
Removal and installation the cylinder head (petrol 4-cylinder) Transporter T4 (1990-2003)
Link to this page in different formats


Visitor comments


No comments yet


How much will 46 + 29 =


Caddy 3 
  • General information
  • User manual
  • Daily care
  • Maintenance
  • Petrol engines 1.4 l
  • Engine repair
  • Cooling and lubrication system
  • Power and exhaust system
  • Petrol engines 1.6 l
  • Engine repair
  • Cooling and lubrication system
  • Power and exhaust system
  • Diesel engines
  • Engine repair
  • Cooling and lubrication system
  • Power and exhaust system
  • Transmission
  • Mechanical gearbox 0AH
  • Mechanical gearbox 0A4
  • Drive shafts
  • Chassis
  • Car suspension
  • Steering
  • Brake system
  • Body and wiring diagrams
  • Interior and exterior
  • Electrical circuits
Beetle 
  • General information
  • Maintenance
  • Power unit
  • Engine repair
  • Cooling and lubrication system
  • Supply system
  • Exhaust system
  • Transmission
  • Clutch
  • Car gearbox
  • Chassis
  • Front suspension
  • Rear suspension
  • Steering
  • Brake system
  • Wheels and tires
  • Body
  • Exterior
  • Electrical equipment
  • Equipment and devices
  • Power devices
  • Electrical circuits
LT 2D 
  • General information
  • User manual
  • Maintenance
  • Power unit
  • Petrol engines 2.3 l
  • Diesel engines 2.5 l
  • Diesel engines 2.8 l
  • Injection system (diesel 2.8 l)
  • Transmission
  • Clutch
  • Manual gearbox
  • Differential
  • Chassis
  • Car suspension
  • Steering system
  • Brake system
  • Body
  • Body elements
  • Heating system
  • Electrical equipment
  • Equipment and devices
  • Electrical circuits
LT 28 
  • General information
  • Maintenance
  • Power unit
  • Petrol engines 2.0L
  • Petrol engines 2.4L
  • Diesel engines
  • Cooling and heating
  • Fuel and exhaust system
  • Ignition system
  • Transmission
  • Clutch
  • Car gearbox
  • Cardan shaft
  • Rear axle
  • Chassis
  • Brake system
  • Car suspension
  • Steering system
  • Body
  • Body elements
  • Doors, locks and windows
  • Electrical equipment
  • Power devices
  • Equipment and devices
  • Electrical circuits
VWmanual.ru © 2016-2026 | Mobile version | News and articles | Sitemap: EN BG BY UA RS HR RO PL SK HU | Write message | Site search
Passat B2 • Passat B3 • Passat B4 • Passat B5 • Passat B6 • Golf 1, diesel • Golf 1, petrol • Golf 2, petrol • Golf 2 • Golf 3 • Golf 4 • Golf 5 • Polo 3 • Polo 4 • Touareg 1 • Tiguan 1 • Sharan 1 • Transporter T3 • Transporter T4 • LT 28 • LT 2D • Beetle • Caddy 3 •
Our website uses cookies to ensure functionality and convenience.