
Visual inspection of the anthers of the hinges
Perform the following operations.

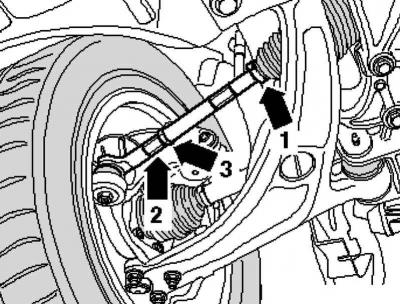
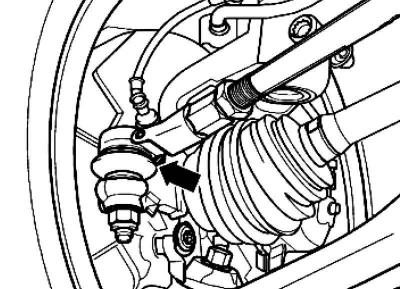
Pic. 5.27. Anthers of internal and external hinges
Check the anthers of the inner and outer hinges for leaks and damage (pic. 5.27).
Removing
Set the wheels straight ahead.
Note: If the bellow is damaged, moisture and dirt will penetrate into the steering gear. There must be a film of lubricant that can be felt on the rack teeth. If there is no lubrication, the steering gear must be replaced. The steering mechanism is also replaced in case of corrosion, damage or wear of the gear rack.
Remove the wheel.
Clean the steering gear in the anther area.
At the same time, it is necessary to exclude the ingress of dirt into the steering mechanism through a damaged anther.
Mark the position of the nut 3 on the steering rod.
Pic. 5.28. Tie Rod
While holding the tie rod end 2 from turning, loosen the lock nut 3 (pic. 5.28).
Remove the spring clamp 1 from the corrugated cover with clamps to install the clamps and move it towards the steering rod.
Remove the clamp and pull the boot off the steering gear housing.
Unscrew the tie rod from the tip.
Pull the dust boot together with the spring clamp from the transverse link.
Note: If there are visible signs of corrosion, damage, wear or contamination of the toothed rack, the steering gear is replaced as an assembly.
Note: If there is no visible film of lubrication on the rack, the steering gear is also replaced as an assembly.
Installation
Apply the lubricant supplied with the repair kit to the rack before installation.
Attention: It is strictly forbidden to use other lubricants.
To do this, turn the steering mechanism in both directions until it stops.
For better clarity, the figure shows the removed steering gear.
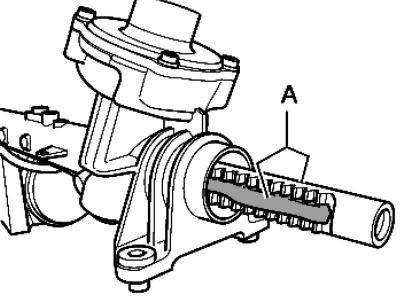
Pic. 5.29. Rack teeth
Apply to rack teeth A and rack rod (from the abutment side) lubricant (pic. 5.29).
Set the wheels in the straight position.
On steering draft put on new collars and a corrugated cover.
Screw in steering draft to the mark put before removal.
While holding the tie rod end 2 from turning, tighten the lock nut 3 (pic. 5.28).
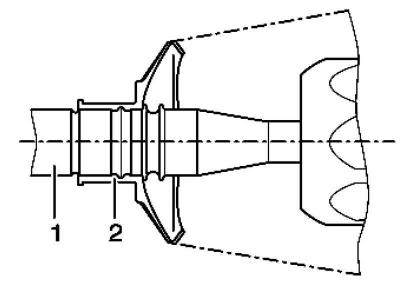
Pic. 5.30. Cover installation scheme
Establish a corrugated cover 2 on steering draft 1 as it is shown in drawing 5.30.
Use the clamp pliers to secure the spring clamp to the bellows.
Put on a corrugated cover on a case of the steering mechanism.
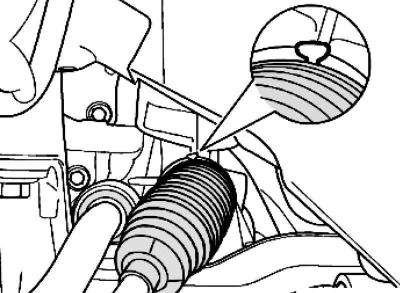
Pic. 5.31. Clamp crimp
Pliers for Phaeton steering gears crimp the new clamp, as shown in Figure 5.31.
Further installation in reverse order.
After installation, check the wheel alignment.
Adjust wheel alignment.
Carry out the basic setting of the angle encoder with.
Then carry out the basic setting of the steering with.
Checking the tie rod ends for play, fastening and tightness of anthers
Perform the following operations.
On a lifted car (wheels hang freely) check the play by pulling the tie rods and wheels.
Check fastening.
Pic. 5.32. Tie rod boot
Check the tie rod boots for damage and correct fastening (pic. 5.32).
Visitor comments